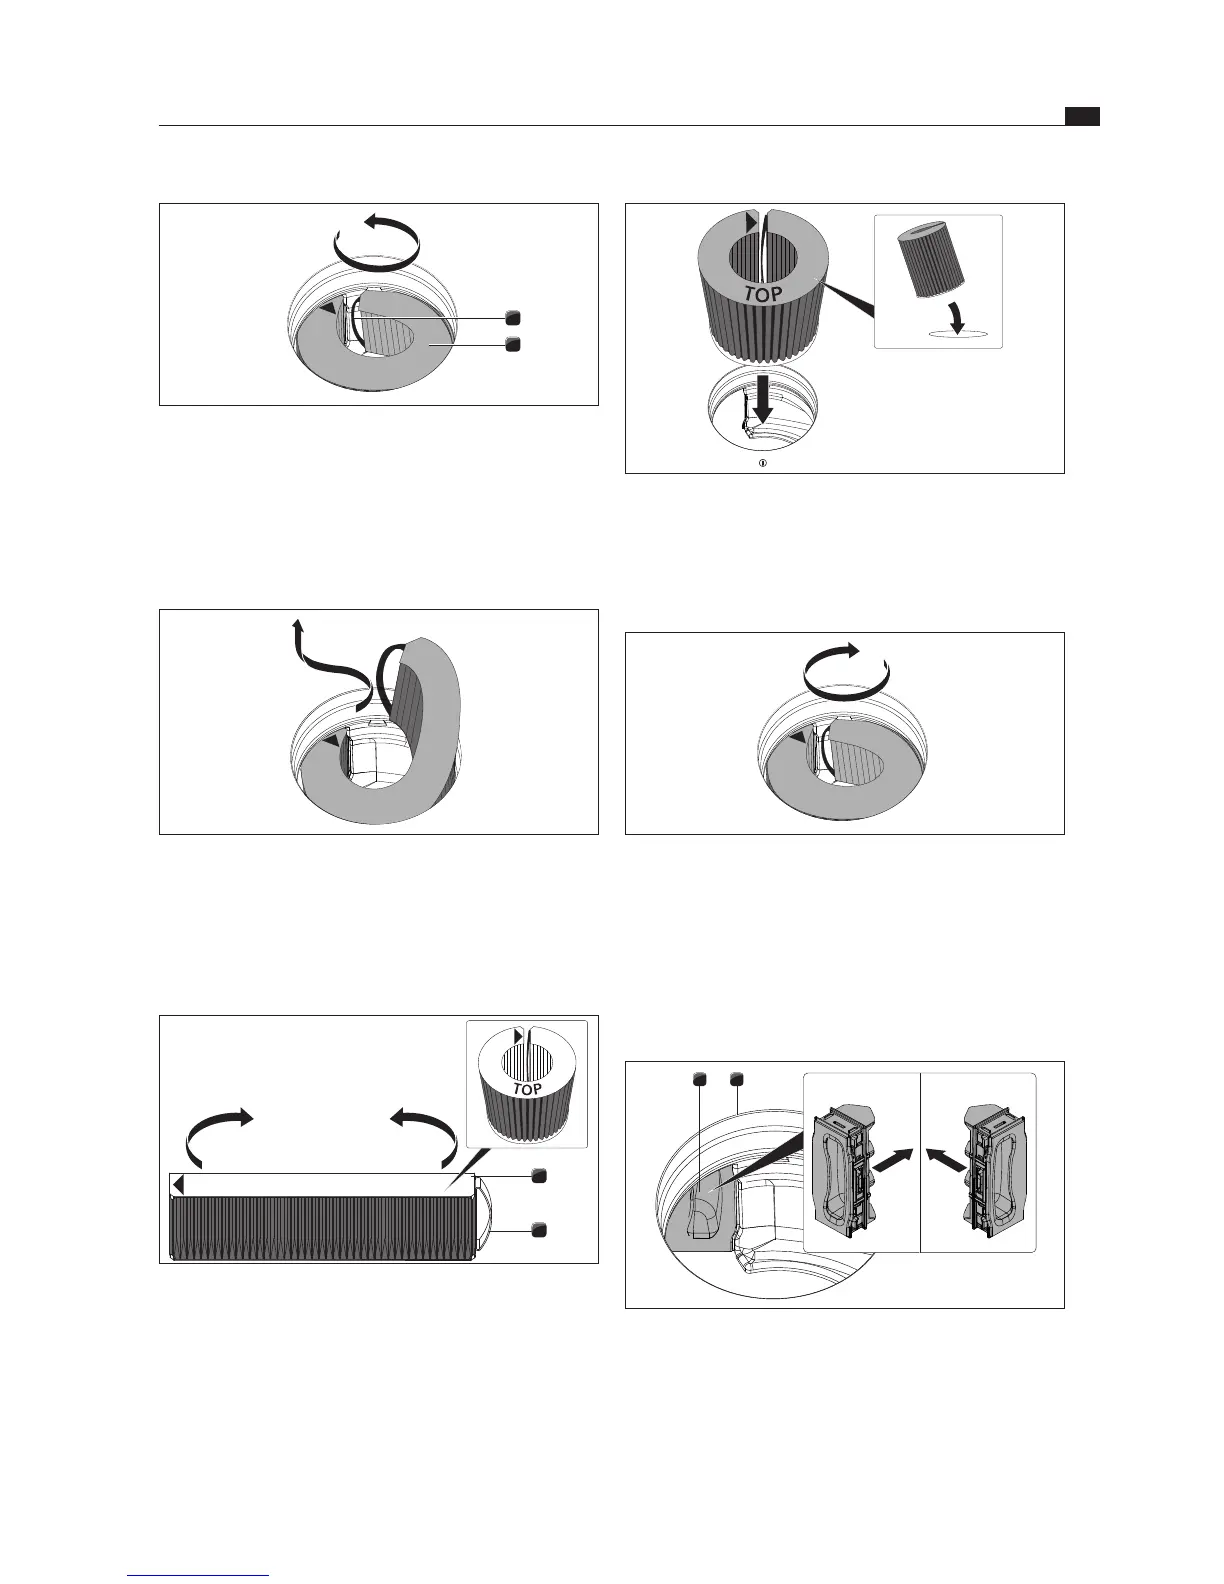
Fig. 8.8 Inserting the activated charcoal lter
Tilt the activated charcoal filter towards you slightly
and insert it through the inlet opening.
Guide the left end of the filter into the opening in the
filter housing.
Fig. 8.9 Placing the activated charcoal lter in the end position
Push the activated charcoal filter into the filter housing
until it will go no further (To do this, you can can place
one finger between the slats and gradually push the
filter into the housing).
The end position of the activated charcoal filter is
reached when the filter has been fully pushed inside
the filter housing.
21
Fig. 8.10 Inserting the lter replacement cover
[1] Filter replacement cover
[2] Inlet opening
Inside the inlet opening push the filter replacement cover
until it comes to a stop in the filter housing opening.
Check that the filter replacement cover is positioned correctly.
Insert the stainless steel grease filter and the air inlet nozzle.
1
2
Fig. 8.5 Removing the activated charcoal lter from the housing
[1] Grip strap
[2] Activated charcoal filter
Take hold of the activated charcoal filter [2] by the grip
strap [1] and pull it out as far as possible through the
filter housing opening.
Fig. 8.6 Removing the activated charcoal lter
Take hold of the end of the activated charcoal filter and
pull upwards and towards the left until it is completely
out of the inlet opening.
8.6.2 Inserting the activated charcoal filter
1
2
TOP
Fig. 8.7 Activated charcoal lter
[1] Activated charcoal filter
[2] Grip strap
Remove the packaging from the activated charcoal filter [1].
Position the activated charcoal filter correctly with the help
of the printed symbols (arrow left, grip strap [2] right).
Hold the activated charcoal filter at both ends.
Bend the activated charcoal filter into a cylindrical shape
so that both ends of the filter are opposite each other.