en
|
18
|
User guide
| OBD 1350
ProGrade OBDII Scan Tool
580001 | REV. A | 11.2016
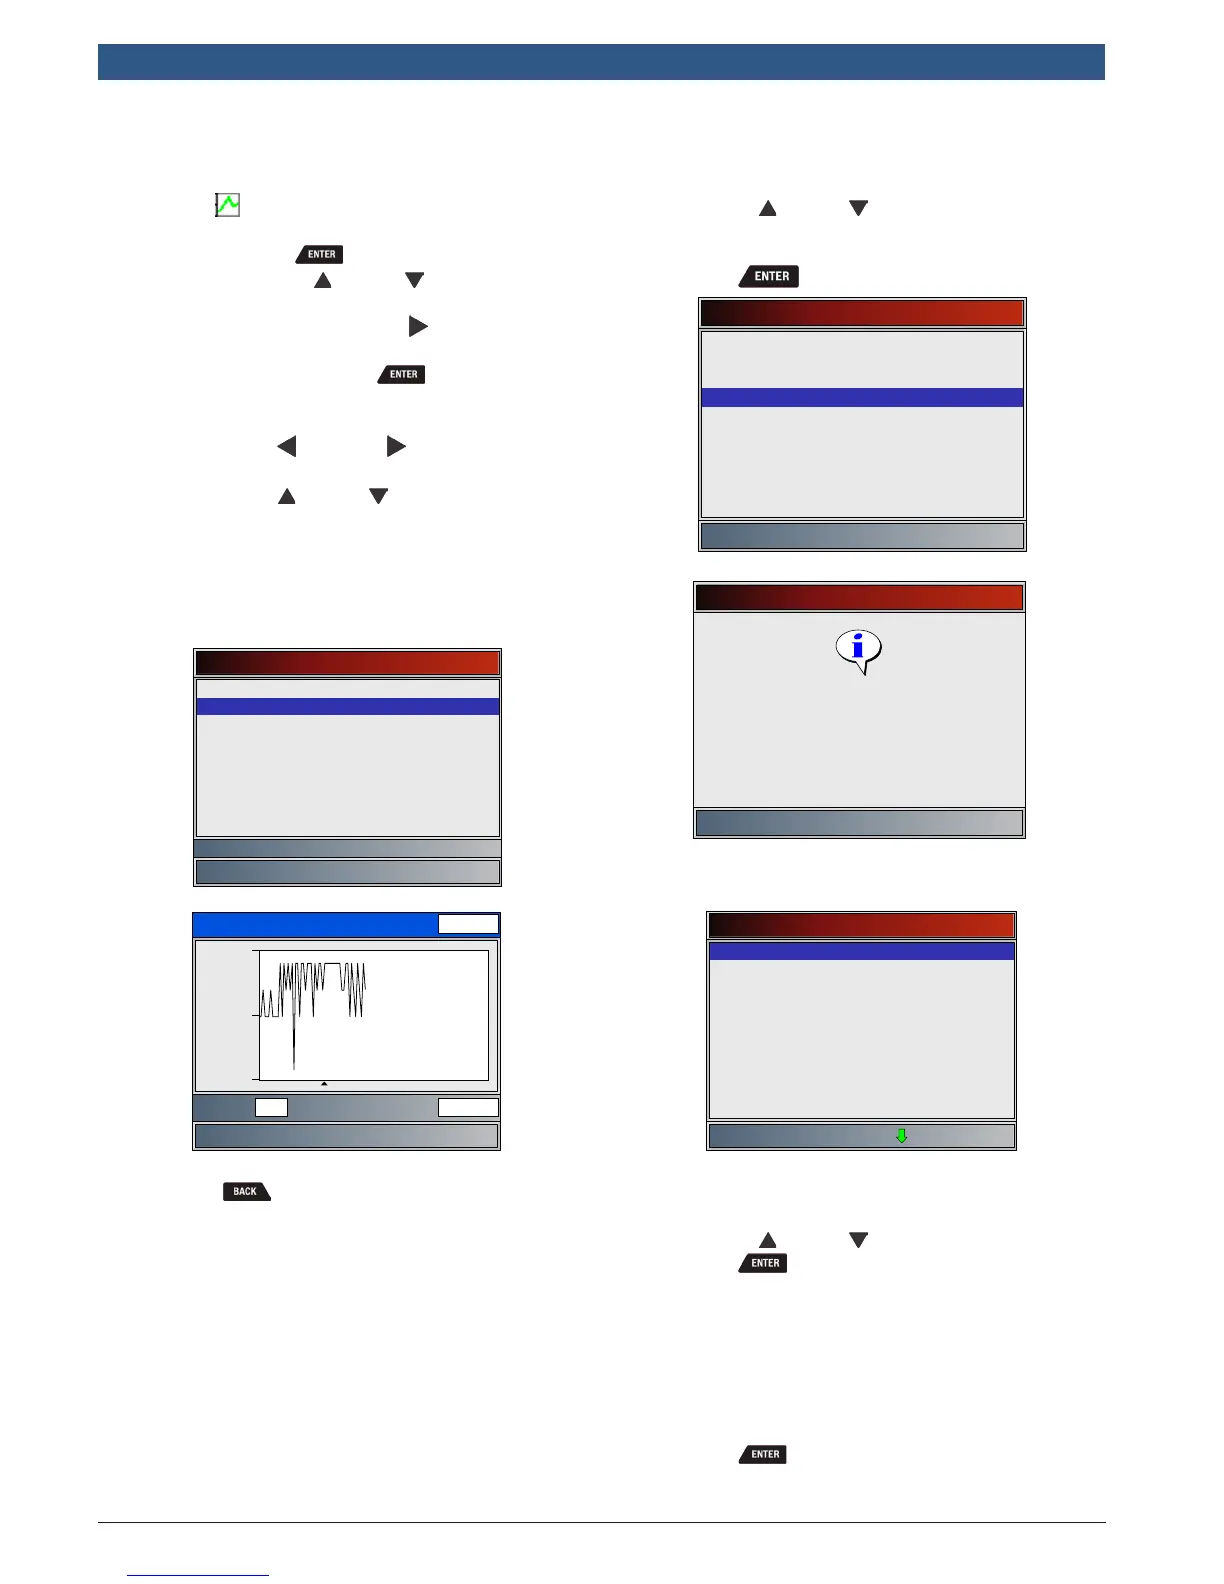
– If graphing is available for selected PID, the
“ ” icon is located on the side of the
screen.
– Press to select PIDS to graph.
– Use the UP and DOWN arrow keys
to highlight the second PID to graph
and then press the RIGHT arrow to
select. A maximum of two PIDs can be
graphed. Press to see graph.
• The triangle below the graph indicates the
position of the frame in the graph.
– Use the LEFT and RIGHT arrow keys to
scroll back and forth through graph.
– Use the UP and DOWN keys to toggle
back and forth between PIDs.
• Different vehicles communicate at different
speeds and support a different number of PIDs.
Therefore, the maximum number of frames that
can be recorded varies.
Select PIDs to Graph
ABSLT TPS(%)
✓CALC LOAD(%)
COOLANT(°F)
ENG SPEED(RPM)
IAT(°F)
MAF(LB/M)
MAP(”HG)
VEH SPEED(MPH)
Calculated Engine Load
CALC LOAD(%)
19.4
17.5
Frame: Time:
21 26.8
19.2
3. Return to Review Data menu.
• Press .
Print Data
The Print Data function allows the printing of diagnostic
information stored in the scan tool.
• The scan tool’s internal battery power can be
used to print data.
• Use the Print Data function to turn On/Off
printing vehicle information prior to printing
data.
• Make sure you have previously installed the PC
software in Download Scanning Suite.
• Launch Scanning Suite and then start printing
application.
• Follow all instructions on PC.
1. Select Print Data.
• Use the UP and DOWN keys until Print
Data is highlighted.
• Press .
Main Menu
Vehicle Diagnostics
Acronyms
Review Data
Print Data
Code Lookup
System Setup
Print Data
Press ENTER to continue
Launch PC printing software
application.
• On the Print Data menu, Print All prints all data
collected by the scan tool.
Print Data
✓Print All
✓I/M Monitiors
✓DTCs (Codes)
State OBD Check
Recording
View Freeze Data
O2 Monitor Tests
Diagnostic Monitor Tests
Vehicle Information
• When printing a Recording, Start Frame and End
Frame need to be defined.
2. Select Data to Be Printed.
• Use the UP and DOWN keys.
• Press .
• The Print Data menu shows a check mark next
to the items that have data.
• If there isn’t a checkmark next to the item, then
this item can’t be selected until the appropriate
function is run from the Diagnostic Menu.
3. Return to Select Print Data screen.
• Press .