56
DISASSEMBLY PROCEDURES
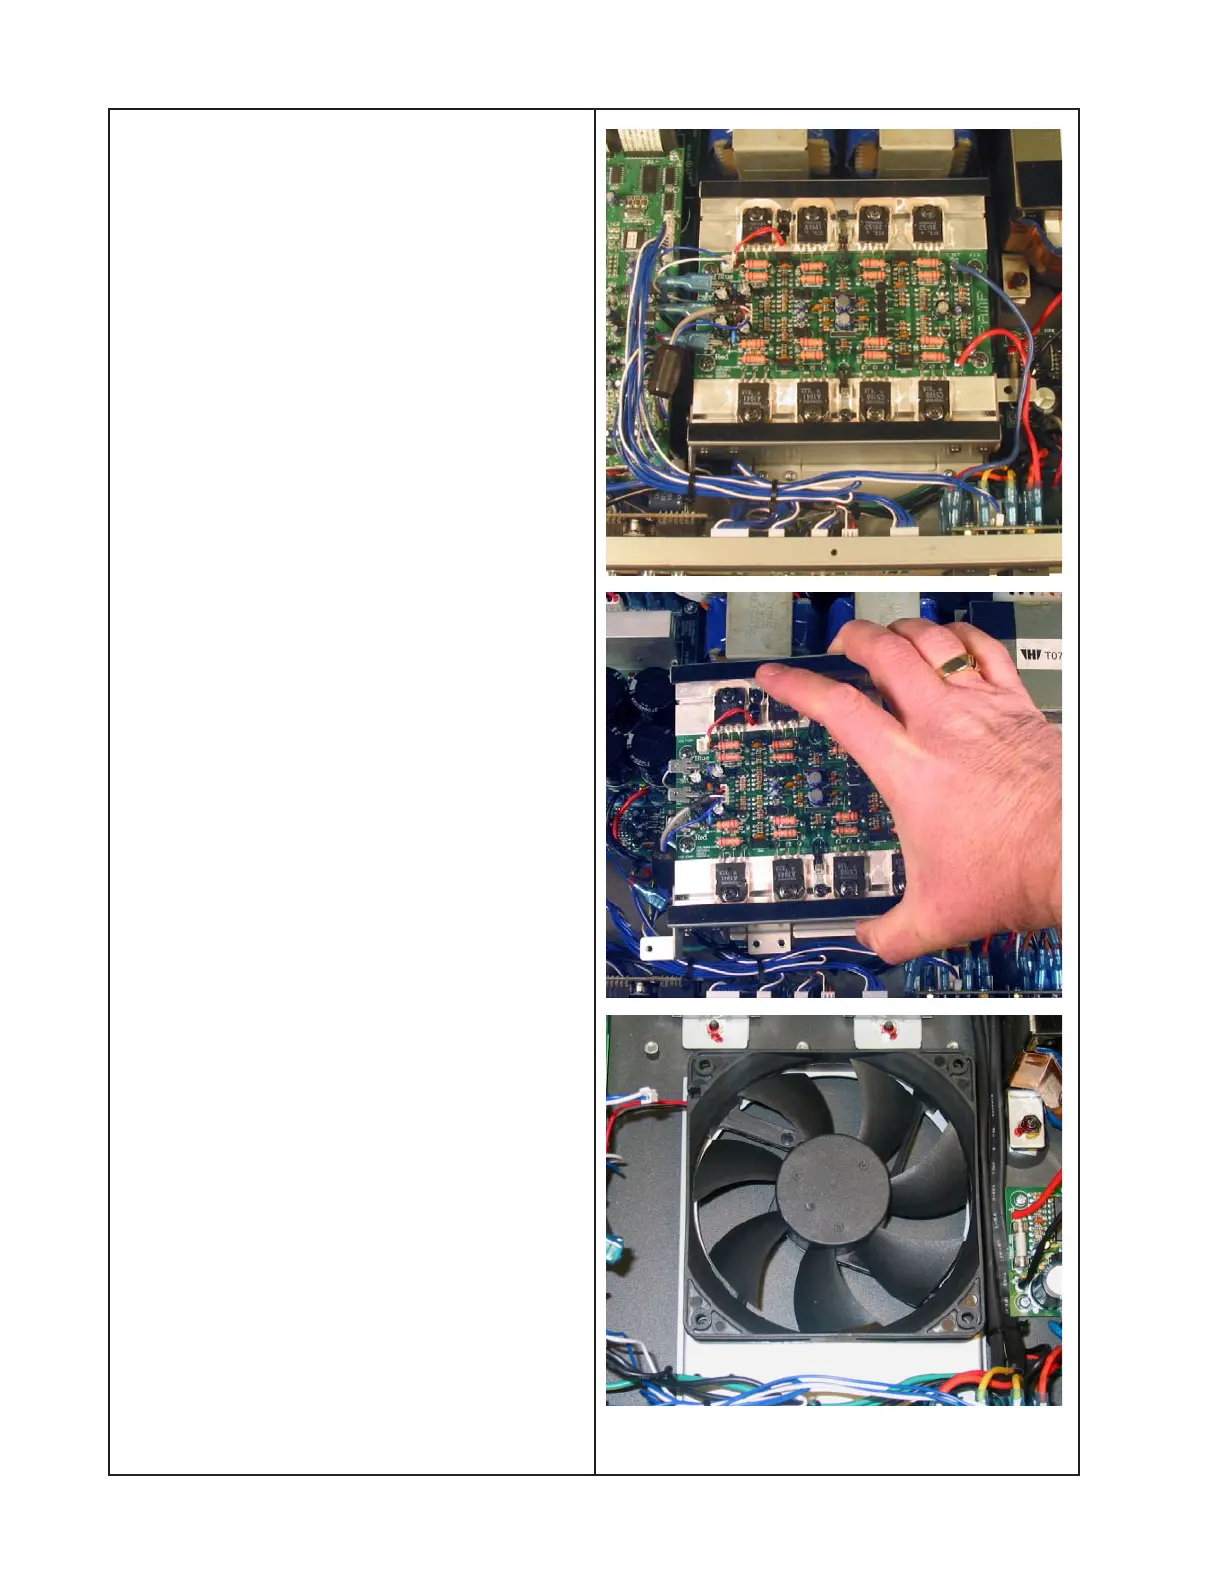
5. Fan Removal
5.1 Perform procedure 1.
5.2 Unplug the Red, Blue and Black Faston
connectors from the amplifier PCB. These
wires run up from the PSU PCB.
5.3 Unplug the audio input cable from the
DSP PCB at CN06B.
5.4 Remove the two screws that retain the
DSP board support bracket. Remove the
seven screws that secure the heatsink
assembly to the chassis. Lift out the heatsink
assembly.
5.5 Unplug the fan wiring harness from the
PSU PCB.
5.6 Remove the four screws that secure the
fan to the chassis. Make a note of which
direction the fan is mounted into the chassis
and lift it out.
Re-assembly Note: Be sure to re-install the
fan facing the correct direction for proper
airflow. Air should flow into the sides of the
chassis and out the opening in the back.
 Loading...