Disassembly / Assembly
3 - 46 Infusomat® Space 6.0
EN
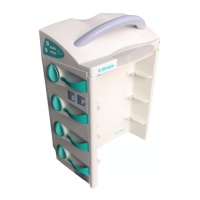
Housing Upper Part
1. If you have carried out any activities on the pressure adjust-
ment unit, or dismounted or replaced the pressure a
djust-
ment unit, remove the rectangular cover cap from the
housing to
p and keep it in a safe place until calibration, be-
fore mounting the housing upper part.
Take care that no cables are squeezed, and check that the connec-
tor seals at the back are correctly p
laced in the housing, the snap-
in hook spring is located outside the housing wall and that the
loudspeaker is correctly placed when the housing is fitted. The
two wires must point downwards, so that the loudspeaker wires
are placed in the insulation to the coil in the cut-out of the hous-
ing bottom part.
2. Check beforehand the position of the cable cover at the top
and bottom of the housing upper part and the bottom part.
3. Lower the upper part of the housing vertically and carefully
on to the lower part
.
4. Engage the snap-in hooks between housing top and
front
frame.
Rework when Replacing the Processor PCB
When the processor PCB is replaced all data of the pump except
for the calibration d
ata was probably saved on a PC(see „Prepara-
tions for Exchanging the Processor PCB“ ➨ pg. 3 - 2). Carry out
the following steps to transmit the data back to the device.
When data previously saved is transferred back to the device, cal-
ibration data is not transferred. Therefore, a complete new cali-
bration of the unit is required.
Please note that text and / or functions of the Service Program
may change depending on the software version. The following
screenshots are only examples and represent the state when the
manual was printed.

 Loading...