4-7
10. Remove element wires from Second-
ary Contactors (14 & 17),
11. Remove four Basket Guides (25) from
inside cooking well that secure ele-
ments (23) to the cooking well.
12. Remove capillary guard (26).
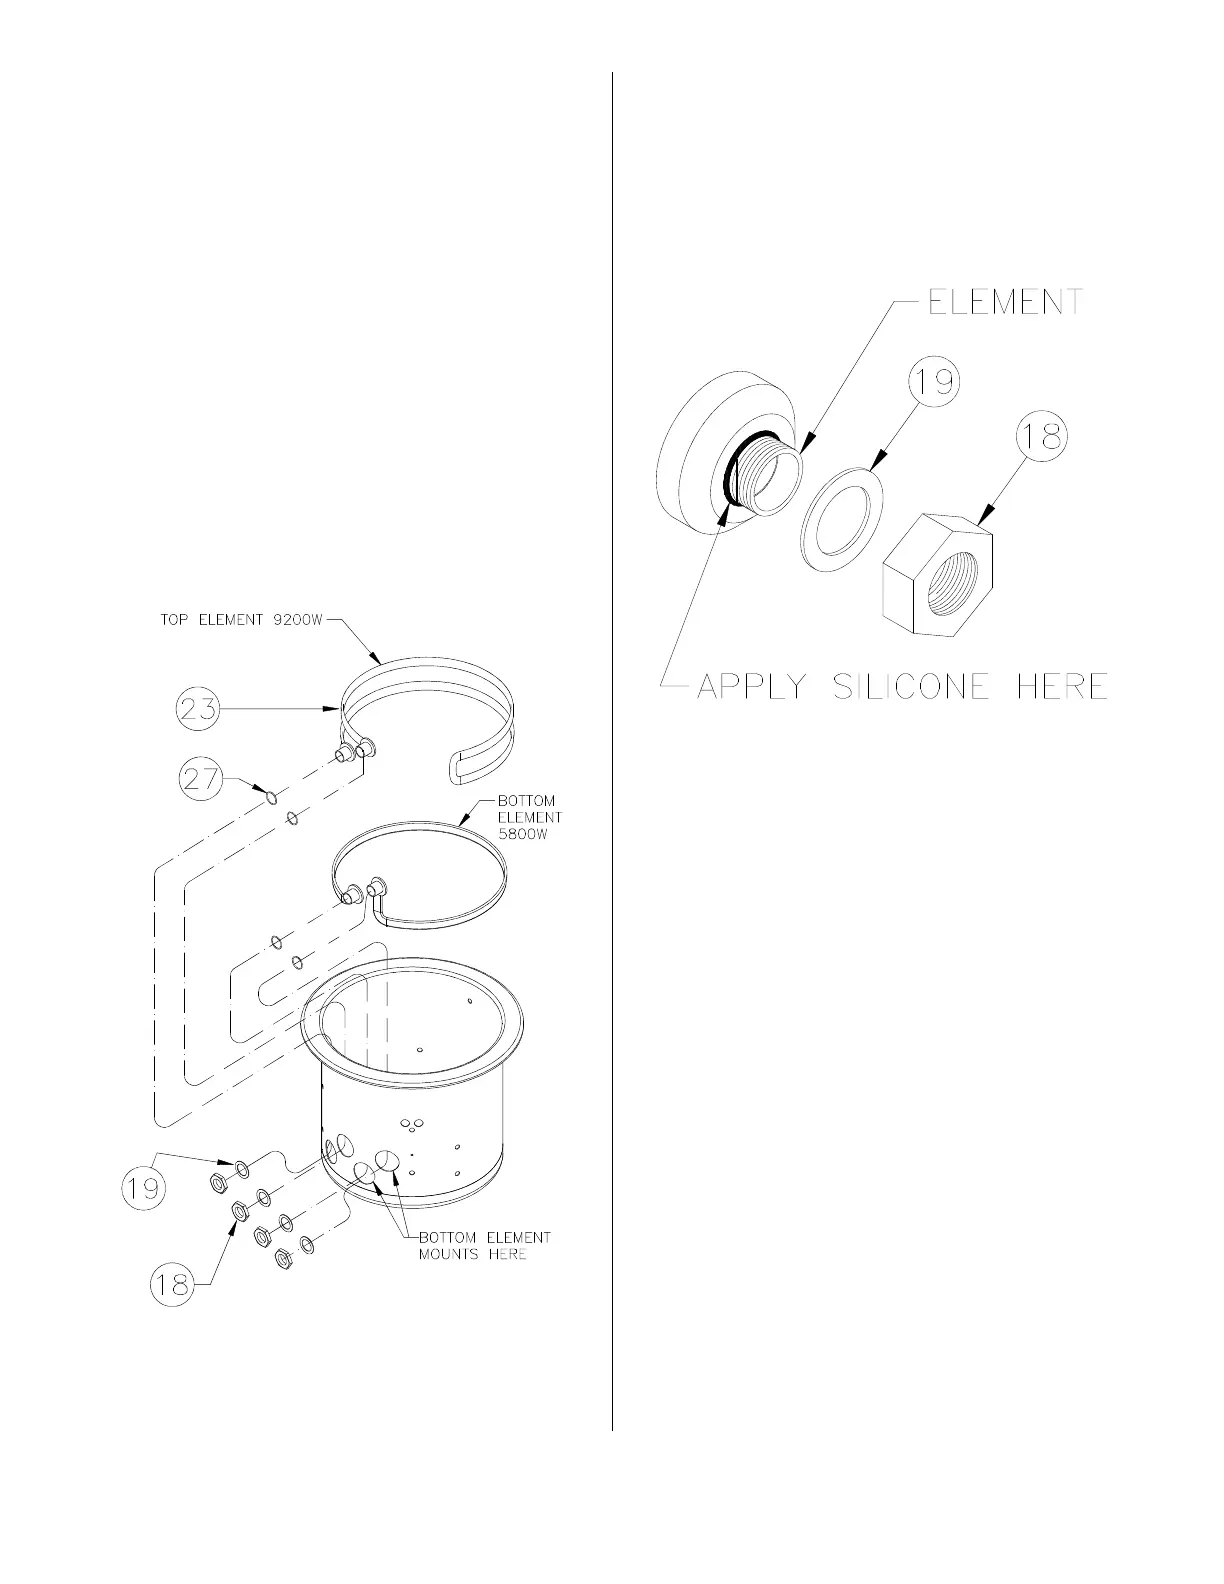
13. Remove large nut (18) and washer (19)
from element(s) (23).
Note: To remove bottom element,
remove element above it.
14. From inside the cooking well, slide ele-
ment out, lift and rotate on end to
remove.
15. Install new elements using new gas-
kets (27) located between element and
inside of the cooking well bulkhead.
16. Loosely attach basket guides (25) and
capillary guard (26).
17. Apply bead of #94622 Silicone to
threads of element at the bulkhead fit-
ting.
18. Loosely attach washers (19) and large
nuts (18).
19. Tighten large nuts (18).
20. Tighten basket guides (25) and capil-
lary guard (26).
21. Be sure all wire connections are
secure and in their original location.
broaster.com Manual #17280 1/15 Rev 6/15