7-5
Drafts can be caused by open doors,
fans and ventilation systems. See
VENTILATION.
3. Incorrect ventilation can affect com-
bustion. See VENTILATION.
4. Gas pressure is a main factor for good
operation. Be sure correct water col-
umn is present. See Gas Pressure
Adjustment under FLAME ADJUST-
MENTS.
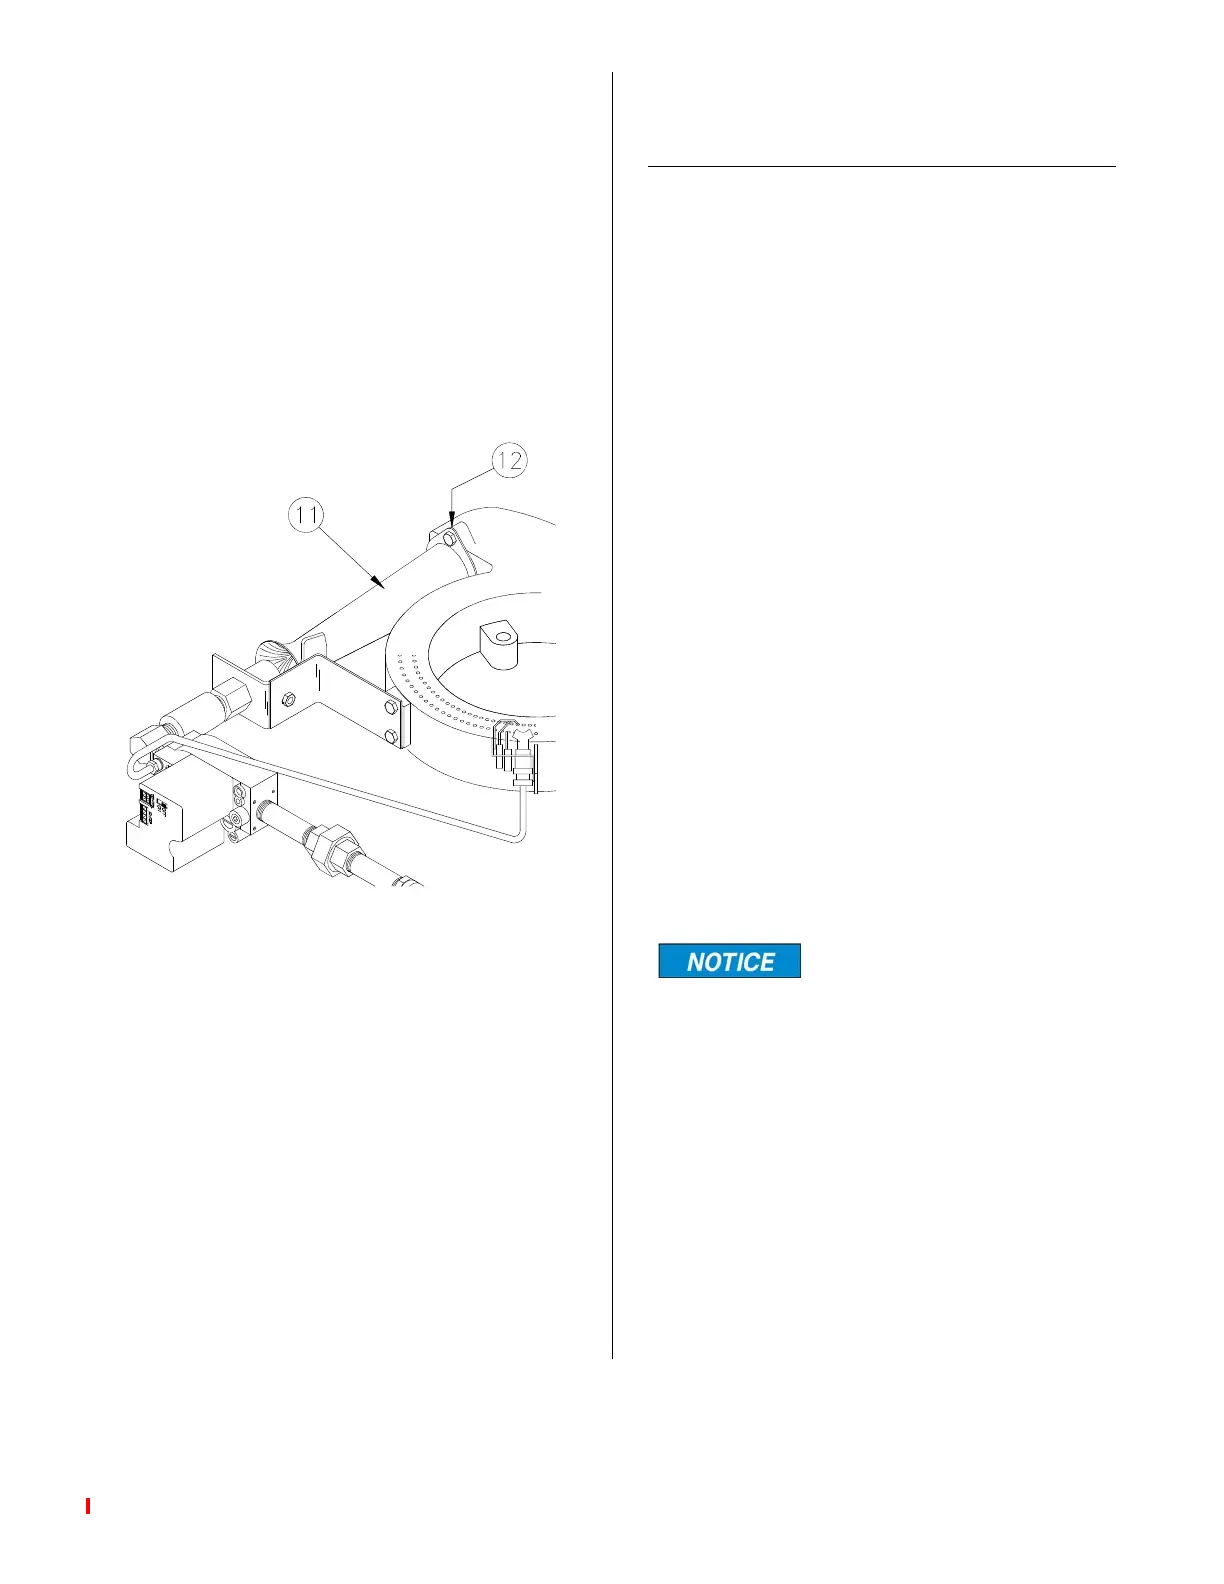
5. Loose venturi (11) or bad gasket (12)
can affect combustion. Tighten or
replace gasket.
MAIN BURNER FLAME
ADJUSTMENT CAST IRON
BURNER
1. On the back of the fryer loosen the set
screws holding the clamps on each
side of the gas line support bracket.
2. While observing the flame, slowly slide
the gas pipe from front to back in the
support bracket. When the flame is as
blue as it can get, re-tighten the
clamps on each side of the support
bracket to hold the pipe in position.
Is the flame blue and settled on the face
of the burner? If it is, no further adjust-
ment is necessary otherwise continue.
3. Remove the LH side panel.
4. Using an adjustable wrench or large
pair of pliers, carefully change the
angle of the orifice holder mounting
bracket, up or down, so the orifice is
pointing down the middle of the mixer
tube.
5. Replace the side panel.
To get the best flame sev-
eral adjustments, both up
and down and front and back, may be
necessary.
broaster.com Manuals #17280 1/15 Rev 12/15