Introduction
E1400011_1_001
31
5.6 Calibration Samples Hatch and Probe Exchange
The Magnet Unit cover has two outer hatches or doors.
• The first one is on the front panel of the unit and can be used to contain the calibration
samples. Pressing on the upper part of the hatch will unlock and open it.
• The second is the top hatch, which allows access into the minispec magnet compartment
and permits quick and tool-free exchange of probes.
To replace a probe the hatch at the top of the Magnet Unit must be opened:
1. Release the front hatch to expose the red button in the front of the unit.
2. Press the red button to release the top latch and open the hatch as far as it will go.
3. A second hinged lid, blue in color, will become visible. Lift this lid up and lean it against
the outer hatch.
WARNING
Danger of injury due to falling lid
The hinged lids may close unexpectedly during probe exchange causing injury to hands or
fingers.
u Ensure that the gas spring on the outer lid is operating correctly.
u The blue inner hinged lid does not have a gas spring, use extreme care when
exchanging the probe assembly.
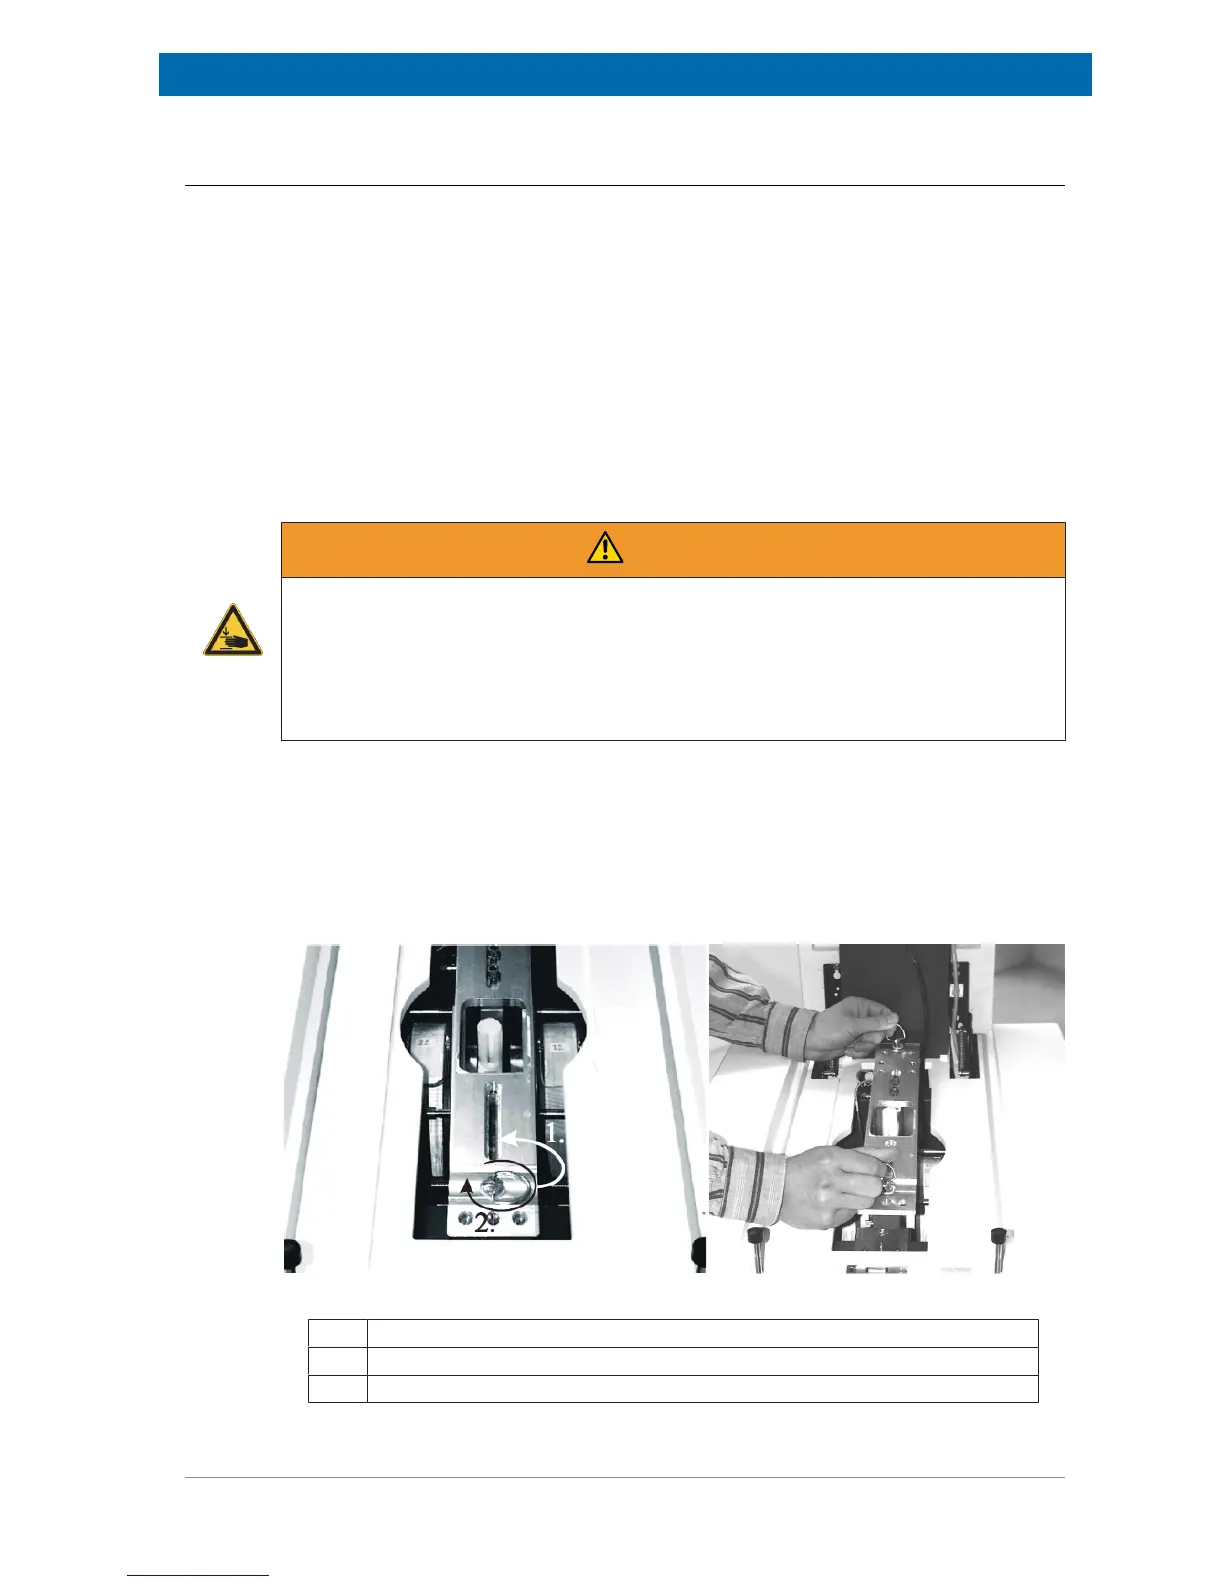
4. The probe assembly is fixed with two quick-release fasteners. To release the fasteners,
lift up the D-rings until they snap into a vertical position, then use them to rotate the
fastener posts until released (refer to the figure below).
5. While grasping the D-rings, carefully pull upward to loosen the preamplifier connection
under the mounting plate, than raise the assembly (mounting bar with probe and
preamplifier attached) out of the magnet gap.
Figure5.8: Ring of the Quick-Release Fastener (left) and the Raising of the Probe Assembly (right)
1. Rings
2. Rotating the rings.
To open the fasteners, turn the rings (1) upward and rotate them (2)
 Loading...