Bruker Confidential Information
2.8. Adjusting Sample Tip and Tilt
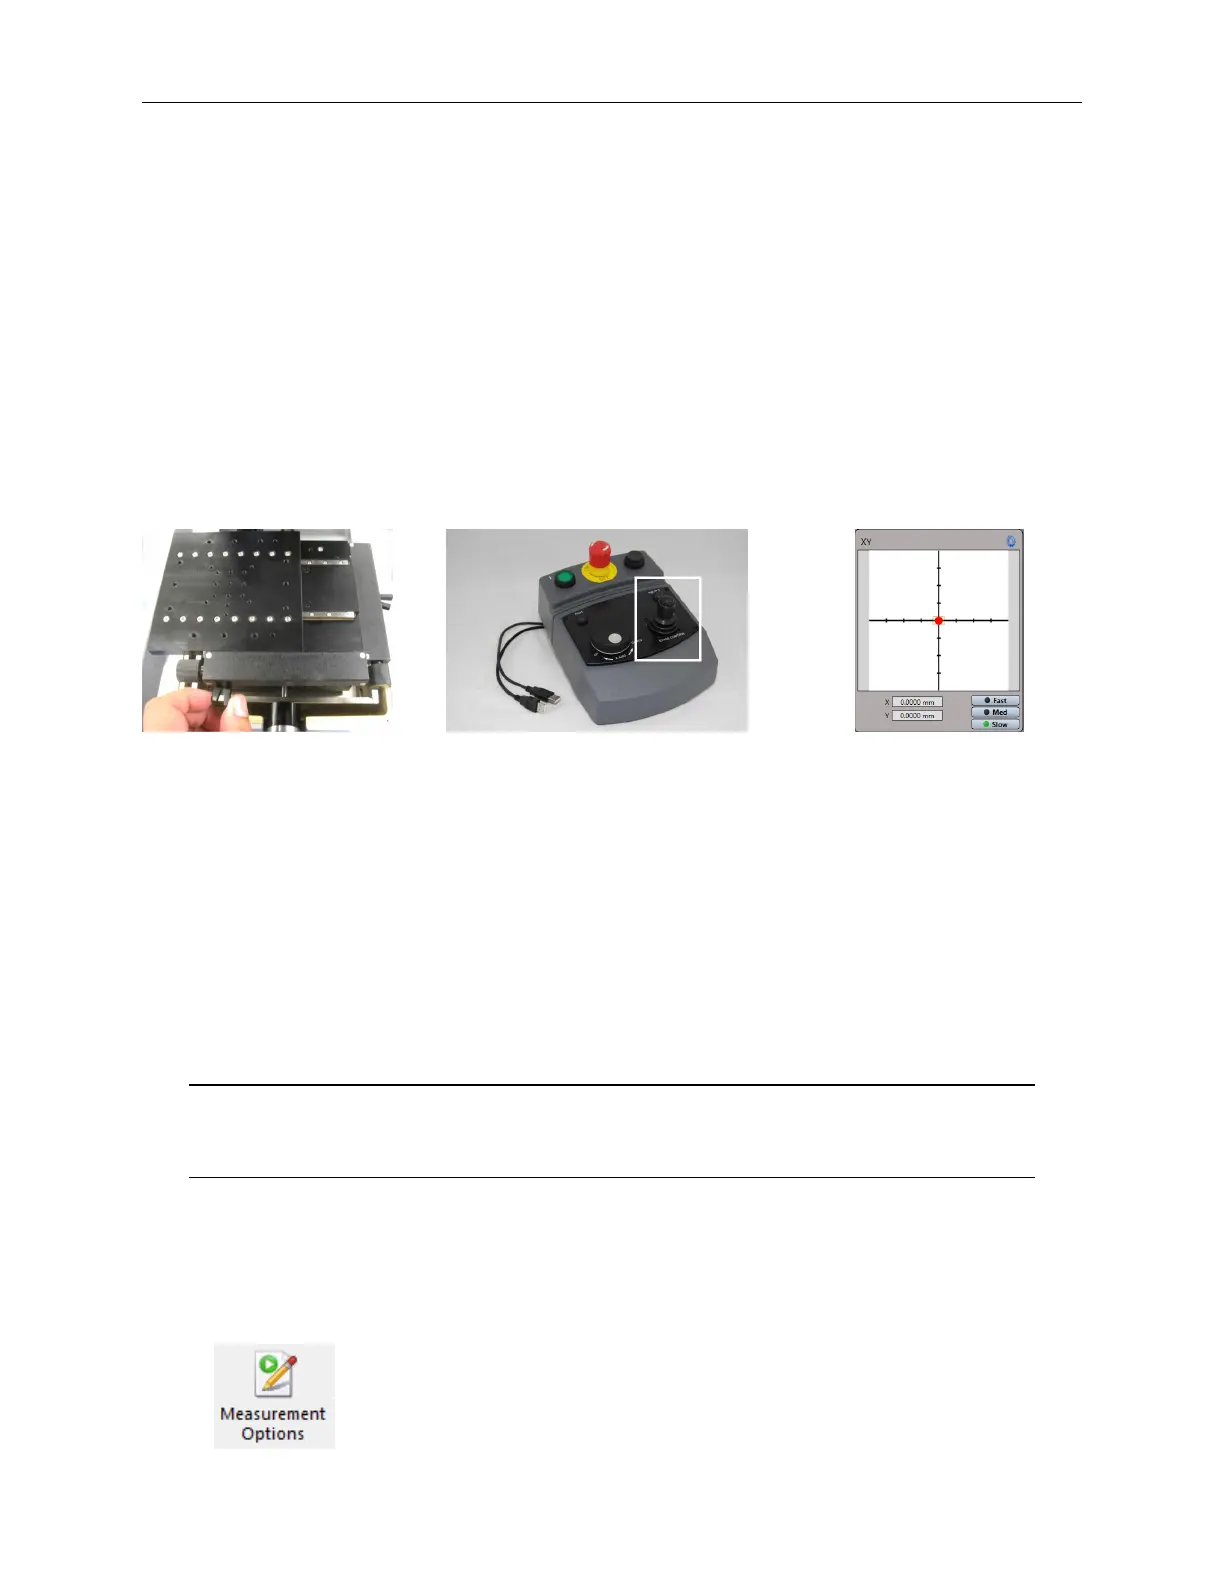
When a joystick is available, the stage can be controlled by the joystick whenever the Vision64
software is running. On the joystick, a fast move is made possible by pressing the button on top of
the joystick.
Within the Vision64 software moves are actuated in one of three ways:
1. By ‘pulling’ the red dot from the center of the grid in the direction you want the stage to
move. Note that the further you pull the dot from the center the faster the stage will move. In
addition, you can select the nominal move speed by clicking the Fast, Med or Slow buttons
before initiating a move.
2. You may double-click anywhere in the x/y grid to move the stage directly to that location.
3. You may double-click anywhere in the Sample View (see Figure 2.2) to move that point to
the center of the cross-hairs.
(a) Manual X/Y adjustment (b) Joystick for X/Y adjustment (c) Vision64 software
Figure 2.5: X/Y Adjustment
2.8 Adjusting Sample Tip and Tilt
The ContourGT-K systems come with a manual tip-tilt stage that has ±6° of tip and tilt adjustment.
The stage has two knobs, one on the front of the system and one on the left, as seen in Figure 2.6a.
You turn these tip and tilt knobs to finely adjust the fringes until they are of the optimal size and
position for your type of sample and measurement. Often this means adjusting the tilt so that
between 0 and 15 fringes are visible for a VSI measurement or < 5 fringes for a PSI measurement.
Note The fringes will likely move out of focus when the tip and tilt are adjusted so
you will normally need to adjust the focus at the same time as you adjust tip
and tilt.
Figure 2.6b shows typical high-tilt fringes that may be visible after finding focus. Figures 2.6c
and 2.6d show the result of adjusting the tip tilt knobs so that fewer and fewer fringes are visible.
2.9 Measurement Options
The Measurement Options button appears on the Vision64 appli-
cation ribbon. This button is used to access measurement options and
is only visible when the Measurement Setup tab is selected.
14
 Loading...