Bruker Confidential Information
2.7. Adjusting Lateral Sample Position
‘pull’ it up or down. The software control allows fast, medium and slow focus speeds. Simply click
Fast, Med or Slow buttons to select the ‘move’ speed before initiating the move.
Using the Scanner axis
Focus can also be adjusted by changing the position of the scanner. On a manual z-axis system
the z-axis control that appears by default (Figure 2.4c) enables adjustment of the scanner position.
This is useful on a manual system because finer control is available via the software than via the
manual focus knob. On the automated systems, the scanner position control can be accessed by
clicking on the arrow next to Z-Axis in Figure 2.4c and selecting Scanner.
Note It’s best to use the scanner sparingly for focus duty. If a lot of focusing is
performed via the scanner it can be moved towards the end of its travel range
and thus limit the effective measurement scan-length.
To Find Focus Safely
The following procedure ensures that the objective is traveling up and away from the sample while
you are watching for fringes in the Intensity window. This helps prevent a crash between the
objective and the sample. To focus on a sample:
1. Select the Live Video tab and click Auto on the intensity control.
2. While watching the objective carefully from the side, adjust the focus to lower the OMM so
that the objective is a few millimeters above the surface of the sample. You may wish to refer
to table 2.1 so you can initially position the objective fairly close the nominal focus position.
3. Focus the system by slowly raising the OMM. As you raise the OMM watch the intensity
window:
a) to see when the sample features start to sharpen.
b) to see when the intensity value reaches a minimum.
4. When any of the above occur you are very close to focus. Slow your adjustment and watch
very carefully for fringes. Note that if the sample is highly tilted the fringes may appear over
a very narrow band.
5. Continue to raise the OMM until fringes appear in the Intensity window. If the required
intensity starts to increase you have passed through focus and will need to lower the OMM
again.
2.7 Adjusting Lateral Sample Position
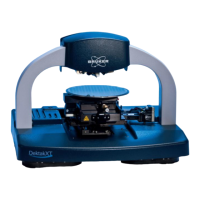
The ContourGT-K systems come with staging that allows 150 mm (6 inches) of x and y travel.
On a manual stage you control x/y movement by turning fine-positioning knobs and sliding coarse-
positioning clips (see Figure 2.5a). Pinching the coarse-positioning clip disengages the stage-carriage
from the lead screw so that it can be moved into position quickly.
If your stage is motorized the control is achieved either via a joystick (see Figure 2.5b) or through
the Vision64 software (see Figure 2.5c).
13
 Loading...

