53
Replacing the Air Filter
Access to the instrument enclosure and the outer chimney is required for a
full replacement to take place. A partial replacement can be conducted
without accessing the outer chimney by replacing the tube up to and
including the blue connector piece on the inside of the main chassis.
1. Gain access to the instrument enclosure as previously described.
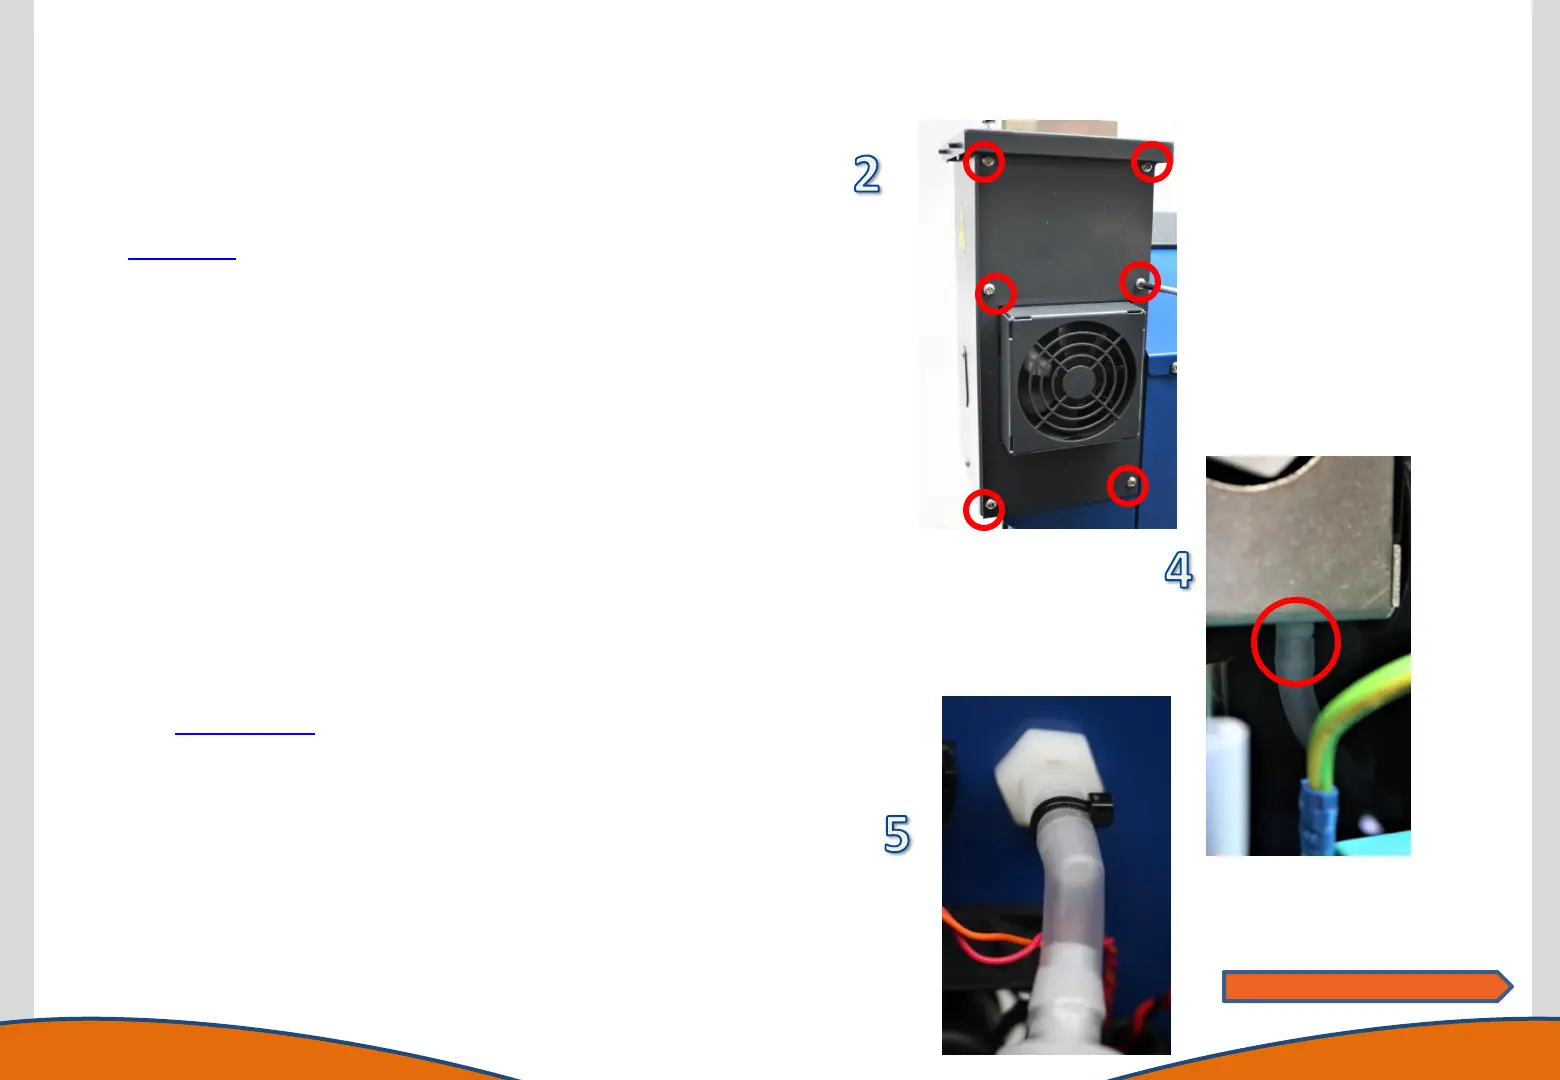
2. Remove the outer Chimney rear plate, (6 screws) using a T20 Torx
driver.
3. It is recommended the chimney fan is unplugged and the ignition
module removed (see relevant section) for ease of access.
4. Disconnect the air tube from the base of the inner chimney and feed
this through the grommet into the main enclosure.
5. Cut the cable tie on the auxiliary air barb and the compressor outlet.
Remove the tube from the barbed fitting.
6. Disconnect the tube from the air pressure sensor on the Marshalling
PCB.
7. Disconnect the tube from the Nebuliser and pull the tube back through
the grommet in the chassis wall.
8. Unplug the temperature probe cable from the motherboard.
9. Release the air filter from the retaining clip.
10. Replacement of the air filter is carried out in reverse.
If a partial replacement is to be conducted the tube can be disconnected
from the blue connector to prevent having to access the outer chimney.
Continues on next page
 Loading...