59
Replacing the Keypad
1. Gain access to the instrument enclosure as previously
described.
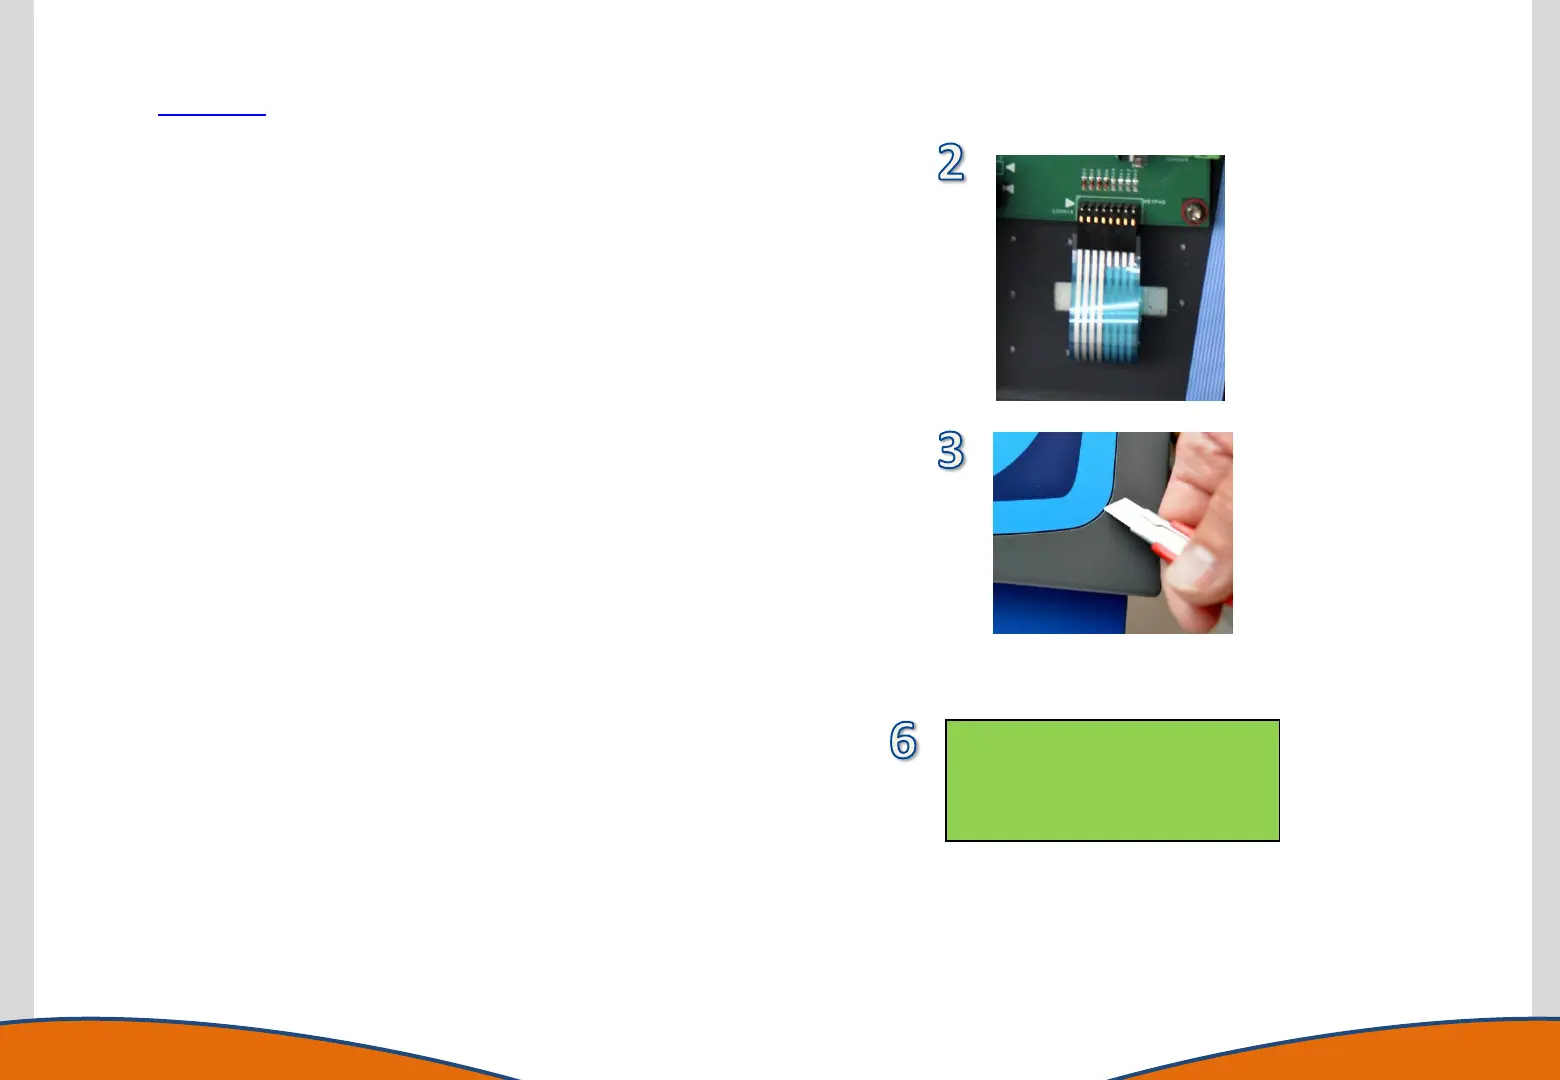
2. Identify and disconnect the keypad connector from the
motherboard.
3. Carefully place the Front Panel Assembly back into position
on the instrument. Using a knife blade or a thin flat
screwdriver, carefully lift a corner of the membrane (2).
Grasp the lifted corner and peel the membrane away from
the metal panel.
4. If necessary clean off any adhesive deposits on the metal
panel using IPA. Remove the adhesive backing from the
replacement membrane keypad. Pass the membrane cable
through the aperture in the panel, carefully locate the
membrane in position and smooth firmly in place.
5. Remove the Front Panel Assembly from the instrument and
place it back on the protected surface. Connect the
membrane cable to the Motherboard.
6. Before reassembly it is advised the Keypad is tested for
operation. Place the Front Panel Assembly back into position
on the instrument and power the instrument on. Navigate to
Setup > Test Hardware > Keypad. Pressing each key on the
keypad should display the reference on screen. If confirmed
operational the instrument can be fully reassembled.
Key Matrix – – – –
Rev:2 – – – –
Read+Stop – – – –
To Abort – – – –