57
Replacing the Gas Fuel Adjustment Valve
1. Gain access to the instrument enclosure as previously described.
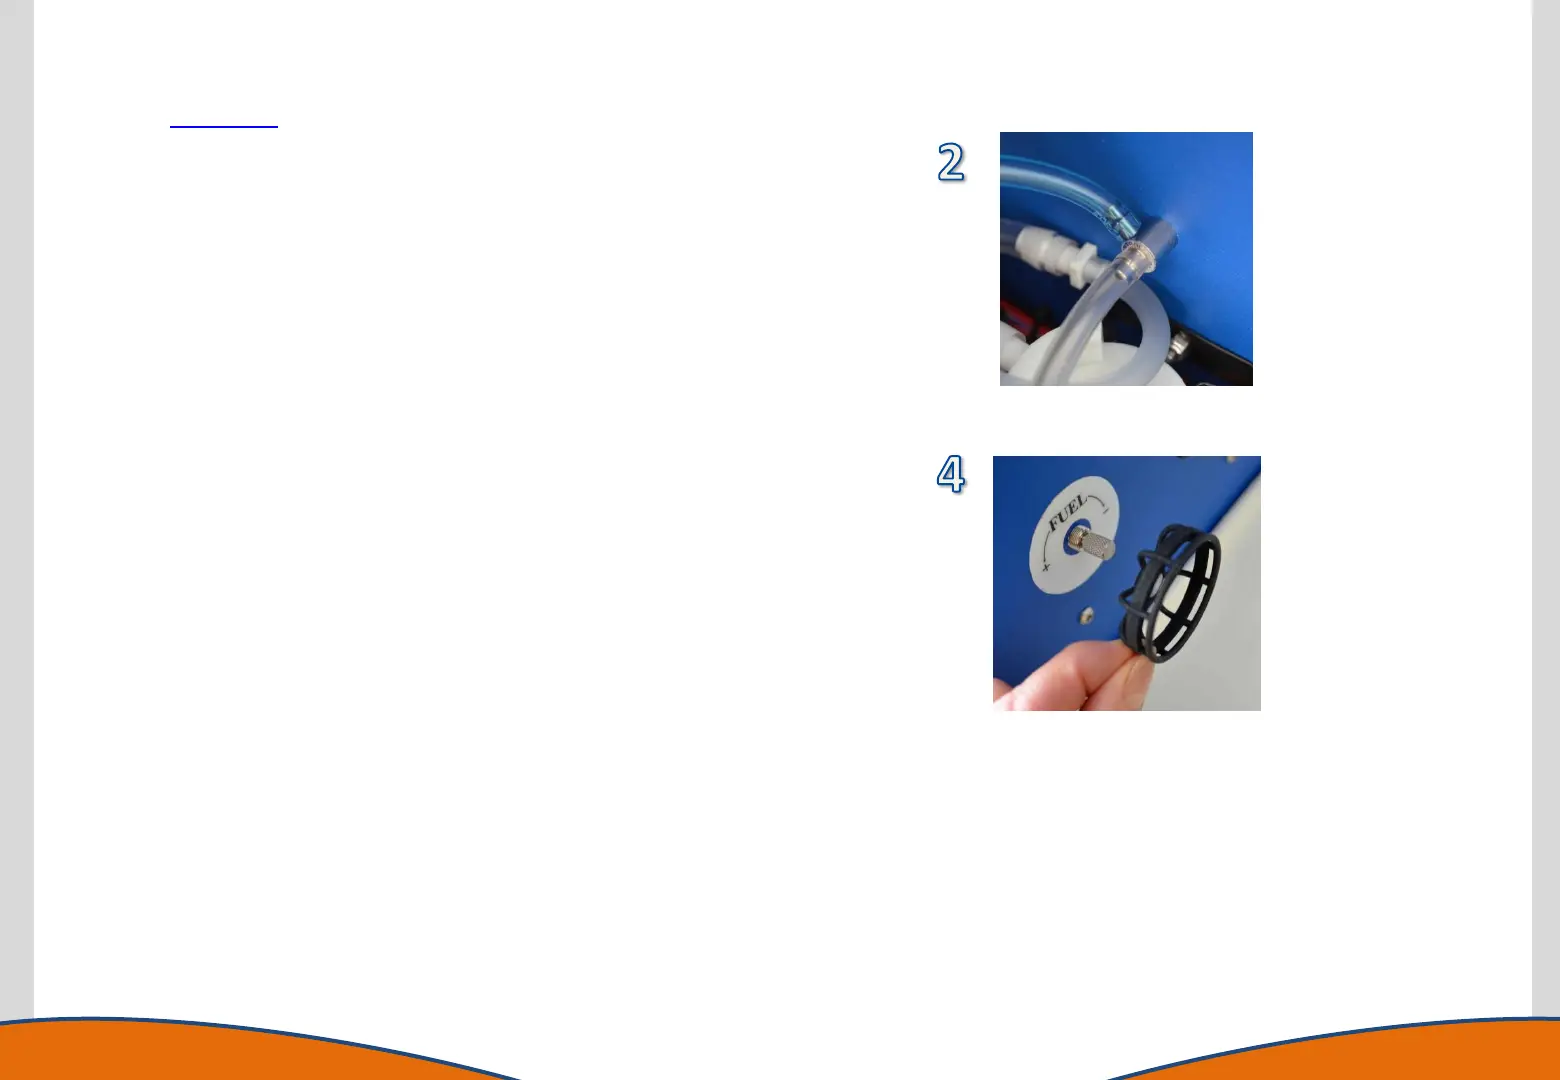
2. Cut the blue tube away from the gas flow adjustment valve (it is
important not to pull this away from the valve as it is a very tight fit
and damage to the valve can occur, it is also important when
cutting not to apply pressure with a sharp edge to the barb on the
gas valve so as not to score the sealing face.
3. Pull the white tube from the gas adjustment valve.
4. Unscrew the fuel gas guard using an anti-clockwise rotation.
5. Remove the valve from the chassis.
6. Replace the valve and refit the gas fuel guard.
7. Ensure the tubes are replaced in the correct orientation as
displayed in the image (2).
It is essential that a leakage check is performed using a soap solution or
BWB leak detection solution once the unit is put back to functional
condition, but before replacing the Front Panel and Top Cover securing
screws. Initiate a flame start sequence allowing the solenoid to pass
gas, lower the Front Panel and check all gas connections for leaks whilst
flame is alight. Once all connections have been confirmed as free from
leaks, refit and secure the Front Panel and Top Cover.


 To Next Page