77
Upgrading (installing) the Printer Module
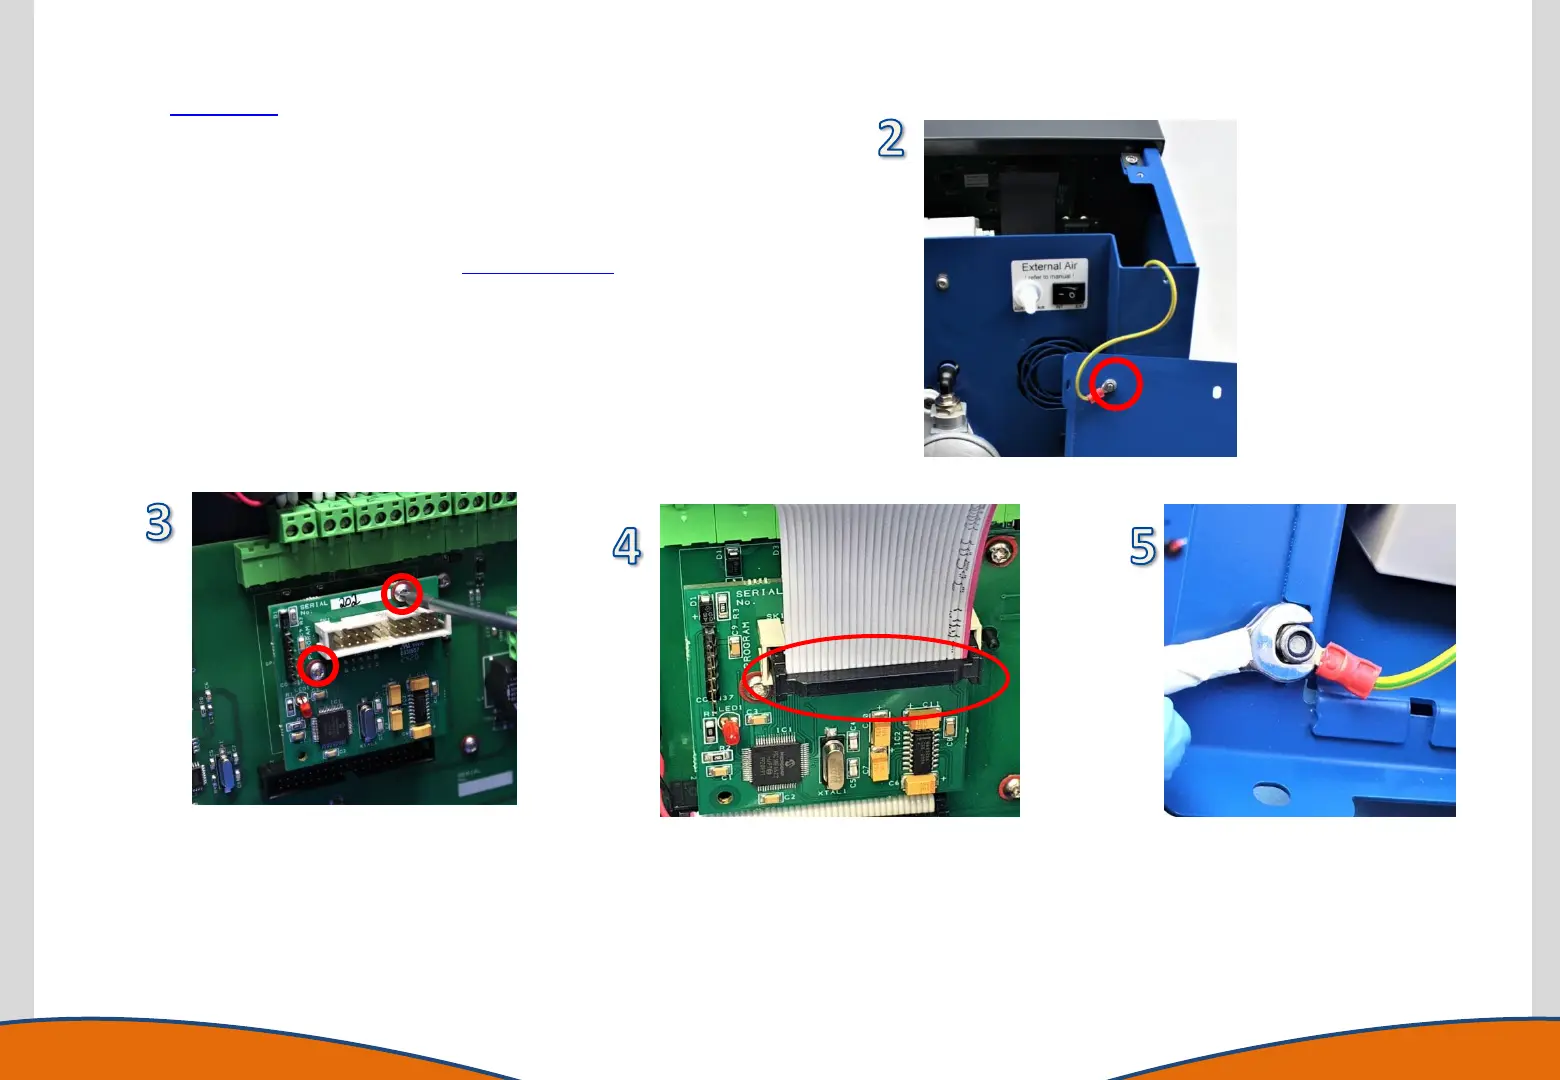
1. Gain access to the instrument enclosure as previously described.
2. Remove the earth cable from the top panel cover.
3. Plug the Printer Interface PCB into the socket on the marshalling board
and secure it in place using the 2 supplied screws in the holes as
identified in the image.
4. Connect the printer ribbon cable to the Printer Interface PCB and plug
the printer power cable into the identified socket on the marshalling
board.
5. Connect the earth cable to the printer enclosure.
6. Reassemble the instrument.
7. The printer functionality will need enabling in the Interfaces menu
within the menu structure of the instrument.
 Loading...