66
Replacing the Igniter
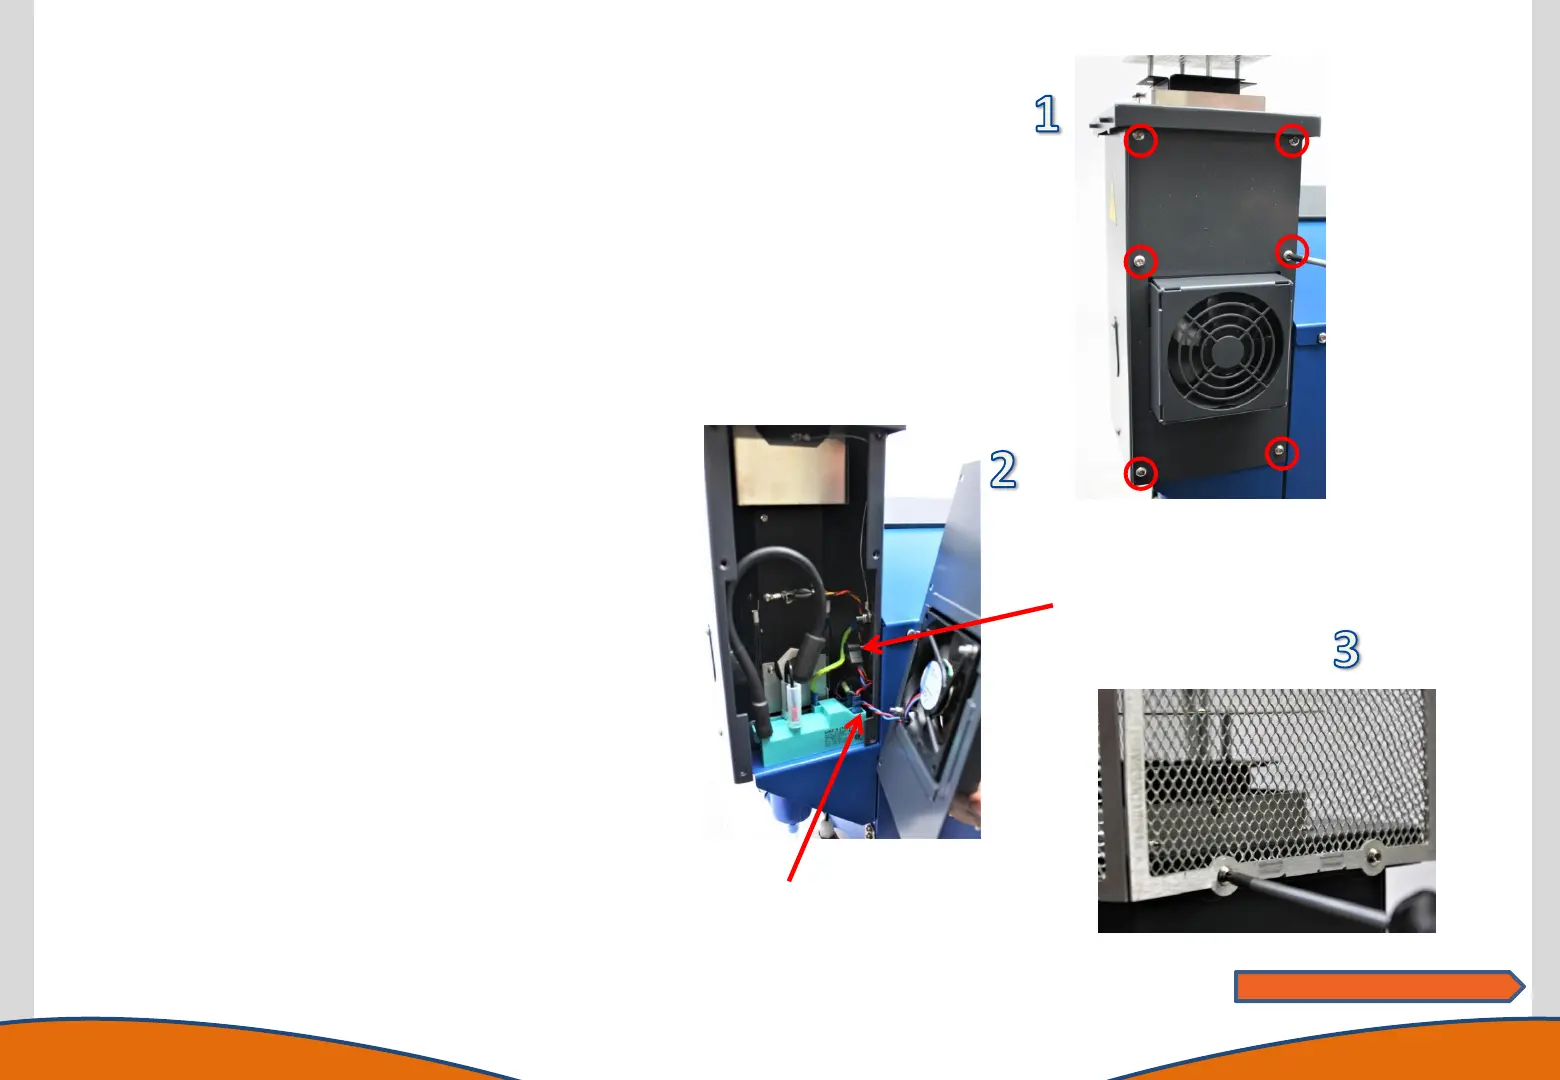
1. Access the rear of the chimney by removing the 6
retaining screws using a T20 torx driver.
2. Unplug the chimney fan from the connection on the
chassis side wall. Note the cable location (tucked down
the side of the igntion module – it is vital the cable is
placed back in this position). Place the chimney rear plate
assembly to one side.
3. Remove the 4 screws retaining the chimney top
protection mesh with a T10 torx driver and place this part
to one side.
4. Remove the HT cable boot from igniter and remove the
screw securing the cable using a T20 torx driver.
5. Remove the 2 screws retaining the inner chimney using a
T10 torx driver.
6. Disconnect the air tube from the base of the inner
chimney.
7. Unclip the temperature sensor from the inner chimney.
8. Carefully raise the inner chimney in an upwards motion
out of the chimney housing.
9. Remove 1 window from the inner chimney to enable
access.
10. Using a 15 spanner, remove the securing nut for the
igniter.
11. Replace the igniter and ensure the nut is reasonably tight
(note – overtightening the plastic thread may cause
thread damage – do not overtighten).
12. Reassemble the instrument in reverse order ensuring the
chimney power cable is tucked down the side of the
ignition module.
Note location of
power cable
routing.
Power connector
socket
Continues on next page