36
Proprietary Information: Not for use or disclosure except by written agreement with Calix.
© 2001-2009 Calix. All Rights Reserved.
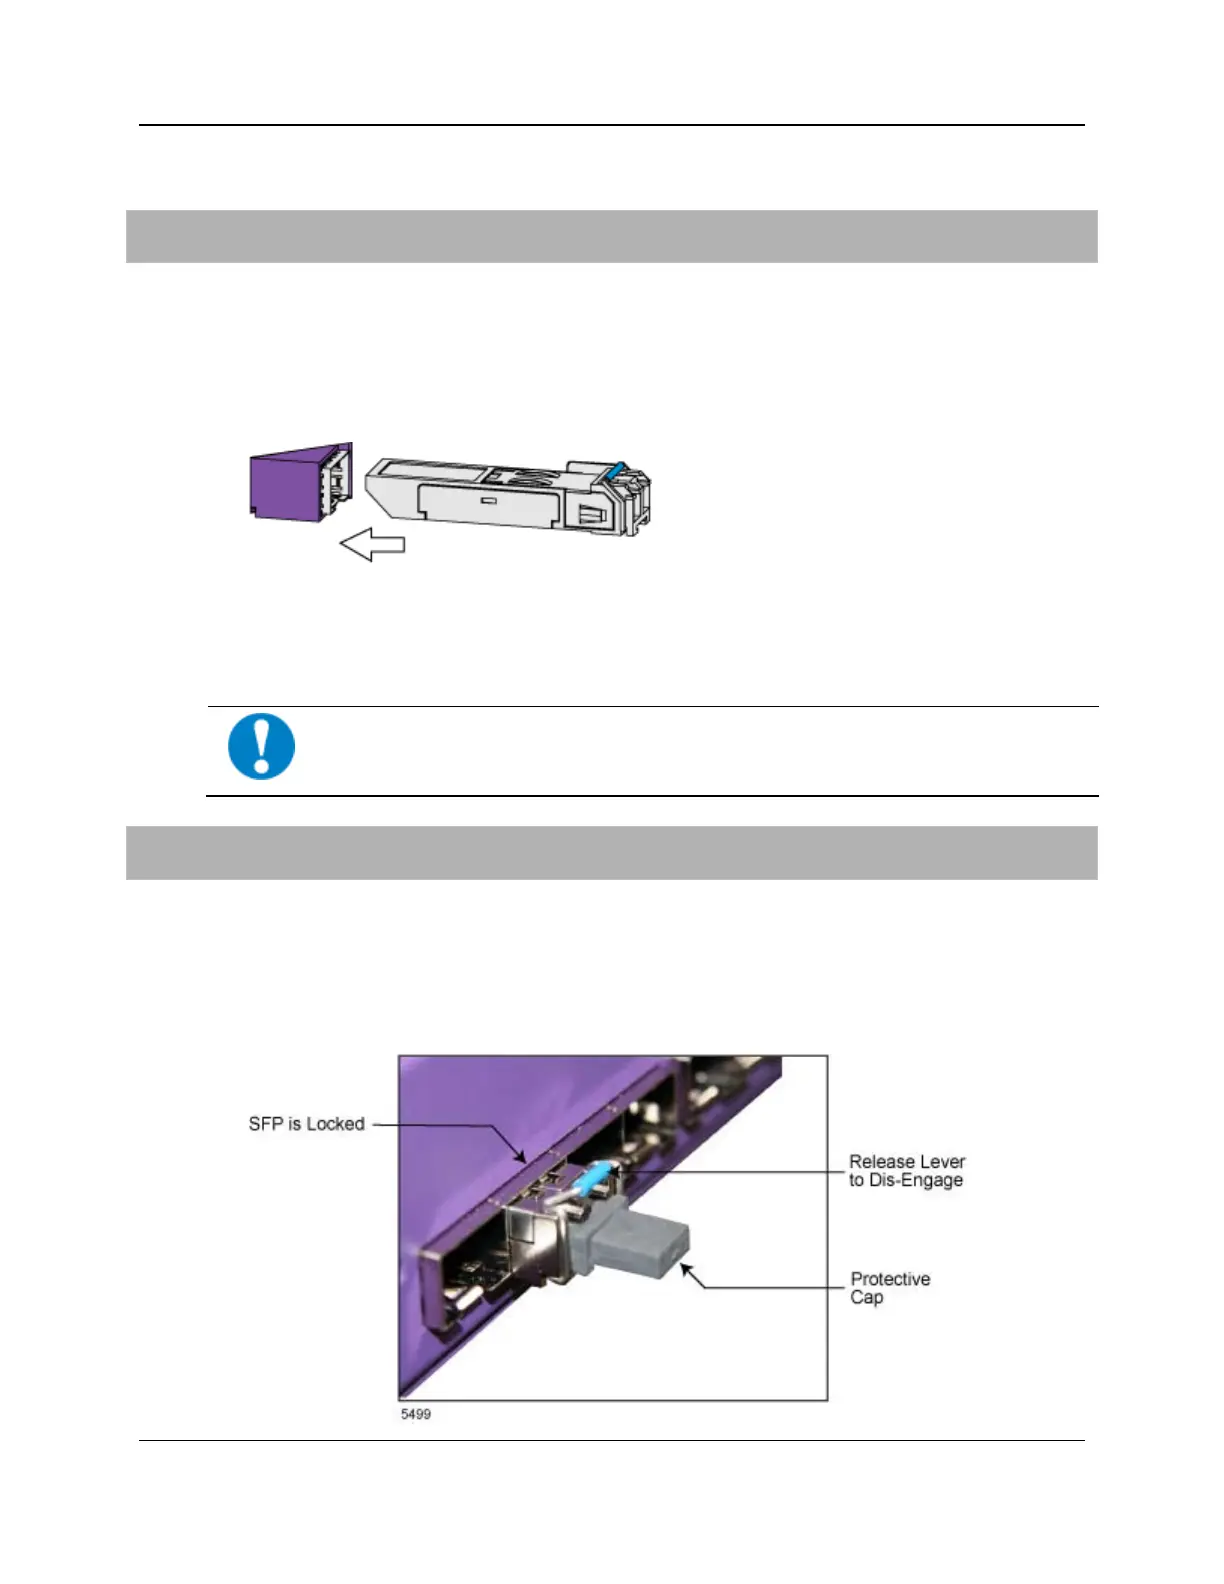
Installing and Removing a Transceiver Module
To install a mini GBIC transceiver
1. Remove the dust cover from the transceiver.
2. For transceivers with a flip-up or flip-down latch, close the latch.
3. Insert the transceiver into the E5-400 slot with the exposed section of PCB board facing
down.
4. Press the transceiver firmly until it clicks into place.
After the transceiver is installed, you can connect the interface cables (typically fibers) to the
transceiver.
ESD ALERT! Beware of electrostatic discharge. Follow standard ESD
precautions. Always wear a grounded ESD wristband to avoid damaging the
electronic equipment.
To remove a mini GBIC transceiver
1. Remove the fiber-optic cables from the transceiver (if present).
2. Unlock the transceiver latch (latch styles vary).
3. Pull the transceiver out of the slot.
4. Put the transceiver protective cap on the transceiver.