Calix ODC-10 Installation Guide
71
Proprietary Information: Not for use or disclosure except by written agreement with Calix.
© 2001-2003 Calix. All Rights Reserved.
4.
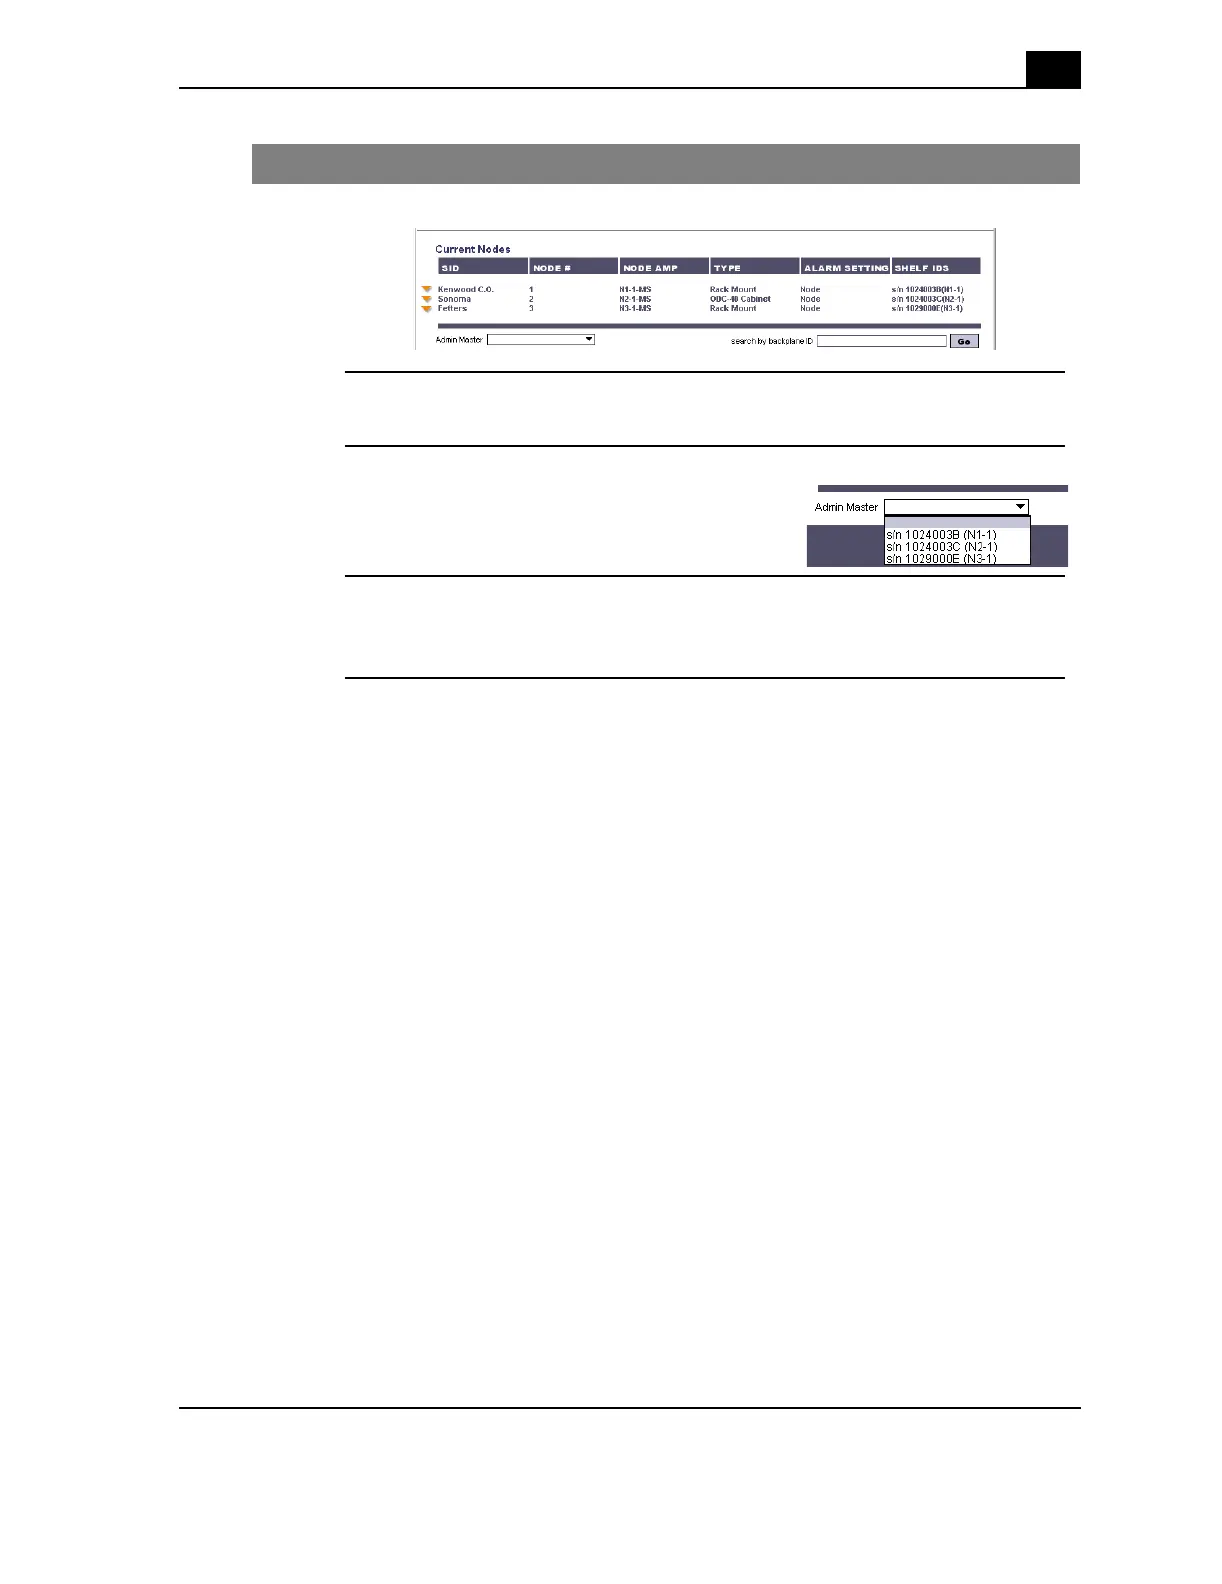
Click Assign to create the node and display it in the Current Nodes area.
5.
Repeat steps 2 - 4 to create additional nodes.
6.
In the lower left corner of the Current Nodes
area, click from the list of shelves to select an
Admin Master for the network.
7.
Click Next to save all node definitions and the Admin Master designation, and
to exit the Network Wizard.
Step Action