Calix ODC-10 Installation Guide
95
Proprietary Information: Not for use or disclosure except by written agreement with Calix.
© 2001-2003 Calix. All Rights Reserved.
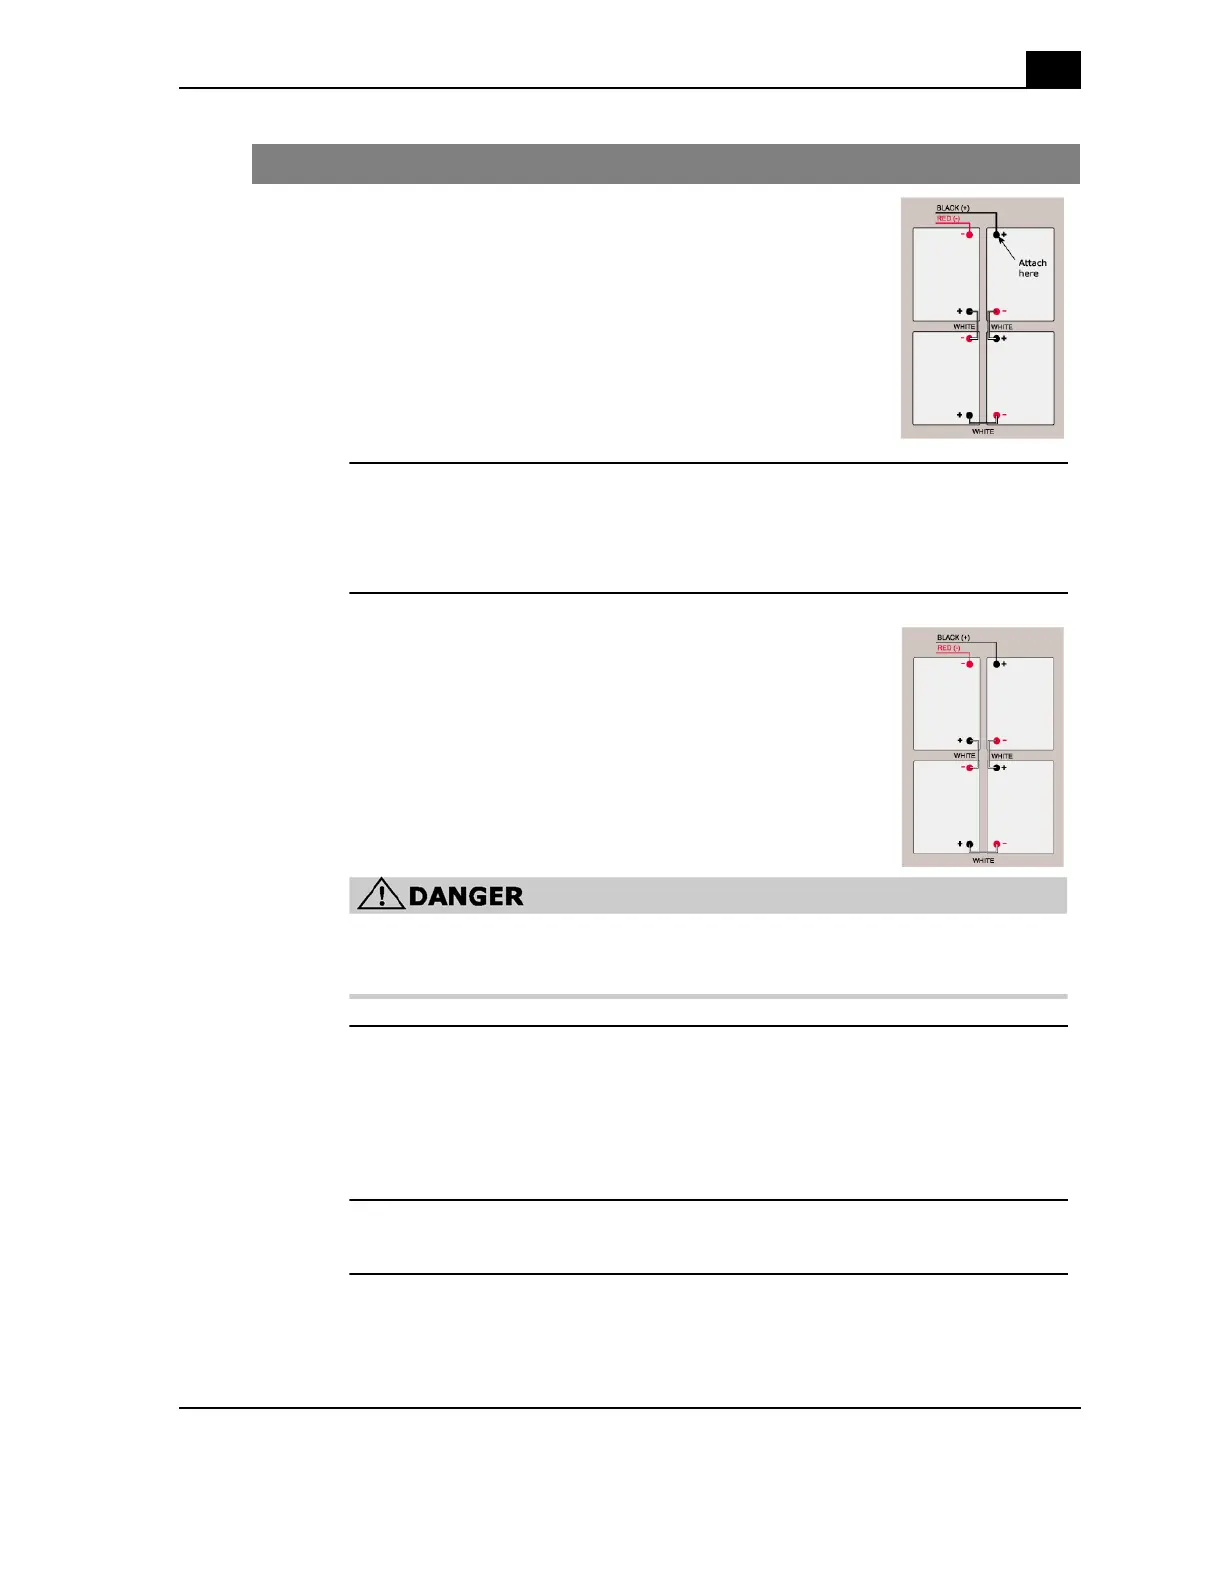
6.
Attach the bolt from step 4 to the positive (black) battery
terminal bolt at the rear of the battery drawer.
Ensure that the battery wire terminal lug is in direct
contact with the greased terminal when you insert the
bolt.
7.
Thread a lock washer, a flat washer, and a battery wire terminal lug onto all
other battery terminal bolts. Attach and ensure that each lug is in direct
contact with the greased terminal when you insert the bolt.
8.
Use an insulated wrench to connect the battery leads
according to the wiring diagram on the inside of the
battery compartment door panel.
Click the diagram to the right to see the wiring diagram
for one battery tray.
DANGER! The black battery lead is positive and the red battery lead is
negative.
9.
Using a volt meter test the battery charge between the negative and positive
battery leads.
a. place the red voltmeter lead on the red negative battery lead
b. place the black voltmeter lead on the black positive battery lead
c. verify that the volt meter reads between -48 and -54 VDC
10.
Set the battery breaker switch above the drawer to ON.
Step Action