9.3.2 Widgets
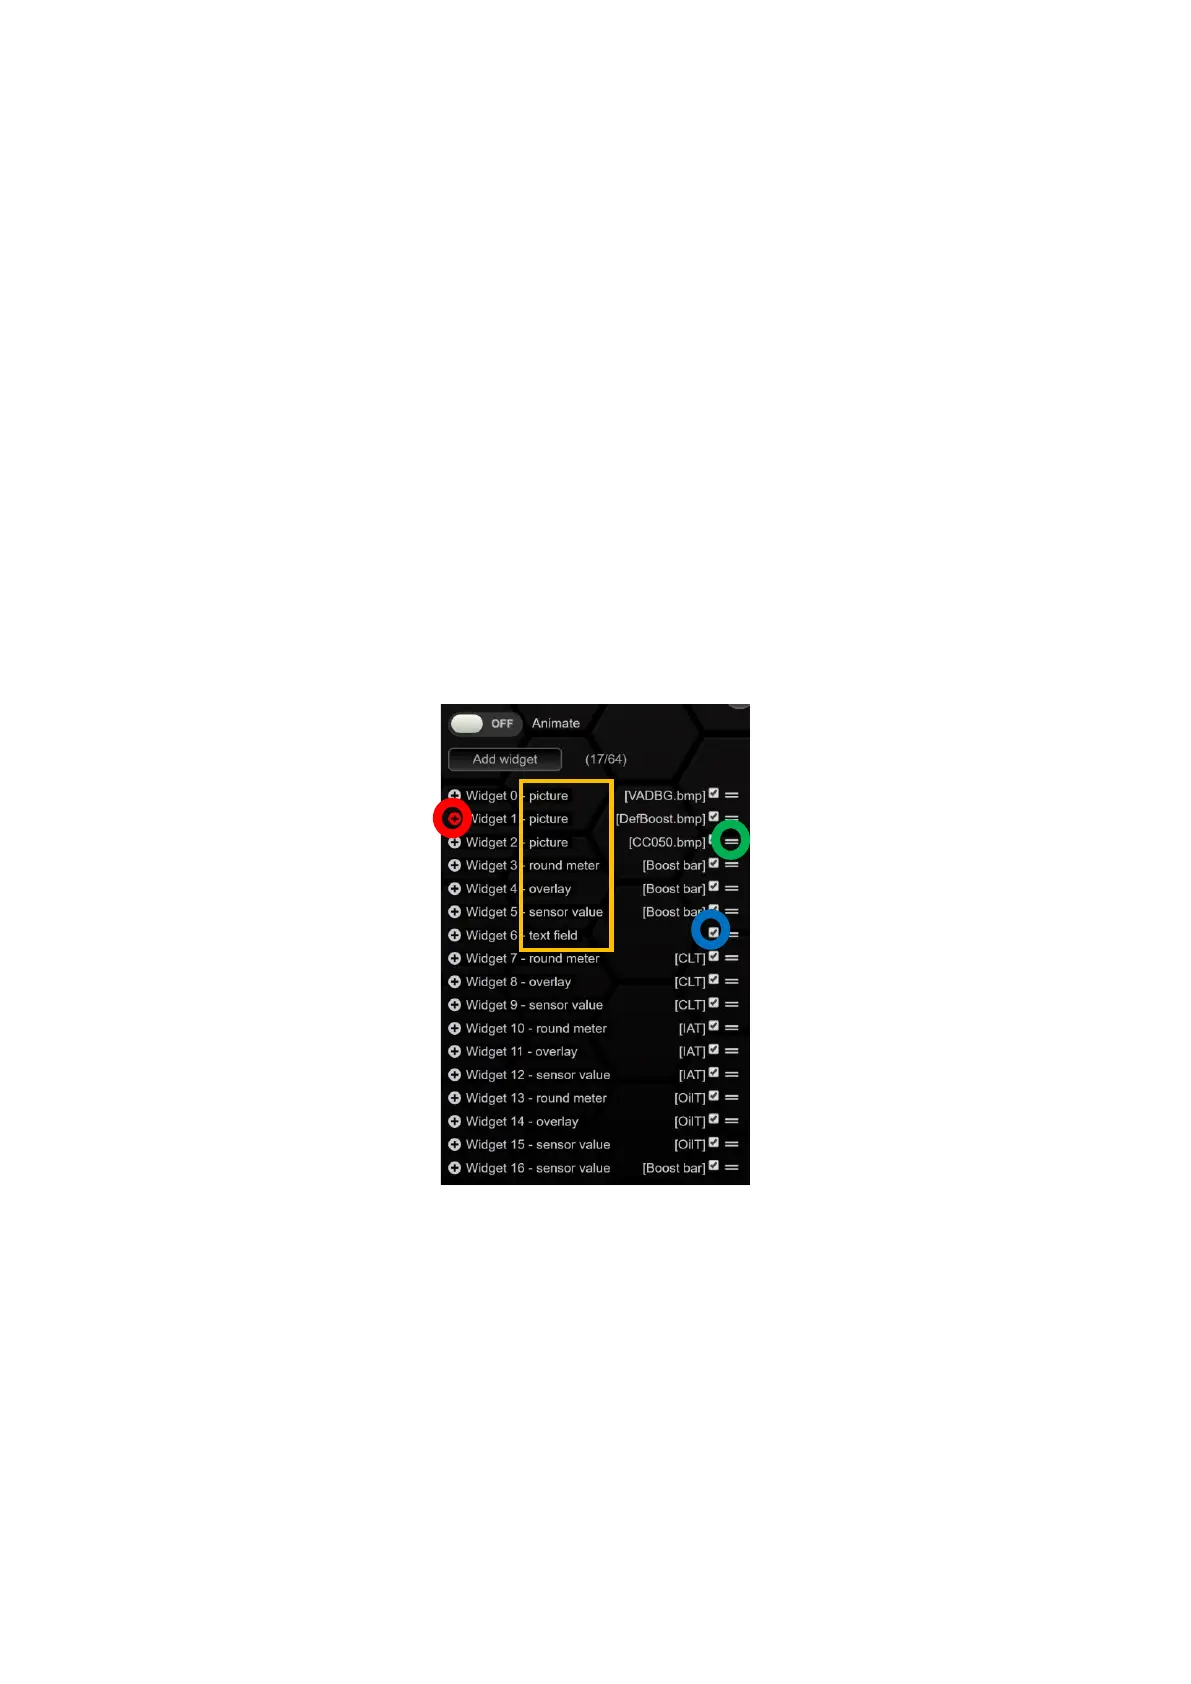
To the right of the preview of the page, you'll find the list of active widgets on the page. The smaller
the number of the widget, the further it is in the background. For example, widget 5 is always above
widget 4. Typically, widgets 0 and 1 are smaller logos or backgrounds.
You can arrange the individual widgets in the list by dragging and move it to the desired layer.
If you select a widget in the preview, the corresponding widget is marked with a red + in the list of
active widgets and the submenu for the widget opens. If you click on the red symbol again, the
submenu will collapse again. The individual submenus and widgets explained in the following
chapter.
If you uncheck a widget in blue, the widget will be made invisible in your preview in the DSS. You can
use this function to create widgets in different layers in the same place without accidentally clicking
on it.
In addition to the number of the widget, you can also see at a glance what kind of widget it is. In
addition, you can see in square brackets which sensor or image is assigned to this widget.
If something is unclear during setup, you can always press the red circle with the question mark to
get more information about the corresponding widget or setup.
Figure 28: List of Active Widgets
Use the Add widget button to add a new widget to your site and then select which widget it should
be from the drop-down menu . Once you've added a new widget, you can drag and drop it onto your
page. The different ways of configuring the widgets (submenus) are discussed individually for each
widget below.