Adjusting the Printhead
Note
• Use Standard Adj. if you have switched to another type of paper or if you want the boundaries
between colors to appear as attractive as possible.
• Use Advanced Adj. to ne-tune the space between nozzles or colors if you have switched the
printhead or if you want printed documents to appear as vivid as possible. W e recommend using
Advanced Adj. for printing at a higher level of image quality .
• Always make sure the loaded paper matches the media type setting on the printer . Adjustment
cannot be completed correctly unless the setting value matches the loaded paper .
• W e recommend using the type of paper you use most often for adjustment.
• This function is not available for CAD T racing Paper , CAD T ranslucent Matte Film , or CAD Clear
Film . If adjustment is not possible as expected using highly transparent lm or similar media, try
another type of media or adjust the Printhead alignment manually . ( → P .455)
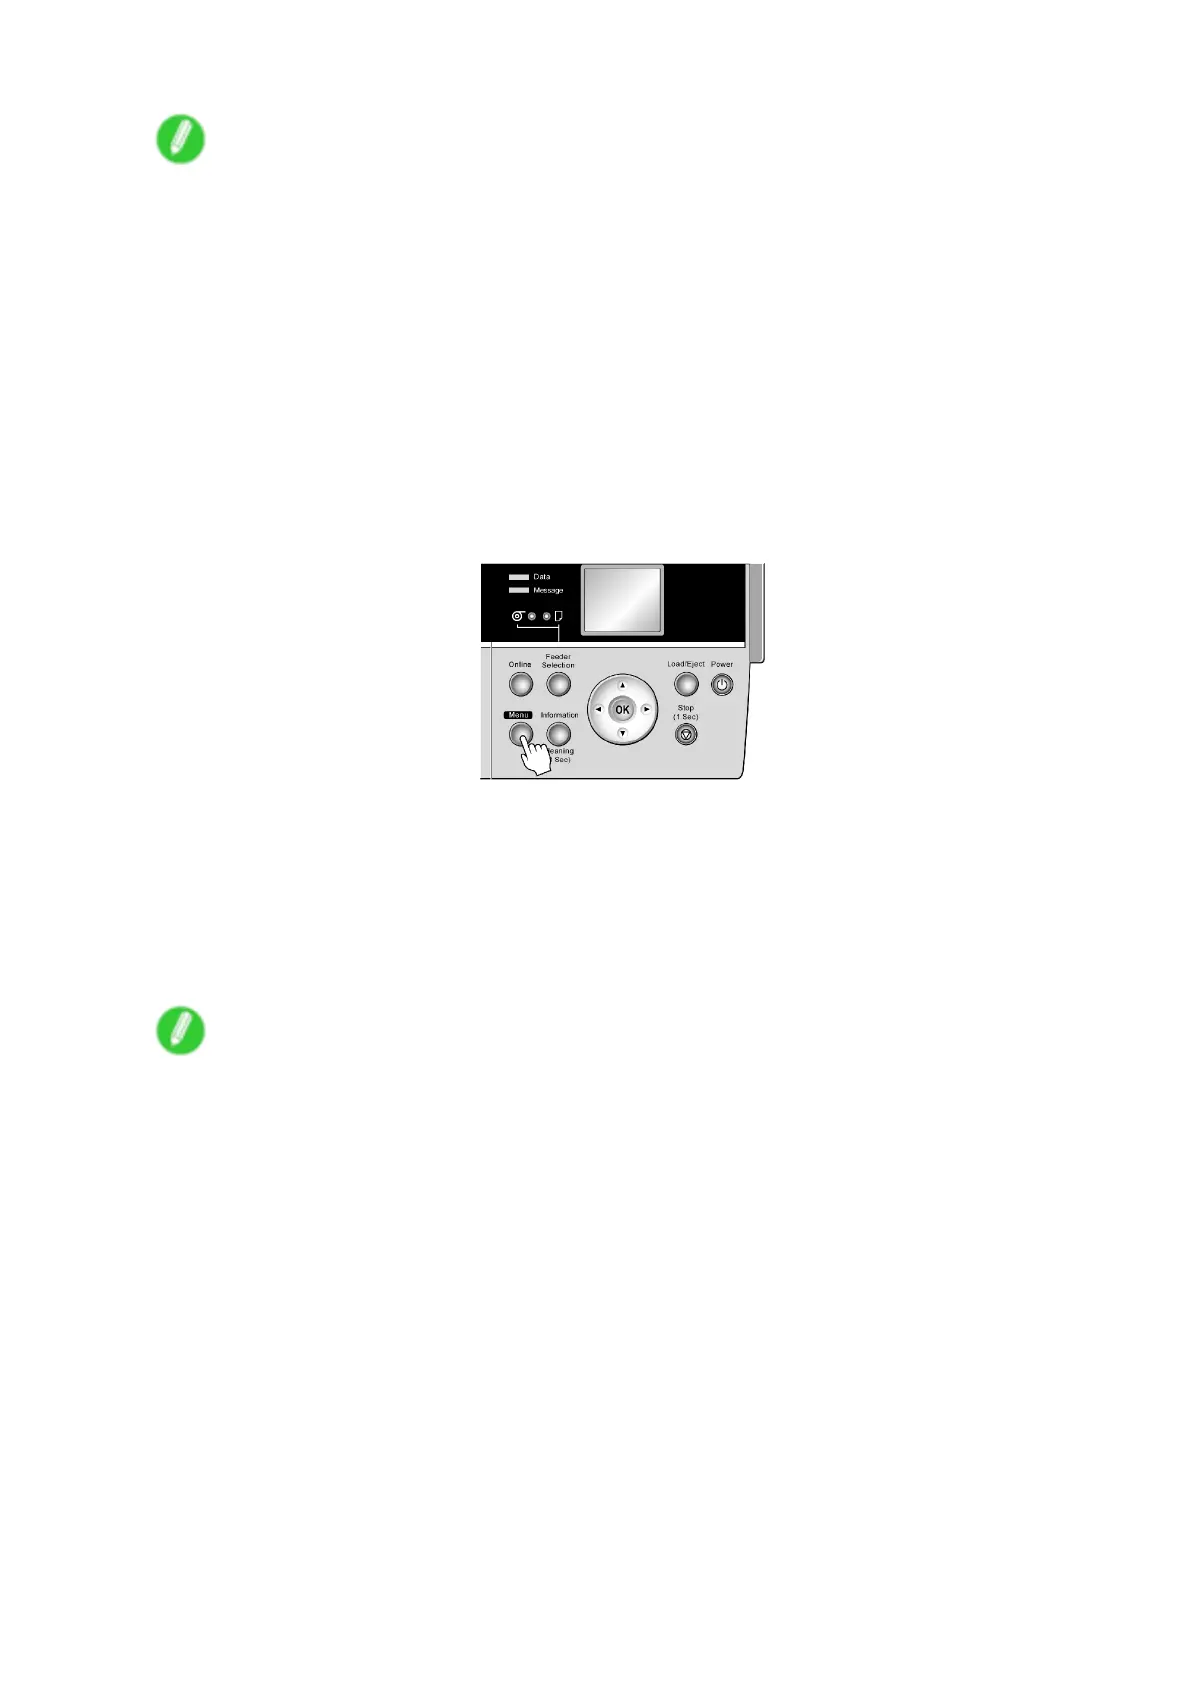
2. Press the Menu button to display MAIN MENU .
3. Press ▲ or ▼ to select Adjust Printer , and then press the ► button.
4. Press ▲ or ▼ to select Auto Head Adj. , and then press the ► button.
5. Press ▲ or ▼ to select Advanced Adj. , and then press the ► button.
6. Press ▲ or ▼ to select Y es , and then press the OK button.
A test pattern is printed for printhead adjustment.
After reading the pattern, the printer automatically adjusts the Printhead alignment.
Note
• If paper is fed automatically and no roll is loaded, select the media source and click the OK button.
454 Adjustments for Better Print Quality

 Loading...