4
4
4-57
4-57
Parts Replacement and Cleaning > PCB > Removing the Paper Edge Cooling Fan (Front) (FAN2) > Replacement Procedure
Parts Replacement and Cleaning > PCB > Removing the Paper Edge Cooling Fan (Front) (FAN2) > Replacement Procedure
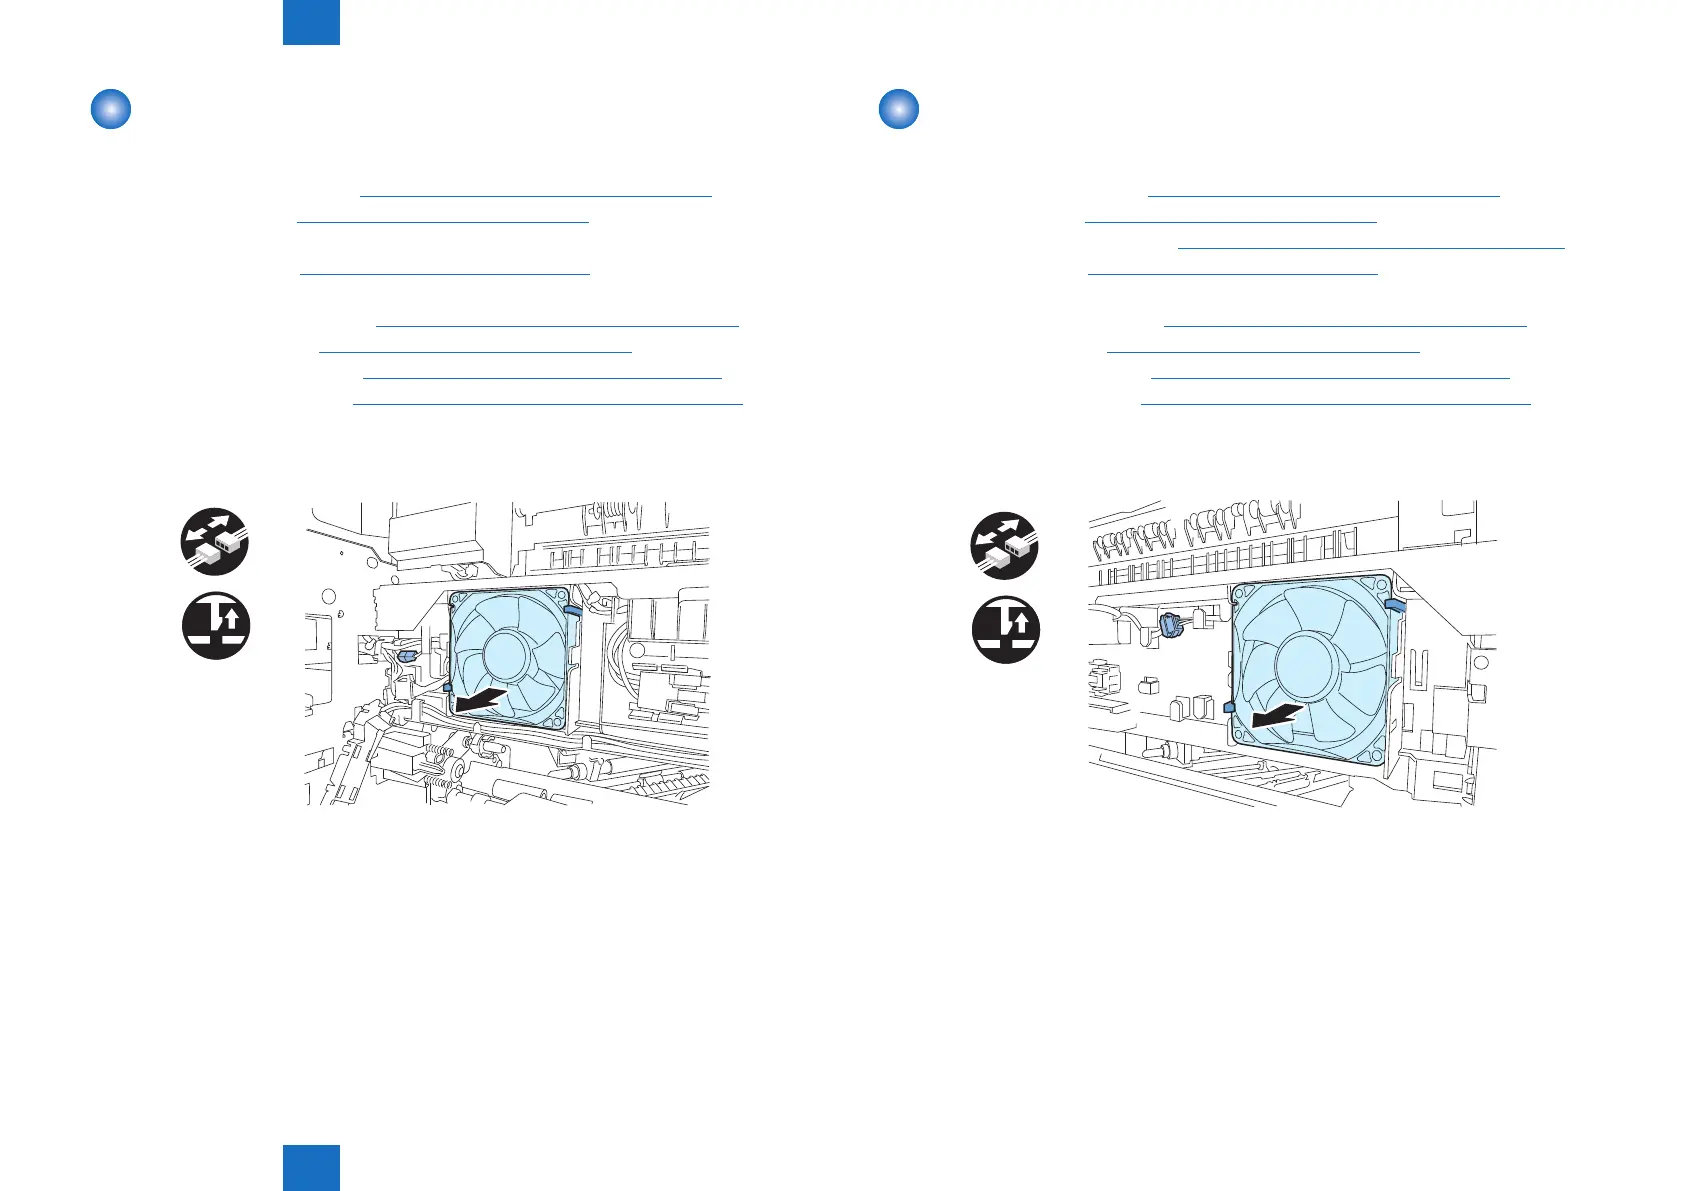
Removing the Paper Edge Cooling Fan (Rear) (FAN1)
■
Replacement Procedure
1) Remove the inside base cover.(“Removing the Inside Base Cover”(page 4-17).)
2) Remove the left cover.(“Removing the Left Cover”(page 4-16).)
3) Remove the waste toner container.(“Removing the Waste Toner Container”(page 4-37).)
4) Remove the drum unit.(“Removing the Drum Unit”(page 4-38).)
5) Remove the toner bottle.
6) Remove the tonner supply cover.(“Removing the Toner Supply Cover”(page 4-19).)
7) Remove the delivery tray.(“Removing the Delivery Tray”(page 4-15).)
8) Remove the laser scanner unit.(“Removing the Laser Scanner Unit”(page 4-27).)
9) Remove the toner supply unit.(“Removing the Toner Supply Assembly”(page 4-28).)
10) Remove the paper edge cooling fan (rear).
- 1 connector
- 2 claws
x1
x2
F-4-132
Removing the Paper Edge Cooling Fan (Front) (FAN2)
■
Replacement Procedure
1) Remove the inside base cover.(“Removing the Inside Base Cover”(page 4-17).)
2) Remove the left cover.(“Removing the Left Cover”(page 4-16).)
3) Remove the waste toner container.(“Removing the Waste Toner Container”(page 4-37).)
4) Remove the drum unit.(“Removing the Drum Unit”(page 4-38).)
5) Remove the toner bottle.
6) Remove the tonner supply cover.(“Removing the Toner Supply Cover”(page 4-19).)
7) Remove the delivery tray.(“Removing the Delivery Tray”(page 4-15).)
8) Remove the laser scanner unit.(“Removing the Laser Scanner Unit”(page 4-27).)
9) Remove the toner supply unit.(“Removing the Toner Supply Assembly”(page 4-28).)
10) Remove the paper edge cooling fan (front).
- 1 connector
- 2 claws
x1
x2
F-4-133
 Loading...