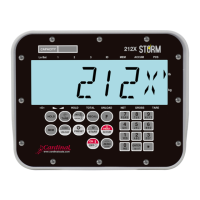
212/212X Installation & Technical
8200-M639-O1 Rev D 09/14
A-TRim (Auto-Trim)
The trim weight is a weight value used to compensate for material that
will continue to flow after a “stop” action has been initiated. The stop
action will be initiated at the preset weight value minus the trim weight
value. A manual trim value for the material can be entered, after exiting
SETUP, by pressing the PRESET key and selecting TRIM=. If auto trim is
selected (A TRIM=YES), trim weight compensation will be automatically
adjusted after each fill, based on the difference between the preset
weight and the weight actually filled. If automatic trim is not selected
(A TRIM=NO), the manually entered trim weight value will not be
automatically adjusted after each fill.
Press the ENTER key to show the current value. If the setting displayed
is acceptable, press the ENTER key again to save it. Otherwise, using
the numeric keys, 0/NO or 1/YES, enter the new setting and then press
the ENTER key to save it.
A-PRNT (Auto-Print)
The Auto-Print feature will cause an optional printer to automatically
record the total weight, time, and date of the fill at the conclusion of the fill.
Press the ENTER key to show the current value. If the setting displayed
is acceptable, press the ENTER key again to save it. Otherwise, using
the numeric keys, 0/NO or 1/YES, enter the new setting and then press
the ENTER key to save it.
dfcend (Digital Fill Control Ending Message)
NOTE: This selection requires two speed operation (SPEED=2).
This feature will enable/disable the Digital Fill Control ending message. If
enabled, the indicator will display (DONE) upon the conclusion of the fill.
Note that this message will remain on the display until a key is pressed.
Press the ENTER key to show the current value. If the setting displayed
is acceptable, press the ENTER key again to save it. Otherwise, using
the numeric keys, 0/NO or 1/YES, enter the new setting and then press
the ENTER key to save it.

 Loading...