7.10.6 Code Plug Replacement
Each Cattron receiver/decoder and controller is equipped with a code plug. This code plug contains the address
of the receiver/decoder or controller. When a command is received by the receiver/decoder, the address of the
controller sending the signal is checked against the address of the receiver/decoder. If the addresses do not
match, the signal is ignored and an error message is displayed on the receiver/decoder.
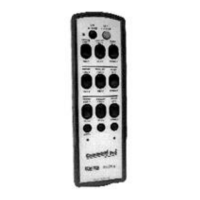
On some controllers, the factory assigned address code can be found by removing the battery cover and battery.
For information on setting the code for your controller, refer to the documentation provided with the controller.
While the factory settings should be adequate for most users, there may be conditions where it is necessary to
change the address code. This may be necessary when installing a spare receiver/decoder or controller.
The code assigned to the receiver/decoder at the factory is found on a label placed on the side of the ‘Gold Box’.
A code plug installed on the decoder circuit board sets the code. Cattron sets the code of all receiver/decoders
before they leave the factory. If the code must be changed, a new code plug with the new code must be obtained
from Cattron. In some circumstances, Cattron may provide blank, or unset, code plugs. An unset code plug
must have a code set prior to installing in the decoder. This is described in the procedure below. Installing an
unset code plug will produce an error code and the receiver/decoder will not operate.
To replace the code plug for the receiver/decoder, follow the procedure below:
1. Open the cover of the receiver/decoder.
2. Remove power from the electronics chassis, or ‘Gold Box’, by turning off the circuit breaker on the
bottom.
3. Release the four captive screws and remove the lid from the Gold Box.
4. Find the code plug located on the decoder circuit board. The code plug location is shown in Figure 23.
5. Remove the old code plug by pulling it straight out of its decoder board socket.
6. If the new code plug is blank, set the new code. To set the code, pins 2 through 8 must be cut in a
specific pattern. Figure 24 shows all possible codes for the code plug. For example, to set the code plug
to code 26, pins 3, 4, and 7 must be cut. DO NOT cut Pins 1, 9 and 10.
7. Write the newly set address code on the side of the code plug using a permanent marker.
8. Carefully install the new code plug, ensuring the dot (Pin 1) is positioned to the left just above the top right
hand side of the Data (blue spot) EPROM.
9. Install the lid on the Gold Box and secure using the four captive screws.
10. Restore power to the receiver/decoder by turning on the circuit breaker on the bottom of the Gold Box.
11. Close the cover of the receiver/decoder.
12. Perform a functional check of the PRC System (refer to the System Checkout section of this manual).