10-27
Cisco Wireless LAN Controller Configuration Guide
OL-17037-01
Chapter 10 Managing User Accounts
Configuring Wired Guest Access
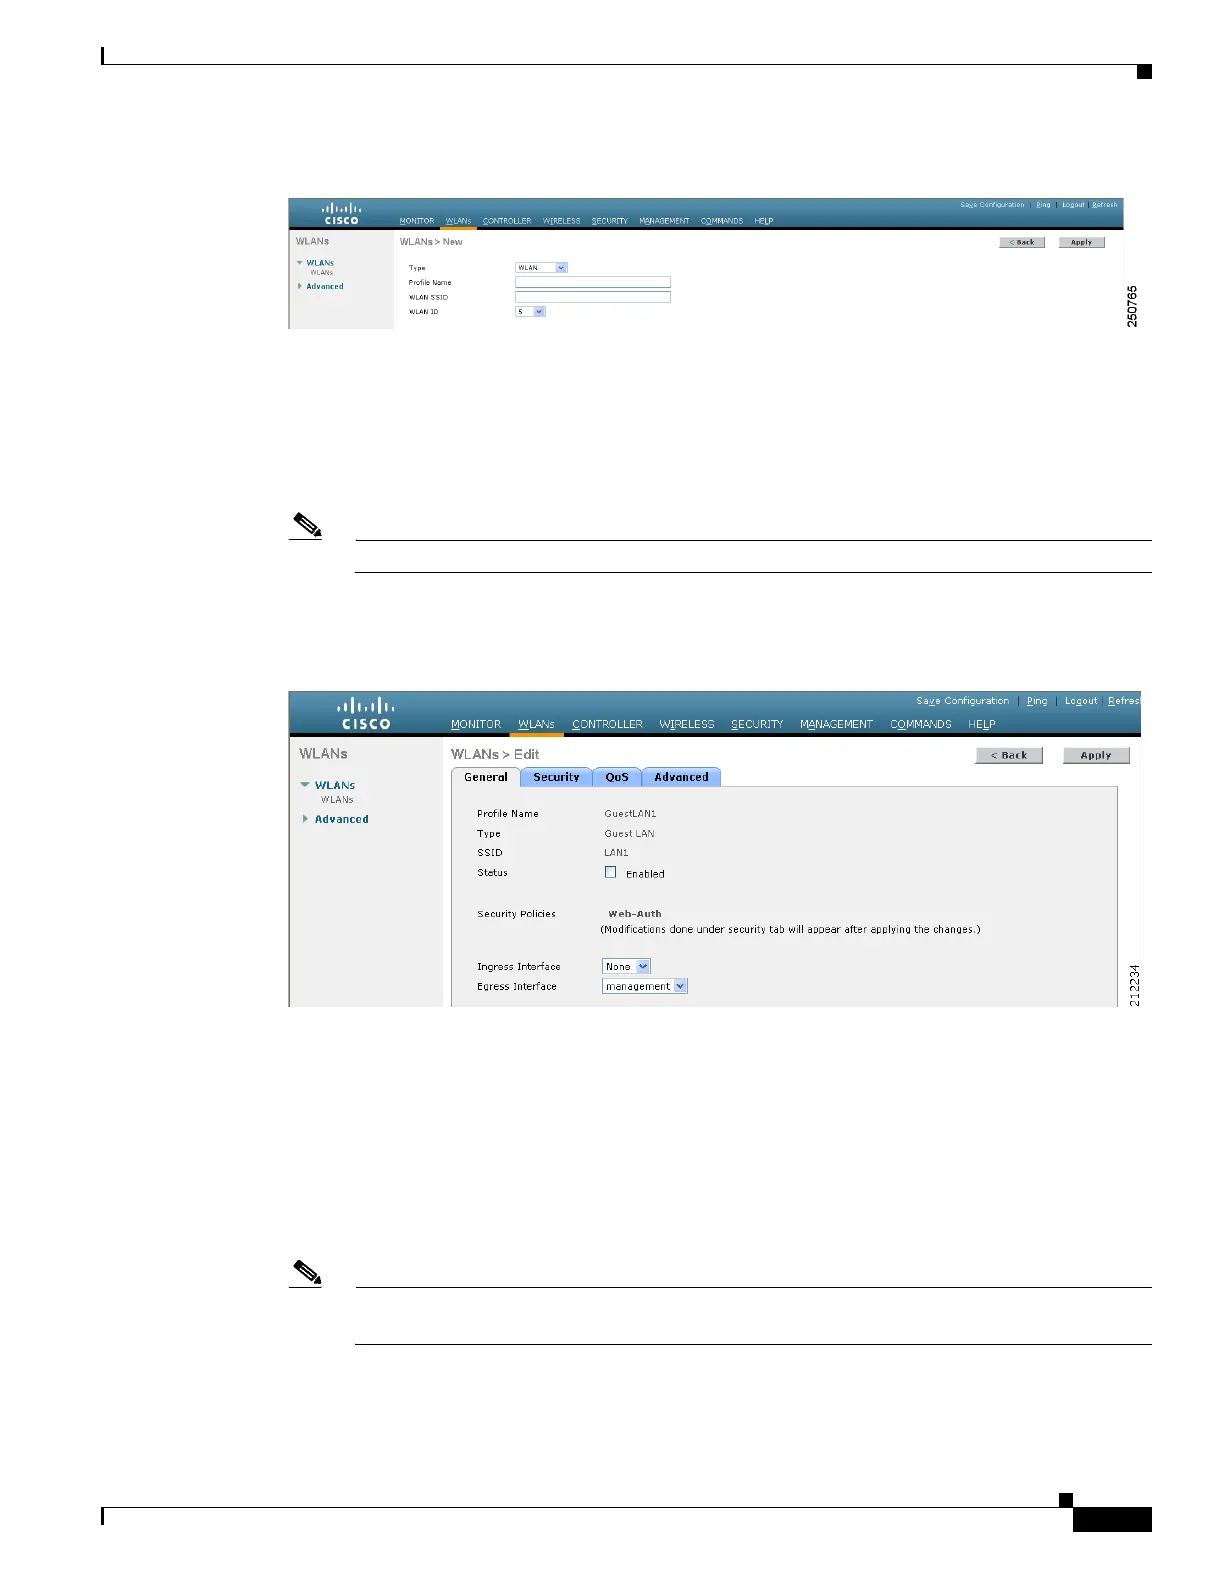
Figure 10-18 WLANs > New Page
Step 12
From the Type drop-down box, choose Guest LAN.
Step 13 In the Profile Name field, enter a name that identifies the guest LAN. Do not use any spaces.
Step 14 In the WLAN SSID field, enter an SSID that identifies the guest LAN. Do not use any spaces.
Step 15 From the WLAN ID drop-down box, choose the ID number for this guest LAN.
Note You can create up to five guest LANs, so the WLAN ID options are 1 through 5 (inclusive).
Step 16 Click Apply to commit your changes. The WLANs > Edit page appears (see Figure 10-19).
Figure 10-19 WLANs > Edit Page
Step 17
Check the Enabled check box for the Status parameter.
Step 18 Web authentication (Web-Auth) is the default security policy. If you want to change this to web
passthrough, click the Security tab after completing Step 19 and Step 20.
Step 19 From the Ingress Interface drop-down box, choose the VLAN that you created in Step 3. This VLAN
provides a path between the wired guest client and the controller by way of the Layer 2 access switch.
Step 20 From the Egress Interface drop-down box, choose the name of the interface. This WLAN provides a path
out of the controller for wired guest client traffic.
Note If you have only one controller in the configuration, choose management from the Egress
Interface drop-down box.
Step 21 If you want to change the authentication method (for example, from web authentication to web
passthrough), click Security > Layer 3. The WLANs > Edit (Security > Layer 3) page appears (see
Figure 10-20).
 Loading...


