Send document comments to nexus7k-docfeedback@cisco.com
4-15
Cisco Nexus 7000 Series NX-OS Interfaces Configuration Guide, Release 5.x
OL-23435-03
Chapter 4 Configuring Layer 3 Interfaces
Configuring Layer 3 Interfaces
Configuring a Loopback Interface
You can configure a loopback interface to create a virtual interface that is always up.
BEFORE YOU BEGIN
Ensure that the IP address of the loopback interface is unique across all routers on the network.
Ensure that you are in the correct VDC (or use the switchto vdc command).
SUMMARY STEPS
1. configure terminal
2. interface loopback instance
3. ipv4 address ip-address
or
ipv6 address ip-address
4. (Optional) show interfaces loopback instance
5. (Optional) copy running-config startup-config
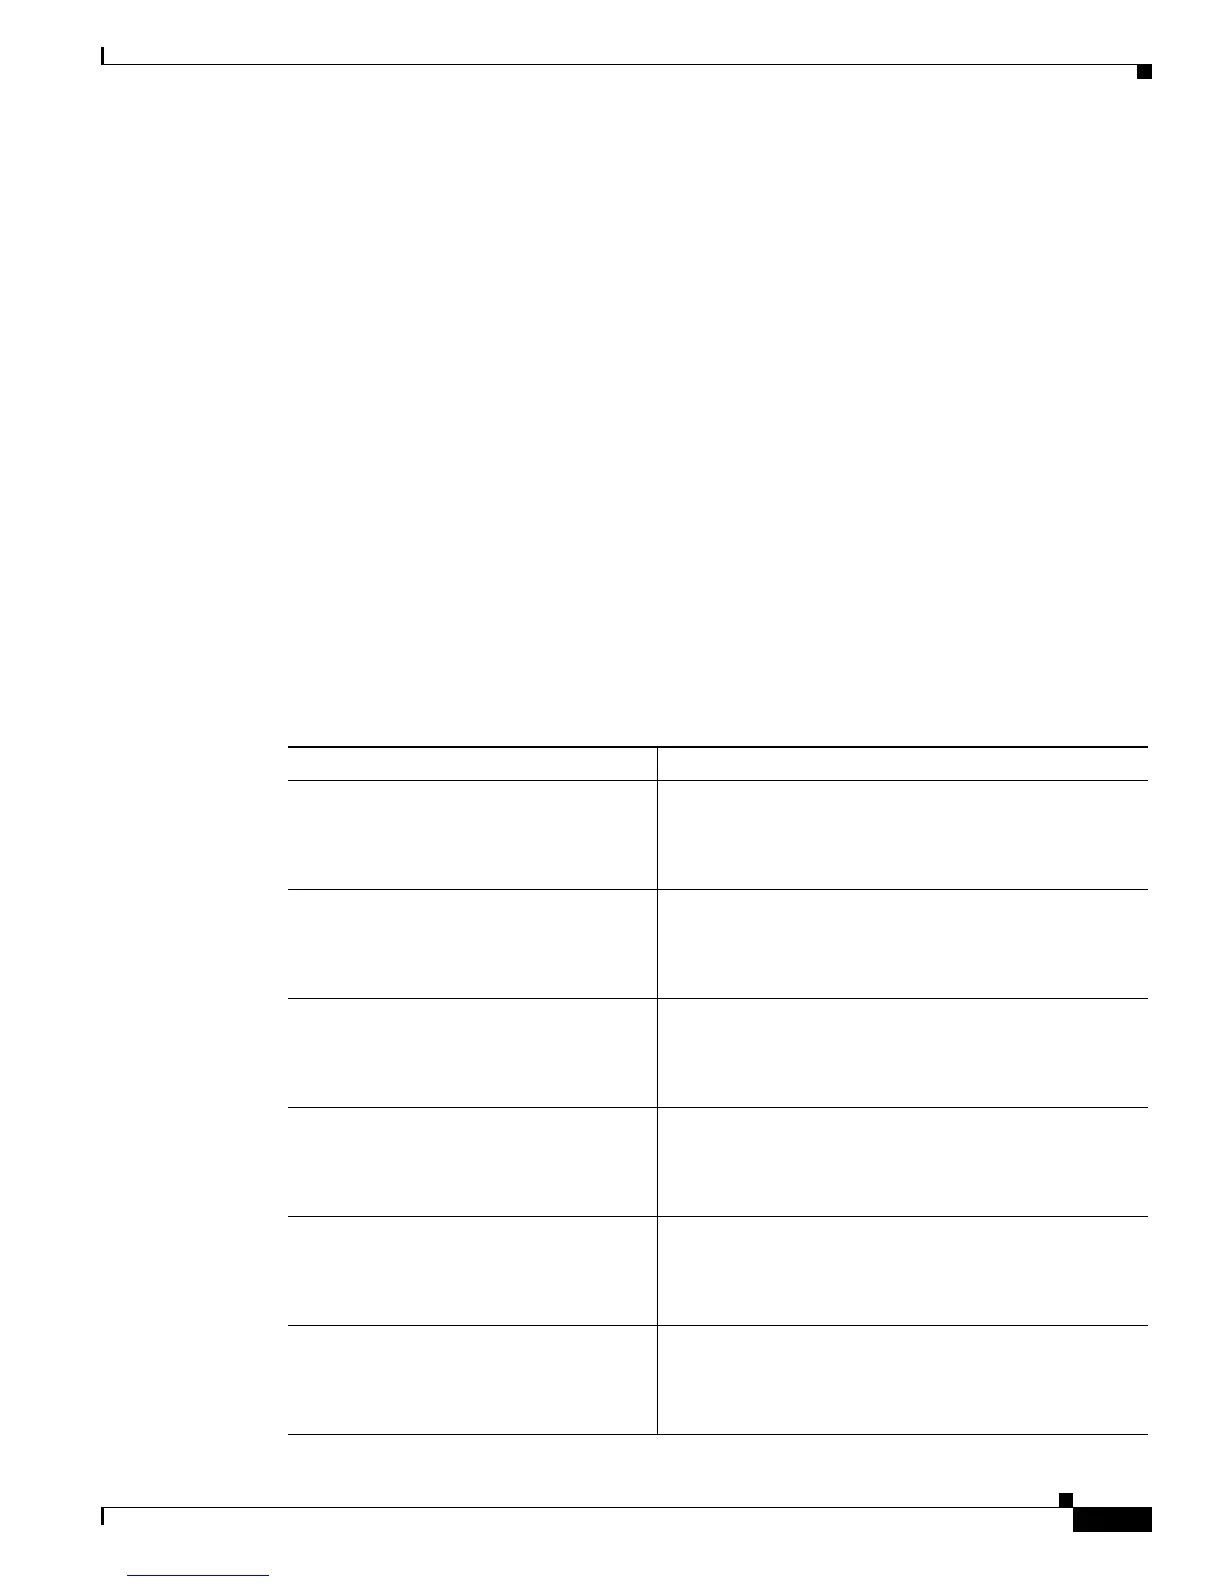
DETAILED STEPS
Command Purpose
Step 1
configure terminal
Example:
switch# configure terminal
switch(config)#
Enters configuration mode.
Step 2
interface loopback instance
Example:
switch(config)# interface loopback 0
switch(config-if)#
Creates a loopback interface. The range is from 0 to 1023.
Step 3
ip address ip-address/length
Example:
switch(config-if)# ip address
192.0.2.100/8
Configures an IP address for this interface. See the Cisco
Nexus 7000 Series NX-OS Unicast Routing Configuration
Guide, Release 5.x, for more information on IP addresses.
ipv6 address ipv6-address/length
Example:
switch(config-if)# ipv6 address
2001:0DB8::18/8
Configures an IPv6 address for this interface. See the
Cisco Nexus 7000 Series NX-OS Unicast Routing
Configuration Guide, Release 5.x, for more information
on IPv6 addresses.
Step 4
show interfaces loopback instance
Example:
switch(config-if)# show interfaces
loopback 0
(Optional) Displays the loopback interface statistics.
Step 5
copy running-config startup-config
Example:
switch(config-if)# copy
running-config startup-config
(Optional) Saves this configuration change.

 Loading...


