Step 3 Verify that any empty module slots have filler panels installed and that the screws holding the panels in place are tight.
Step 4 Turn on the power supply switches to power up the system and check the LEDs on the modules.
For information about how to check connectivity of modules, see the Cisco MDS 9000 Family NX-OS Fundamentals
Configuration Guide.
Crossbar Fabric Switching Modules
Guidelines for Crossbar Fabric Switching Module Installation
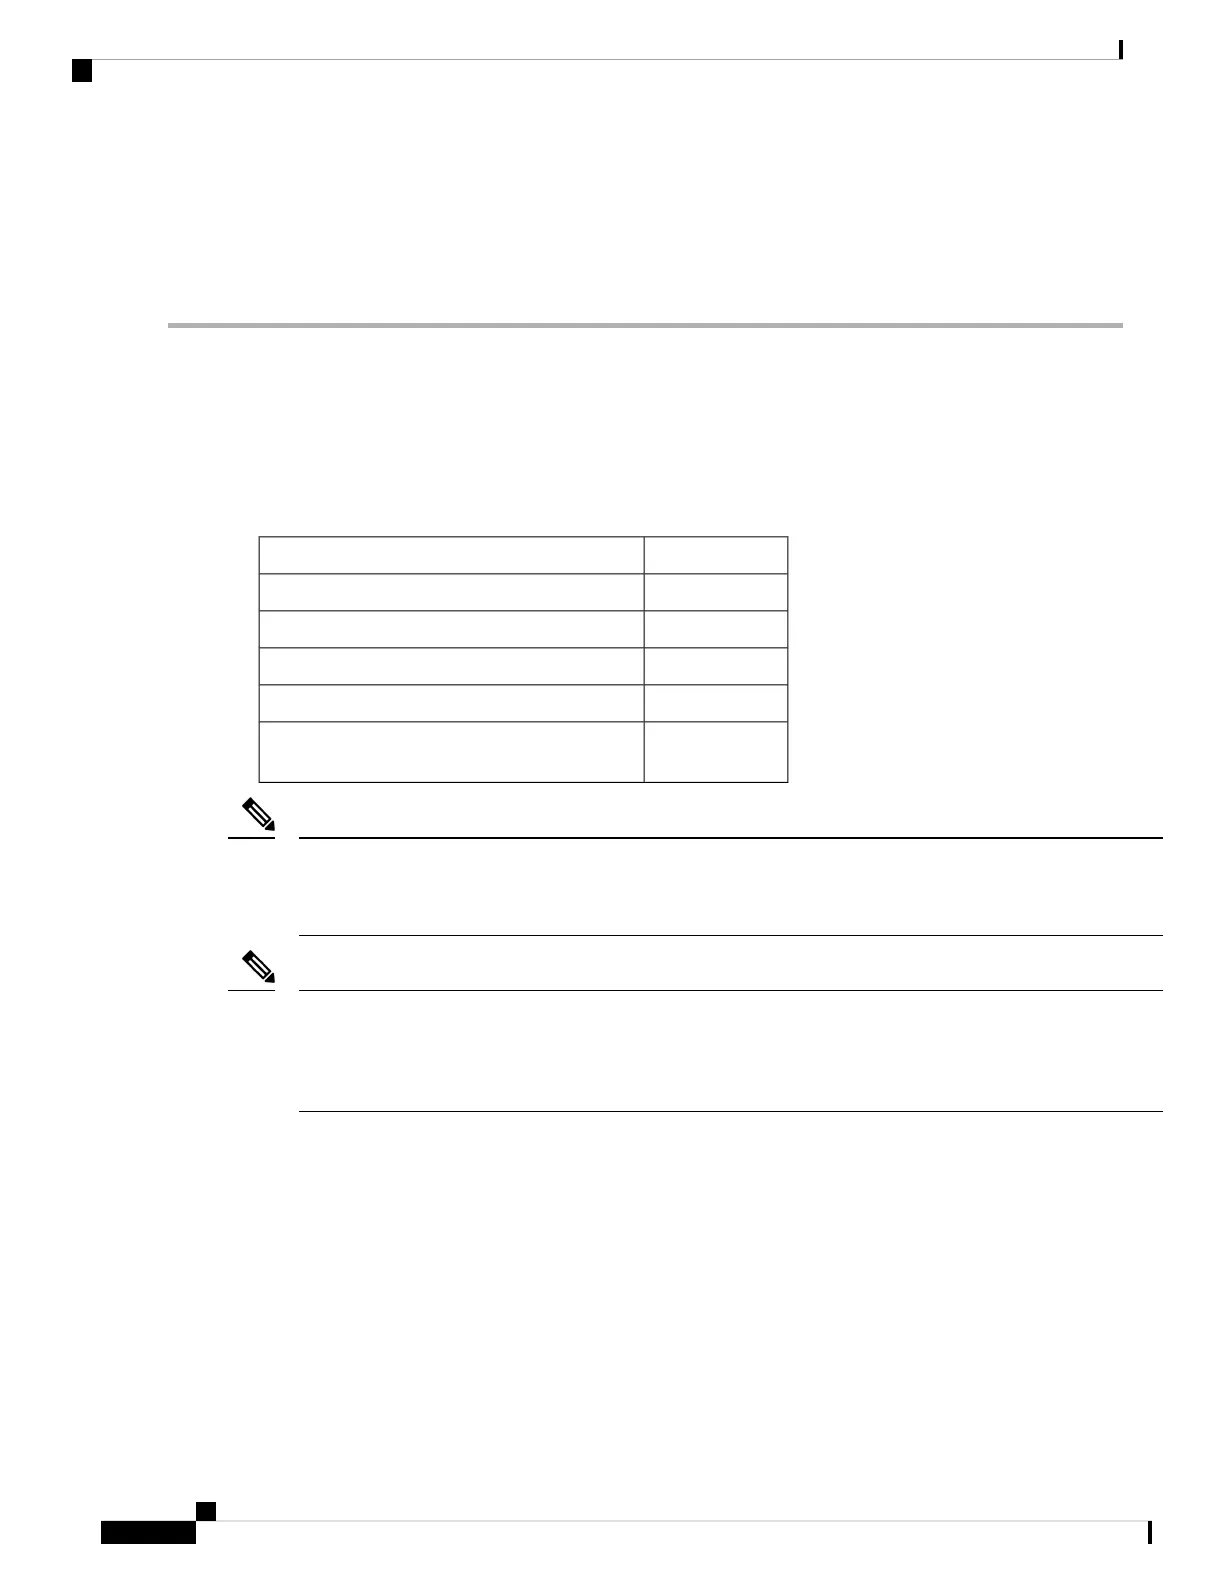
The following table lists the recommended slots for the crossbar fabric switching modules in a Cisco MDS
9700 Series chassis, based on the total number of crossbar fabric switching modules in a chassis:
Slots NumberNumber of Crossbar Fabric Switching Modules
1 and 22
1, 3, and 53
1, 2, 3, and 54
1, 2, 3, 4, and 55
1, 2, 3, 4, 5, and
6
6
In a Cisco MDS 9700 chassis with Cisco MDS 9000 24/10-Port SAN Extension Module (DS-X9334-K9),
the chassis must have at least one online crossbar fabric switching module in the slots 1 to 5 at any point of
time.
Note
In a Cisco MDS 9700 chassis with Cisco MDS 9000 24/10-Port SAN Extension Module (DS-X9334-K9), if
crossbar (xbar) fabric switching modules 5 and 6 are online, and you want to power down or replace module
6 nondisruptively, you have to power down/out-of-service xbar module 5 first, followed by power
down/out-of-service and replace the xbar module 6.
Note
Installing a Crossbar Fabric Switching Module
To install a crossbar fabric switching module in the Cisco MDS 9700 Series switch, follow these steps:
Before you begin
• You must follow ESD protocols, including the following:
• You must wear a grounded ESD wristband (or other personal grounding device) whenever you
handle the electronic modules outside the grounded chassis.
Cisco MDS 9700 Series Switches Hardware Installation Guide
156
Installing, Removing, and Verifying Field Replaceable Units
Crossbar Fabric Switching Modules
 Loading...