Also, when the compute node disconnects from the midplane, the compute node powers off.
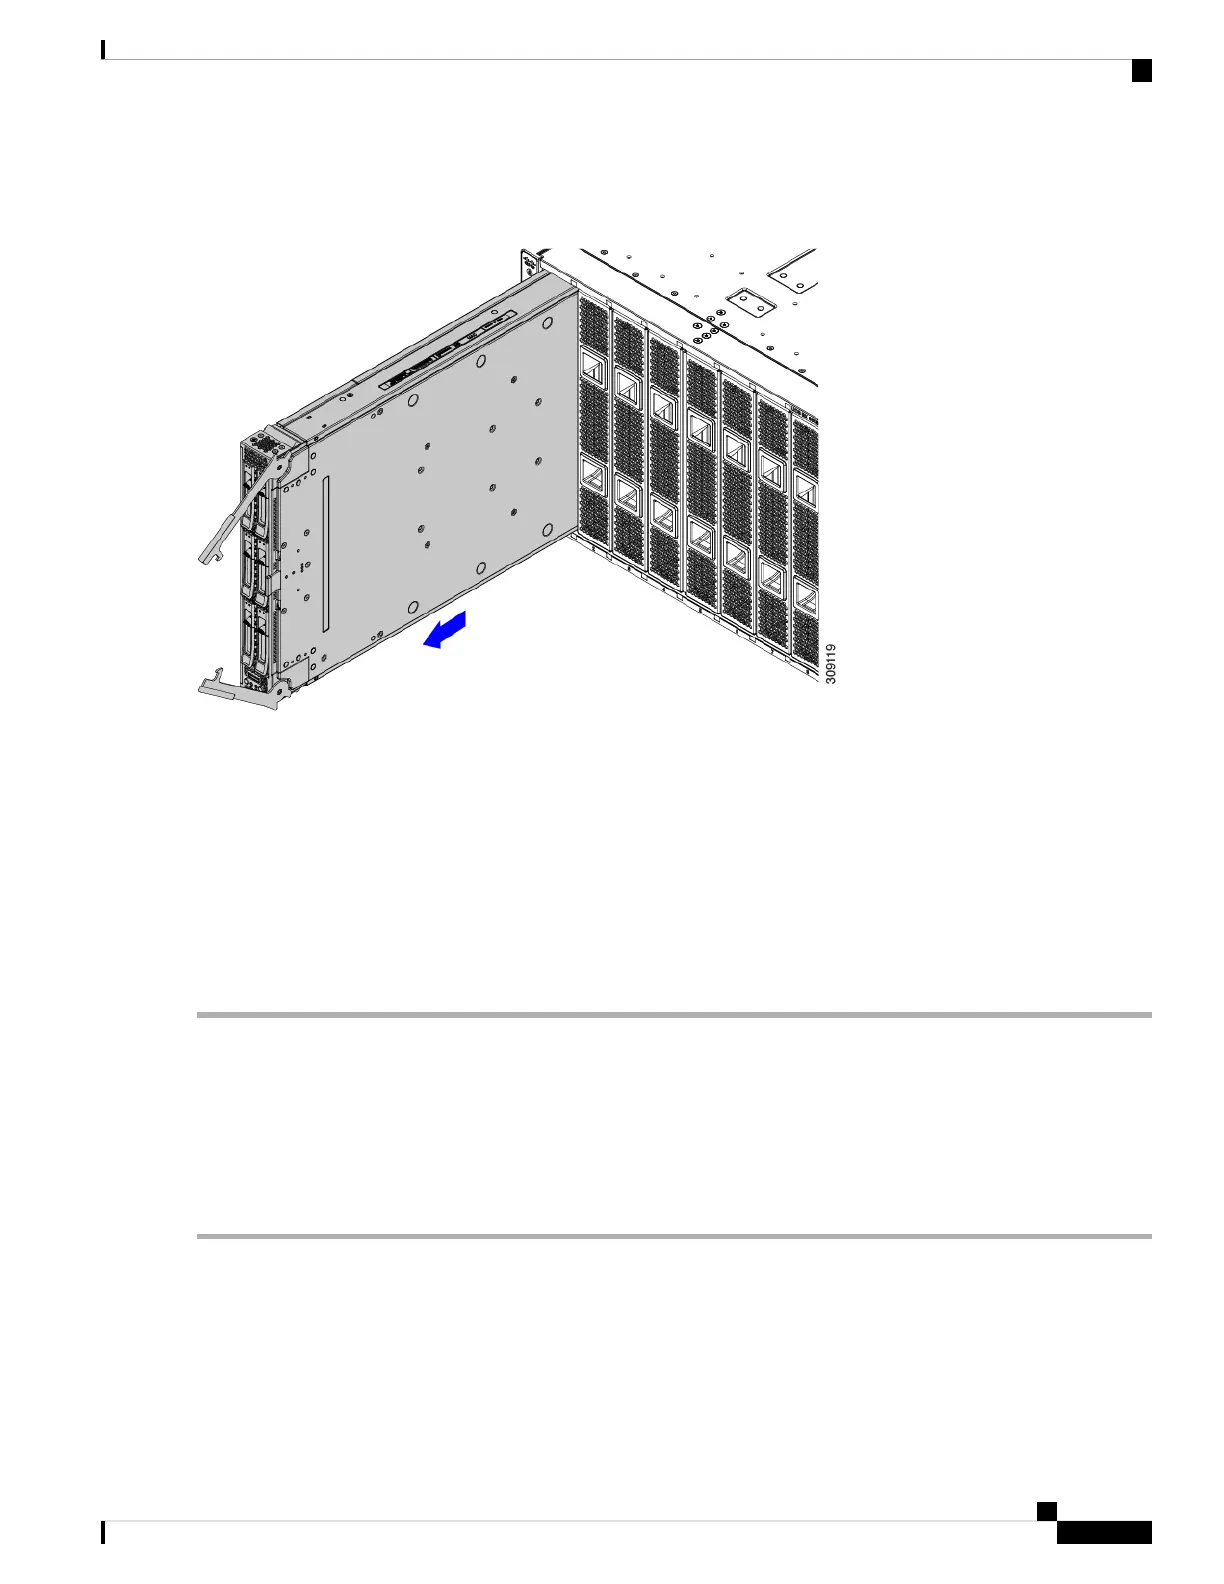
Figure 5: Removing a Compute Node
Step 4 Grasp the compute node handles and slide it partially out of the chassis.
Make sure to keep the compute node vertical while removing it.
Step 5 Place your other hand underneath the compute node to support it and slide the compute node completely out of the chassis.
Step 6 Once removed, place the compute node on an antistatic mat or antistatic foam if you are not immediately reinstalling it.
Step 7 Do one of the following:
a) If you will be installing another compute node, see Installing a Compute Node, on page 13
b) If the compute node slot is to remain empty, reinstall the compute node blank panels (UCSX-9508-FSBK) to maintain
proper thermal temperatures and to keep dust out of the chassis.
Installing a Compute Node
Before you begin
The compute node must have its cover installed before installing it into the chassis to ensure adequate airflow.
Step 1 Remove a compute node blank.
See Removing a Compute Node, on page 12.
Step 2 Press the release button at the center of the compute node faceplate to release the ejectors.
While you are inserting the compute node, keep the ejectors open.
Note
Cisco UCS X210c M6 Compute Node Installation and Service Note
13
Installing a Compute Node
Installing a Compute Node

 Loading...