Step 6 Use the provided cleaning kit (UCSX-HSCK) to remove all of the thermal interface barrier (thermal grease) from the
CPU, CPU carrier, and heatsink.
Make sure to use only the Cisco-provided cleaning kit, and make sure that no thermal grease is left on any
surfaces, corners, or crevices. The CPU, CPU carrier, and heatsink must be completely clean.
Important
What to do next
• If you will not be installing a CPU, verify that a CPU socket cover is installed. This option is valid only
for CPU socket 2 because CPU socket 1 must always be populated in a runtime deployment.
Installing the CPU and Heatsink
Use this procedure to install a CPU if you have removed one, or if you are installing a CPU in an empty CPU
socket. To install the CPU, you will move the CPU to the fixture, then attach the CPU assembly to the CPU
socket on the server mother board.
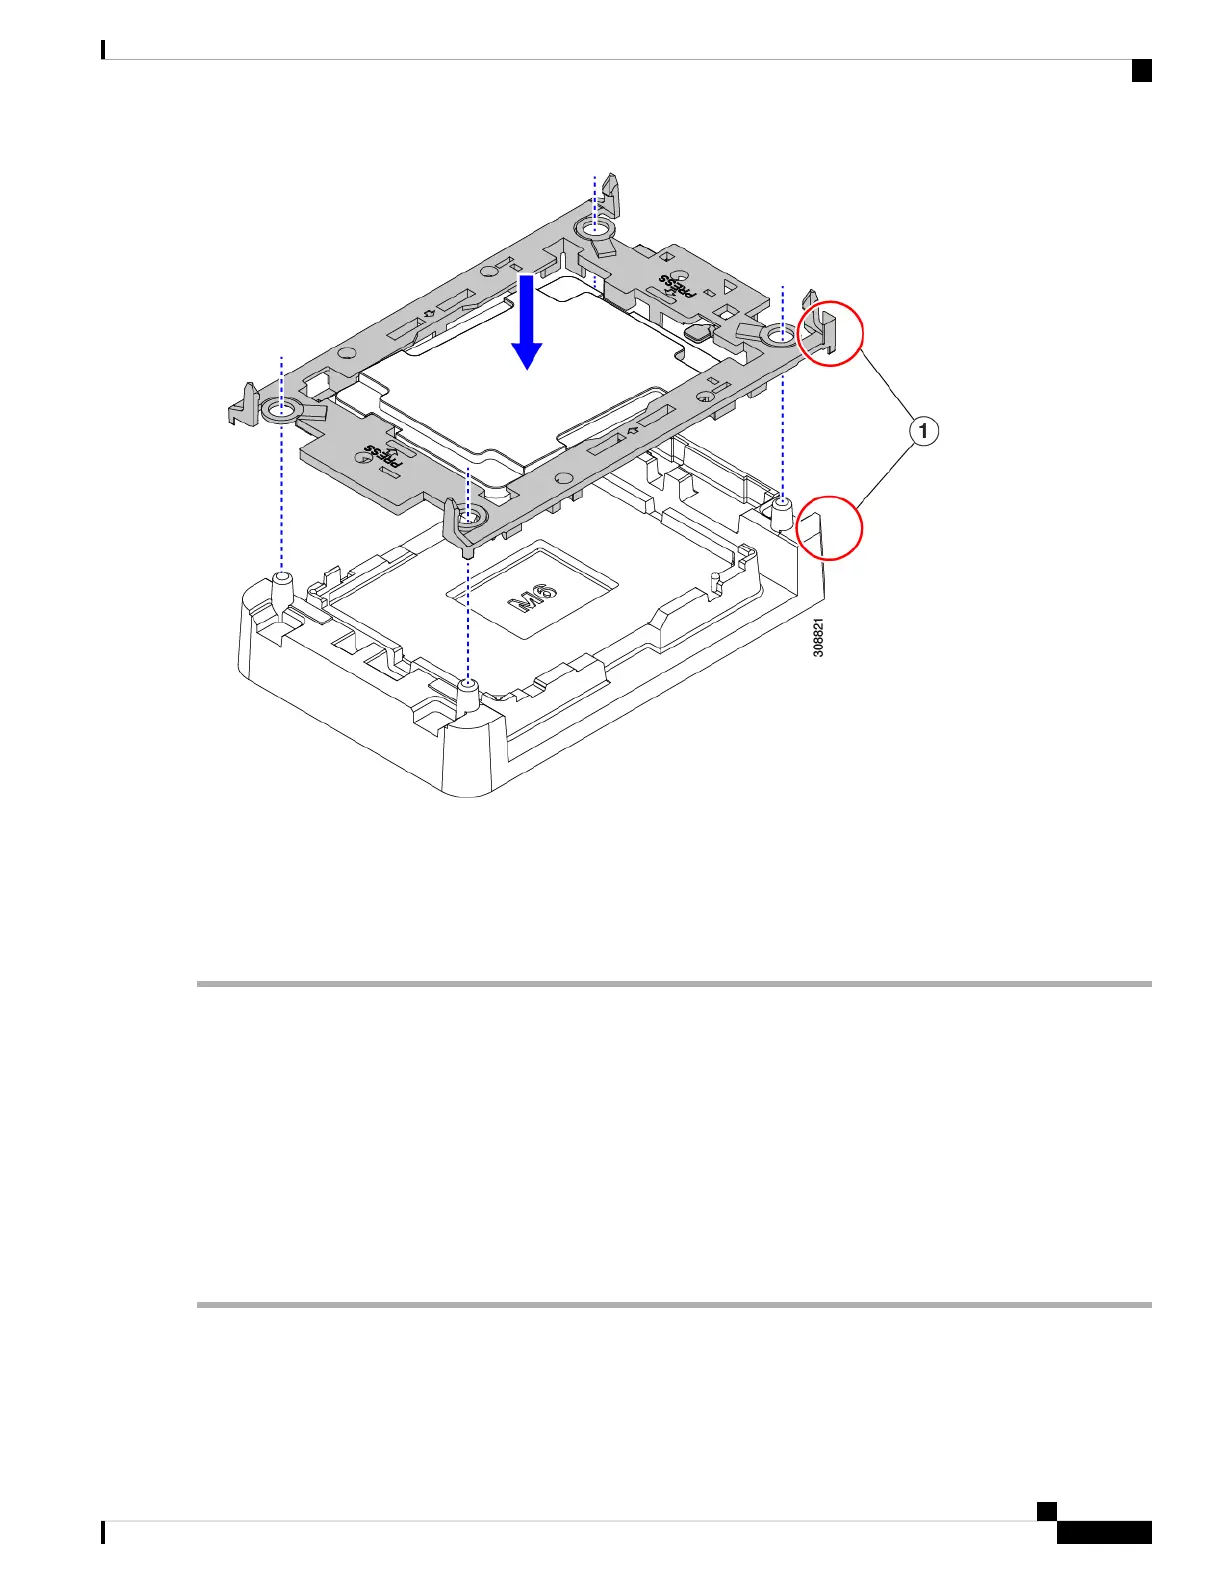
Step 1 Remove the CPU socket dust cover (UCS-CPU-M6-CVR=) on the server motherboard.
a) Push the two vertical tabs inward to disengage the dust cover.
b) While holding the tabs in, lift the dust cover up to remove it.
Cisco UCS X210c M6 Compute Node Installation and Service Note
41
Servicing a Compute Node
Installing the CPU and Heatsink

 Loading...