Step 3 Align the mLOM card with the motherboard socket so that the bridge connector is facing inward.
Step 4 Keeping the card level, lower it and press firmly to seat the card into the socket.
Step 5 Tighten the captive thumbscrews to secure the card.
Step 6 If your compute node has a bridge card (Cisco UCS VIC 14000 Series Bridge), reattach the bridge card.
See Installing a Bridge Card, on page 58.
Step 7 Replace the top cover of the compute node.
Step 8 Reinsert the compute node into the chassis. replace cables, and then power on the compute node by pressing the Power
button.
Replacing an mLOM Card
The compute node supports an mLOM in the rear mezzanine slot. Use this procedure to replace an mLOM:
Step 1 Remove any existing mLOM card (or a blanking panel):
a) Shut down and remove power from the compute node.
b) Remove the compute node from the chassis. You might have to detach cables from the rear panel to provide clearance.
c) Remove the top cover from the compute node. See Removing a Compute Node Cover, on page 15.
d) If the compute node has a UCS VIC 14000 Series Bridge, remove the thumbscrews and remove the bridge card.
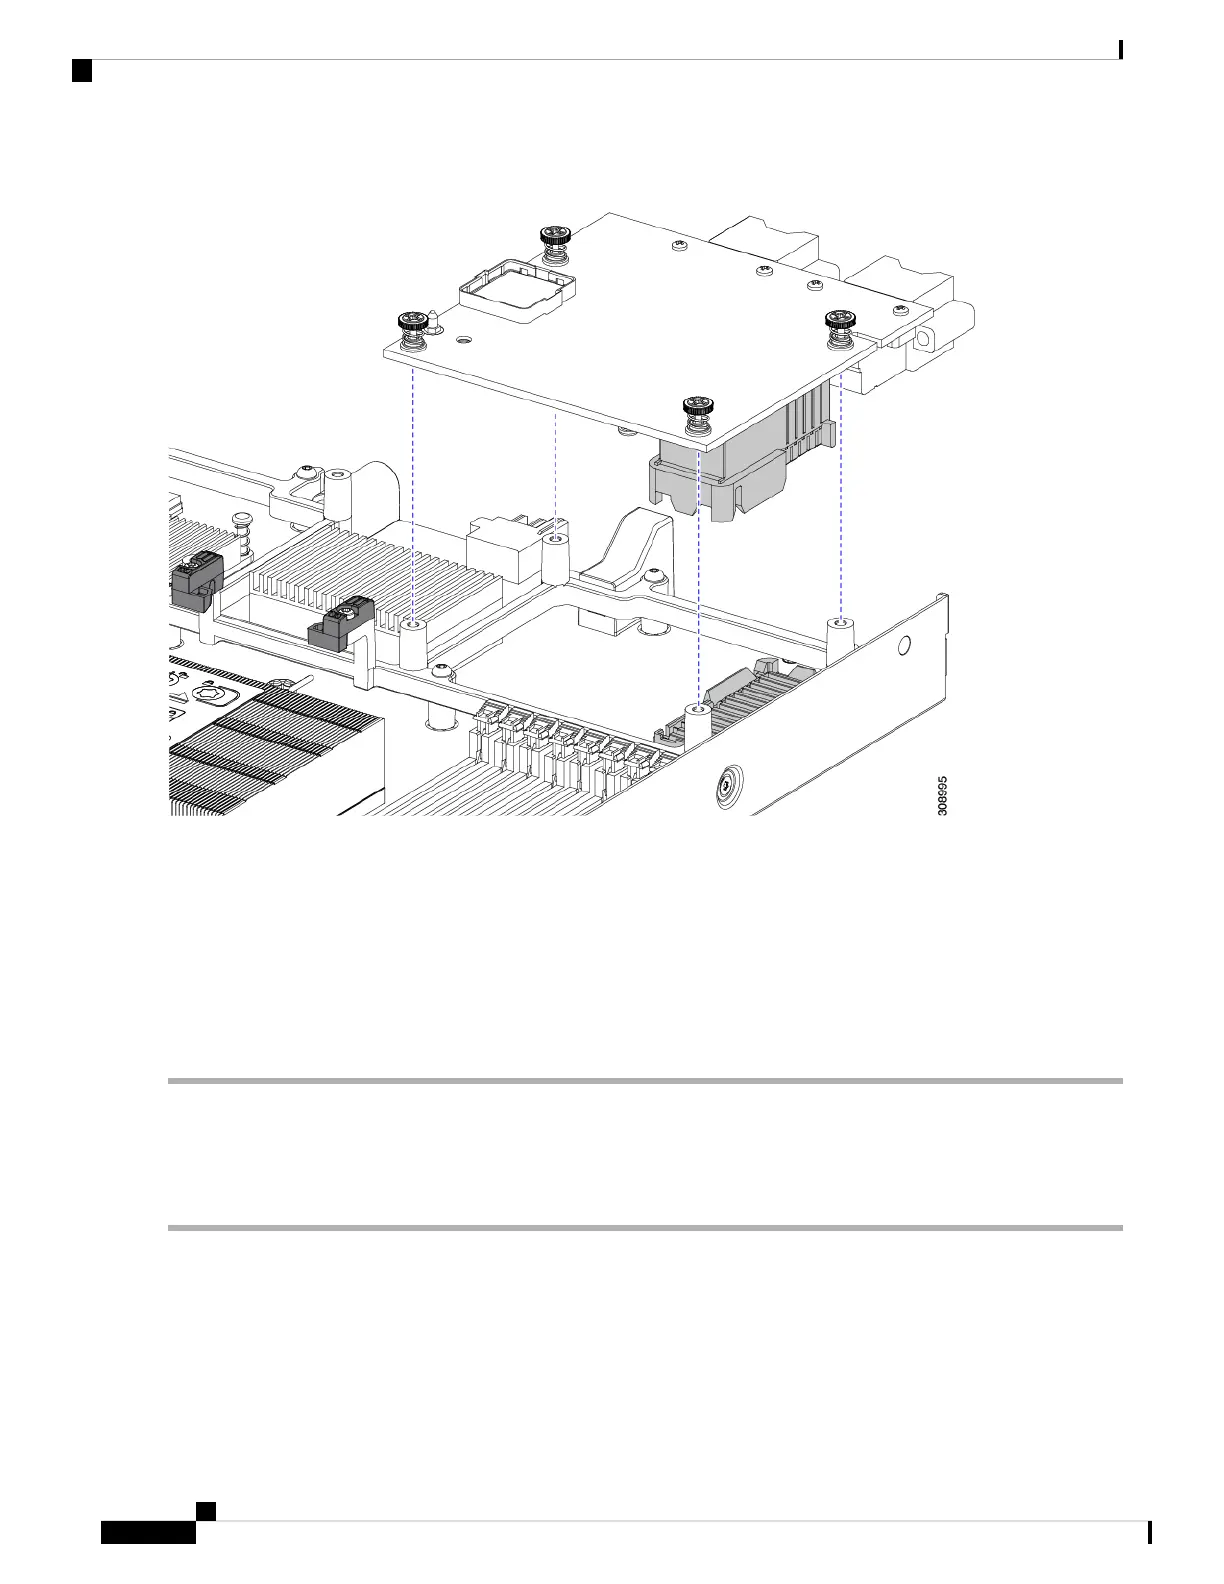
e) Loosen the captive thumbscrews that secure the mLOM card to its threaded standoffs.
Cisco UCS X210c M6 Compute Node Installation and Service Note
56
Servicing a Compute Node
Replacing an mLOM Card

 Loading...