EasyManuals Logo

Citizen CL-E321 User Manual

Citizen CL-E321
101 pages
To Next Page IconTo Next Page
To Previous Page IconTo Previous Page
Page #29 background imageLoading...
Page #29 background image
29
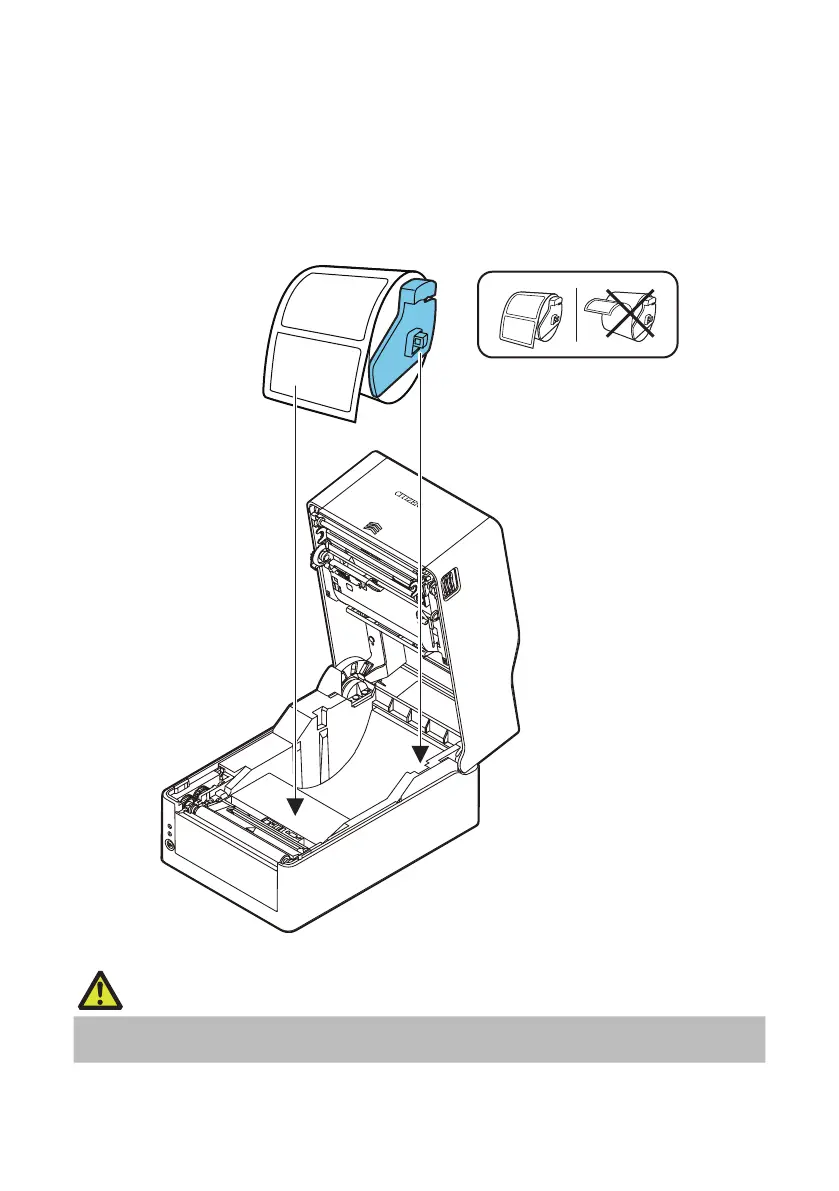
3. Set the media so that the media shaft guide is on the right side of the media when
looking at the front of the printer.
4. Press the media shaft guide onto the media roll so that the center of the media aligns
with the center of the media shaft and then set the media into the printer.
1. Assemble the media shaft and media shaft guide.
2. Insert the media shaft through the core of the media roll and then set the assembly into
the printer.
3. Set the media in the printer and slide the media to the left from the perspective of looking
at the front of the printer. Insert the media shaft guide into the paper at this position.
CAUTION
Too much abutment force by media shaft guide may cause improper feeding of media, which
may negatively impact print quality.

Table of Contents

Other manuals for Citizen CL-E321

Questions and Answers:

Question and Answer IconNeed help?

Do you have a question about the Citizen CL-E321 and is the answer not in the manual?

Citizen CL-E321 Specifications

General IconGeneral
Print TechnologyThermal Transfer / Direct Thermal
Resolution203 dpi
Power Supply100-240V AC, 50/60 Hz
Max Print Width4.1 inches (104 mm)
Media SensorTransmissive and reflective sensor
InterfaceUSB, Serial (RS-232)
Media Width1.97 to 4.33 inches (50 to 110 mm)
Supported Barcode TypesCode 39, Code 128, ITF, Codabar, UPC-A, UPC-E, EAN-8, EAN-13, POSTNET
Supported Media TypesContinuous, Die-cut
Media Thickness0.0635 – 0.254 mm (2.5 - 10 mil)
Print SpeedUp to 8 inches per second

Related product manuals