EasyManuals Logo

Citizen CL-E321 User Manual

Citizen CL-E321
101 pages
To Next Page IconTo Next Page
To Previous Page IconTo Previous Page
Page #53 background imageLoading...
Page #53 background image
53
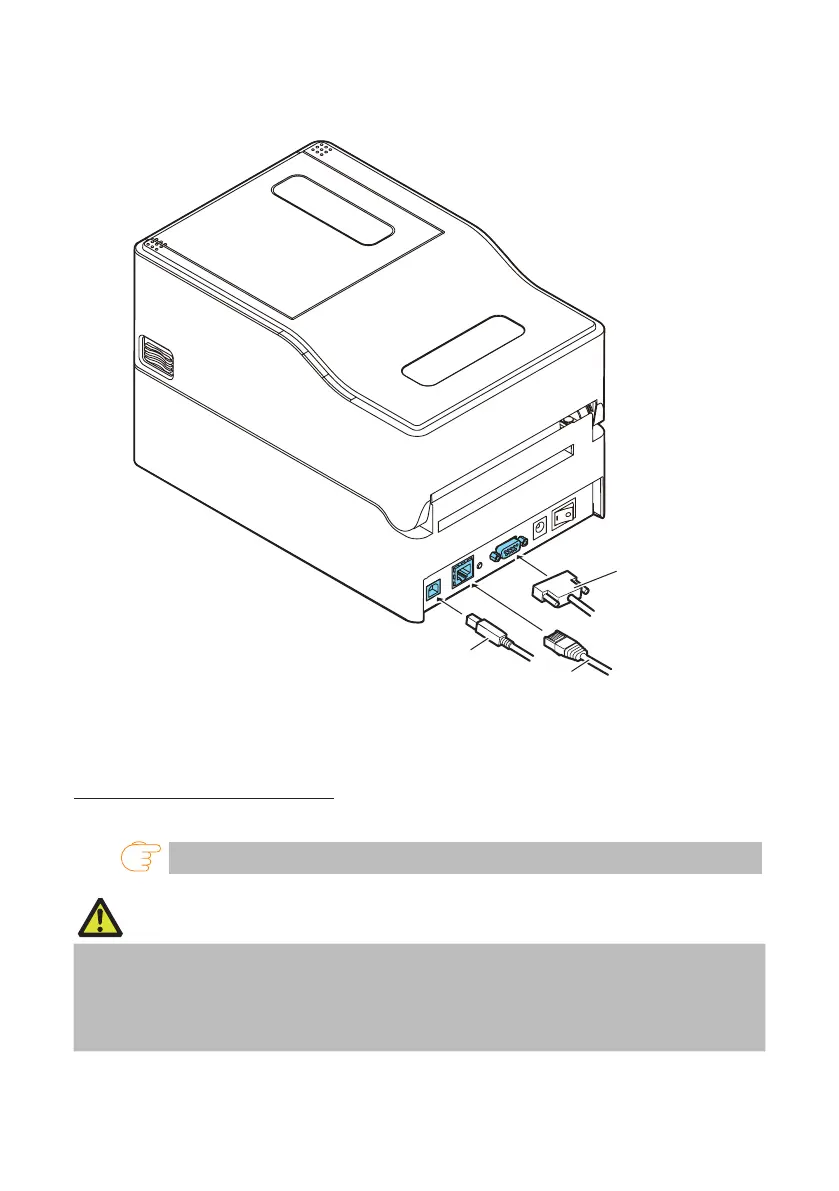
1. Turn off the power to the printer and host computer.
2. Insert the cable into the appropriate interface port at the back of the printer.
Tighten any locking screws to secure the cable.
USB cable
LAN cable
Serial cabl
e
3. Insert the other end of the cable into the appropriate interface port in the host com-
puter.
Tighten any locking screws to secure the cable.
Using an Ethernet connection
Congure network settings as necessary.
Refer to 5. Conguring Ethernet Network Settings Using Network Seeker
CAUTION
To check the current Ethernet settings, press the Ethernet panel button located next to the
Ethernet interface to printout the settings.
To initialize Ethernet settings, press and hold the Ethernet panel button for at least 3 seconds.
Once the buzzer emits a short tone, press and hold the Ethernet panel button again within 3
seconds for at least 3 seconds.

Table of Contents

Other manuals for Citizen CL-E321

Questions and Answers:

Question and Answer IconNeed help?

Do you have a question about the Citizen CL-E321 and is the answer not in the manual?

Citizen CL-E321 Specifications

General IconGeneral
Print TechnologyThermal Transfer / Direct Thermal
Resolution203 dpi
Power Supply100-240V AC, 50/60 Hz
Max Print Width4.1 inches (104 mm)
Media SensorTransmissive and reflective sensor
InterfaceUSB, Serial (RS-232)
Media Width1.97 to 4.33 inches (50 to 110 mm)
Supported Barcode TypesCode 39, Code 128, ITF, Codabar, UPC-A, UPC-E, EAN-8, EAN-13, POSTNET
Supported Media TypesContinuous, Die-cut
Media Thickness0.0635 – 0.254 mm (2.5 - 10 mil)
Print SpeedUp to 8 inches per second

Related product manuals