EasyManuals Logo

Citizen CL-E321 User Manual

Citizen CL-E321
101 pages
To Next Page IconTo Next Page
To Previous Page IconTo Previous Page
Page #41 background imageLoading...
Page #41 background image
41
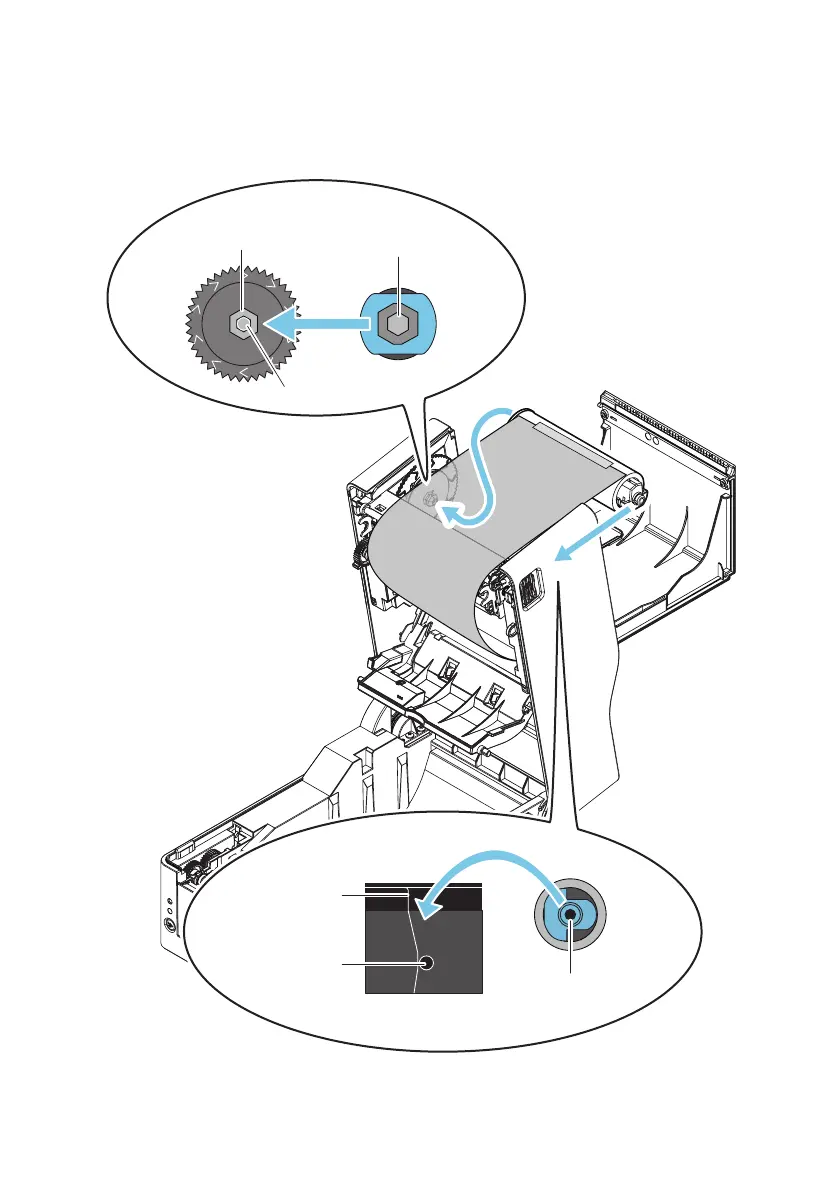
7. Set the ribbon shaft with the loaded ribbon take-up core on the take-up side of the
ribbon drive part.
In the same way as with the delivery side, insert the right part of the ribbon shaft along the
attachment guides and into the attachment hole while pressing the left part of the ribbon shaft
against the protruding part of the ange.
Flange on take-up side
Protruding part
Ribbon shaft
attachment
guide on
take-up side
Attachment hole in
left part of ribbon shaft
Protrusion of
right part of
ribbon shaft
Ribbon shaft
attachment
hole on
take-up side

Table of Contents

Other manuals for Citizen CL-E321

Questions and Answers:

Question and Answer IconNeed help?

Do you have a question about the Citizen CL-E321 and is the answer not in the manual?

Citizen CL-E321 Specifications

General IconGeneral
Print TechnologyThermal Transfer / Direct Thermal
Resolution203 dpi
Power Supply100-240V AC, 50/60 Hz
Max Print Width4.1 inches (104 mm)
Media SensorTransmissive and reflective sensor
InterfaceUSB, Serial (RS-232)
Media Width1.97 to 4.33 inches (50 to 110 mm)
Supported Barcode TypesCode 39, Code 128, ITF, Codabar, UPC-A, UPC-E, EAN-8, EAN-13, POSTNET
Supported Media TypesContinuous, Die-cut
Media Thickness0.0635 – 0.254 mm (2.5 - 10 mil)
Print SpeedUp to 8 inches per second

Related product manuals