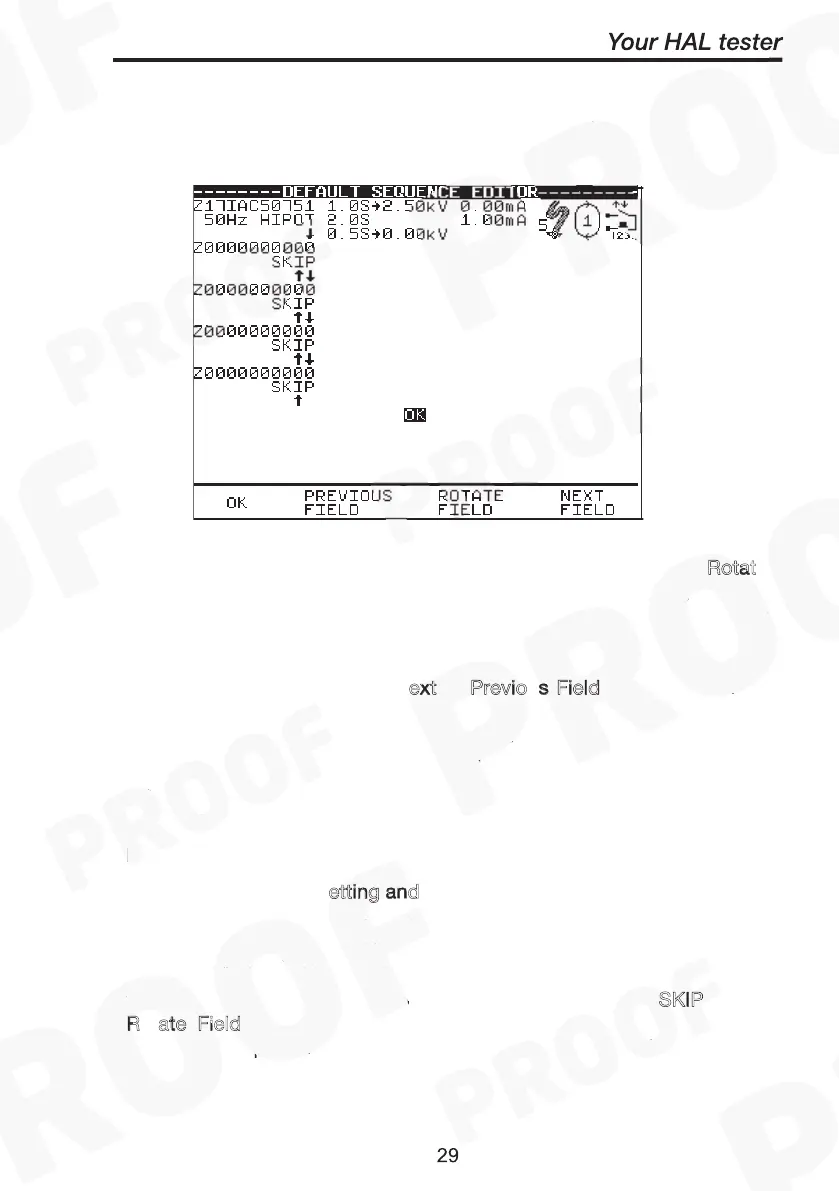
When you first enter this menu all of the previous values are displayed
and one of the field descriptions is highlighted.
Use the encoder highlight a field to be changed and press the Rotat
fast key to activate the encoder. Rotate Field will be highlighted.
Turning the encoder will now cycle through all the available values for
the field. To accept desired value press Rotate Field again to
deactivate encoder for further field value change (highlight deselected).
Again use encoder (or press N
ext or Previo
s Field fast key) to move
cursor to navigate through to other fields including the three icons
fields (see test icon descriptions) for any other changes. Repeat
process of ‘select/deselect’ the Rotate Field key & turning encoder to
search for values needed until all desired fields are changed to the
user’s requirements. Press O
and a message “storing system data”
will be displayed. And depending on the test conditions the test will
begin with the Meter screen displayed.
etting and
Icons for Test Start conditions:
The first field (1
st
column from left) displays the t
for the test.
The test type (e.g. 50Hz Hipot) is shown directly below it. The tests
sequence (indicated by the downward arrows) may hold up to 5 unique
tests. To add a second test code for example; highlight S
KIP, press
R
ate Field, turn encoder to select values and press Rotate Field
again to accept option. Follow through the arrows to add/delete/edit
any levels of test codes sequence if necessary.
o