3. DAYMARK MENU EDITOR
Size Requirements:
• Micro SD Card - 4GB standard.
SD Card Updates:
• Best practice is to clear the SD card and load the
updated files to the SD card and reinstall on the
machine (not recommended for customers).
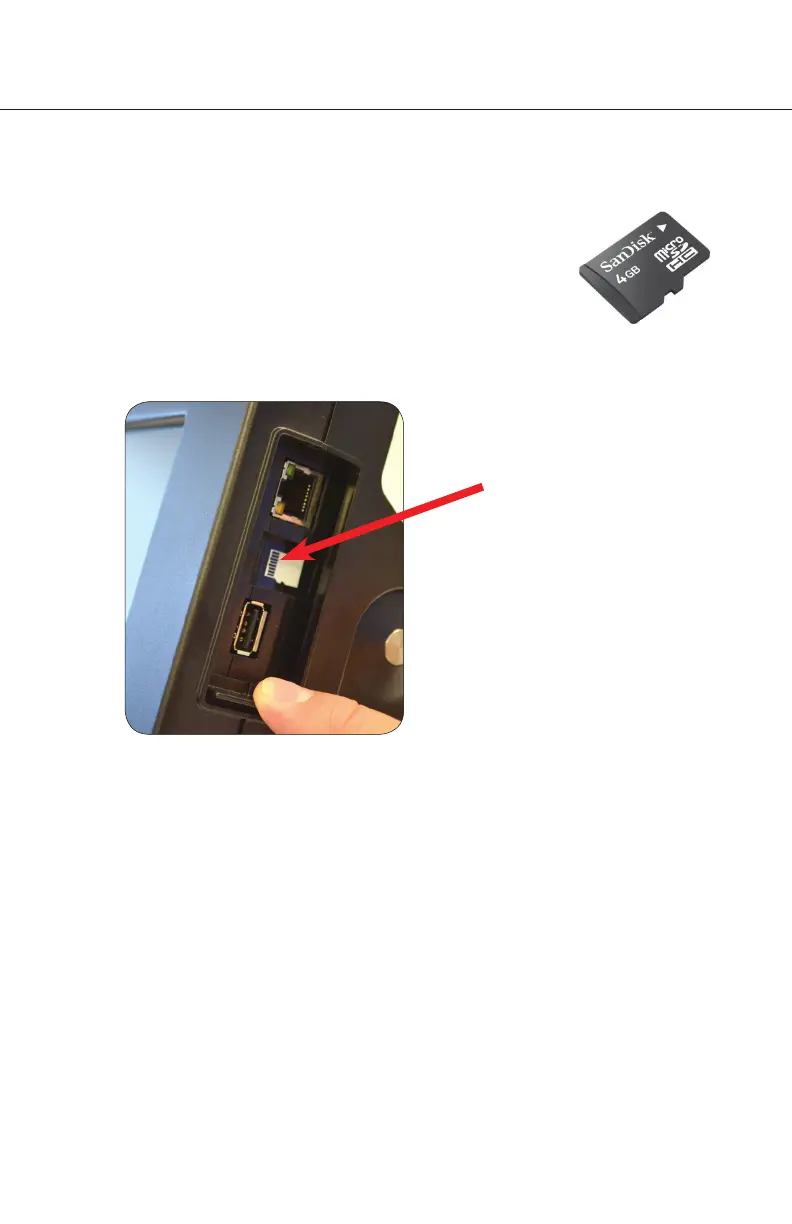
MENU DATA MICRO SD UPDATE INSTRUCTIONS
Micro SD Port
1. Turn off the DayMark 9700.
2. Pull down the access door on the right-hand side of the screen.
3. Remove the existing Micro SD Card located in the middle port. Use caution as the
SD Card port is spring loaded.
4. Copy new menudata file to Micro SD Card.
5. Install the Micro SD Card gold contacts facing front of the unit. Be sure to insert the SD
Card into the card port and not into the gap between the printer and the port. Inserted
correctly into the card port, the SD Card will meet a slight spring resistance and need
to be pushed in until locked.
6. Power on the DayMark 9700.
WARNING: SHOULD NOT BE EXECUTED WITHOUT HELP FROM DayMark.
• TFTP server will have a static IP adress on the network used by the 9700 to communi-
cate.
• DHCP will assign the 9700 an IP address, Subnet Mask and Gateway to use while
communicating with the server.
• If the customer does not use DHCP, each machine will need to be assigned a dedicat-
ed static IP address.
38.
3. DAYMARK MENU EDITOR