Technical Manual Page 48 CODEL
OPS.080 Issue : C Rev. : Date : 16/7/08 Doc. i/d : 0080/6 Ref. : 080040
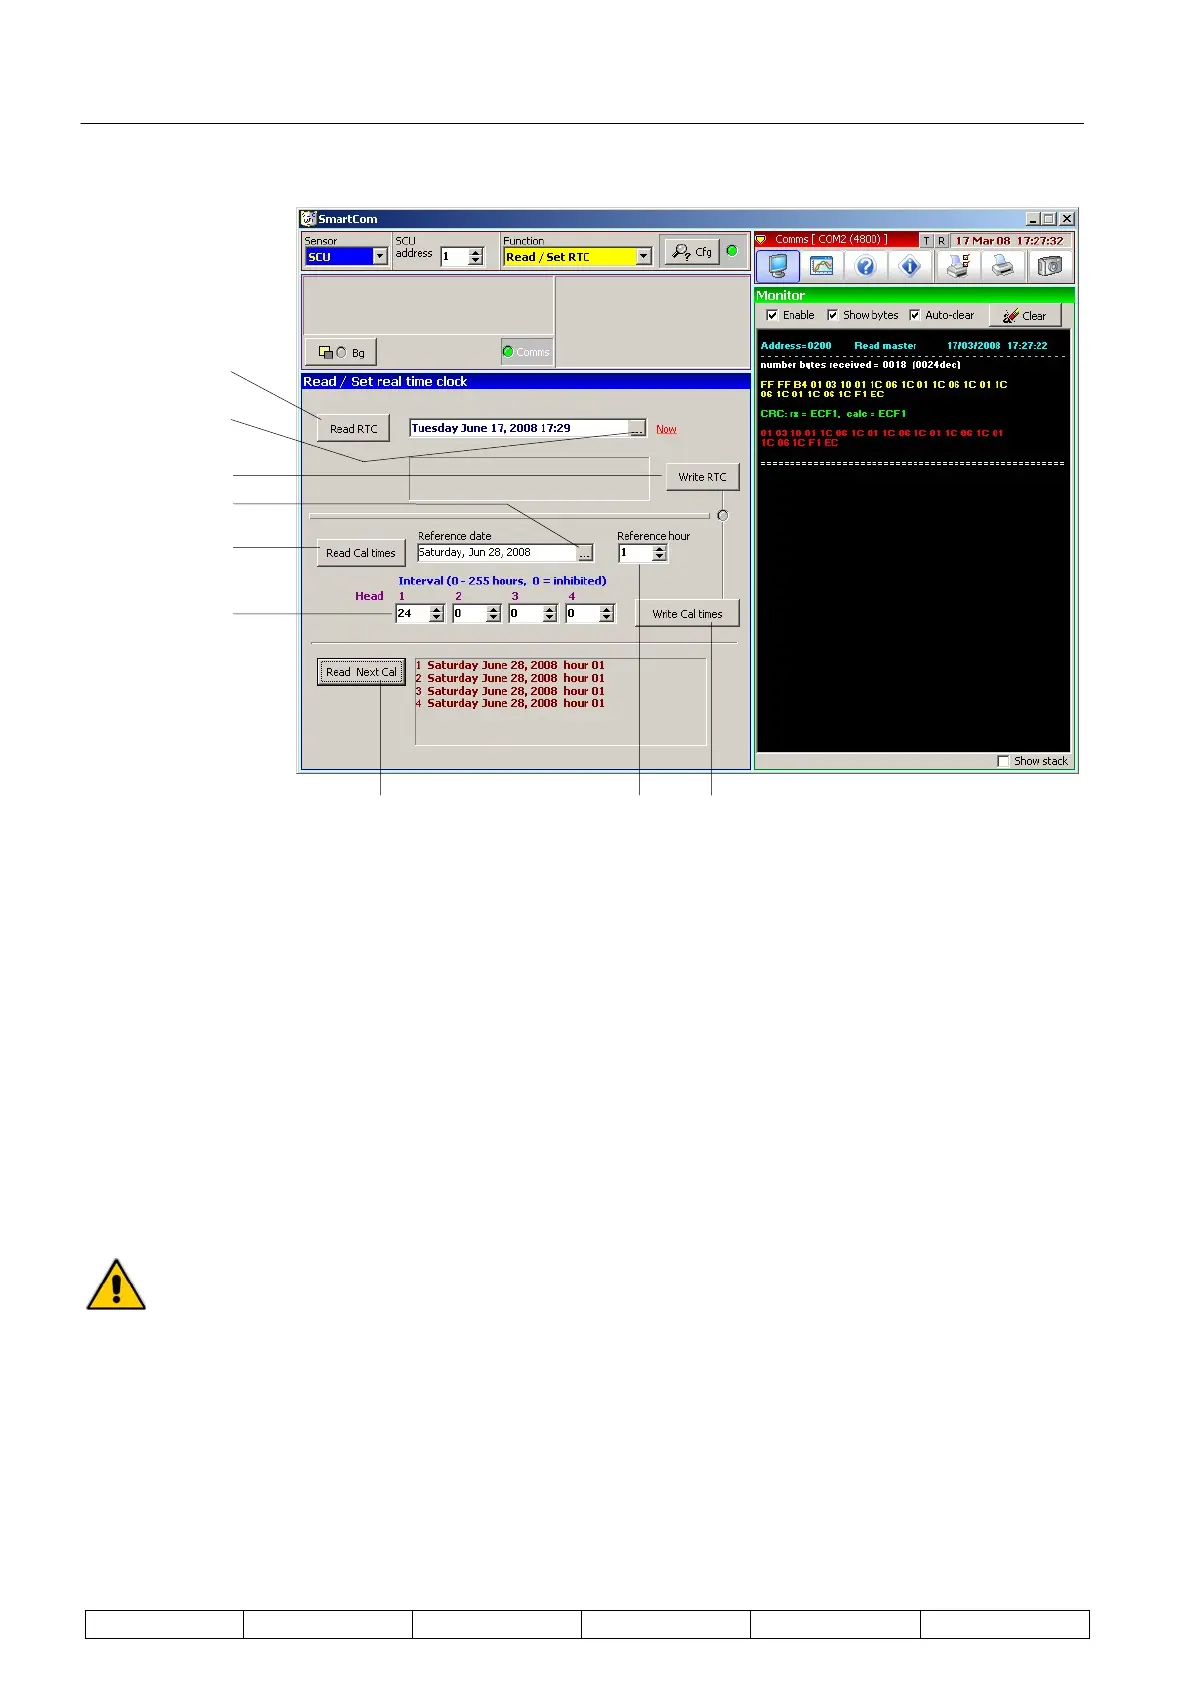
a) Using the ‘Read RTC’ button (1) read back the current stored time from the SCU.
b) Set the real time clock (RTC) (2) in the SCU by clicking on the small box ‘Now’. Select the date and
time and click on ‘Write RTC’ (3).
c) Click on ‘Read Cal times’ (4) then click on the small box (5) to edit the date to reflect that required
for the first automatic calibration.
d) Select the ‘Reference hour’ (6) at which is required the first automatic calibration. NB. Avoid using
zero as this would be midnight; 1 or 2 is usually set here indicating 1 or 2am.
e) In ‘Head 1’ only (7) select the required calibration interval time – 24 or 48 hours.
f) Click on ‘Write Cal Time’ (8) to send the data.
g) It is good practice to read back this data by clicking on ‘Read Next Cal’ (9). Line 1 should indicate
when the next automatic calibration would take place.
When an automatic calibration is activated the GCEM4000 will firstly back-purge the sample
section to clear any dust build-up on the probe filter. The parameters for this procedure are
adjustable but are best left at standard factory settings. If advised by a CODEL engineer the
autocal data can be modified using SmartCEM under ‘Sensor GCEM4000’. Under ‘Function’
select ‘Calibration’ and then from the ‘Type’ menu select ‘Auto Cal data’, as shown below:
(3)
(4)
(6)
(7)
(8)
(9)
(2)
(5)
(1)