Technical Manual Page 36 CODEL
OPS.080 Issue : C Rev. : Date : 16/7/08 Doc. i/d : 0080/6 Ref. : 080040
f. Read the detector sampling positions by pressing ‘Read data’ (6) and the sampling positions will
be displayed in the table.
g. To make adjustments to the sampling positions select the relevant detector channel (7), then
edit the sample value in the box; when the desired value is entered click ‘Apply’ making sure
that the two comms. lights turn green. Note that this value should only be edited in multiples of
80 – increasing this value will move all the sampling positions to the right; decreasing this value
will move all the sampling positions to the left.
h. Repeat steps d-g for each of the 10 detector signals.
On some analysers there will be no signals and a straight line will be displayed for the detector
wave form. This is related to gas channels that the analyser is measuring.
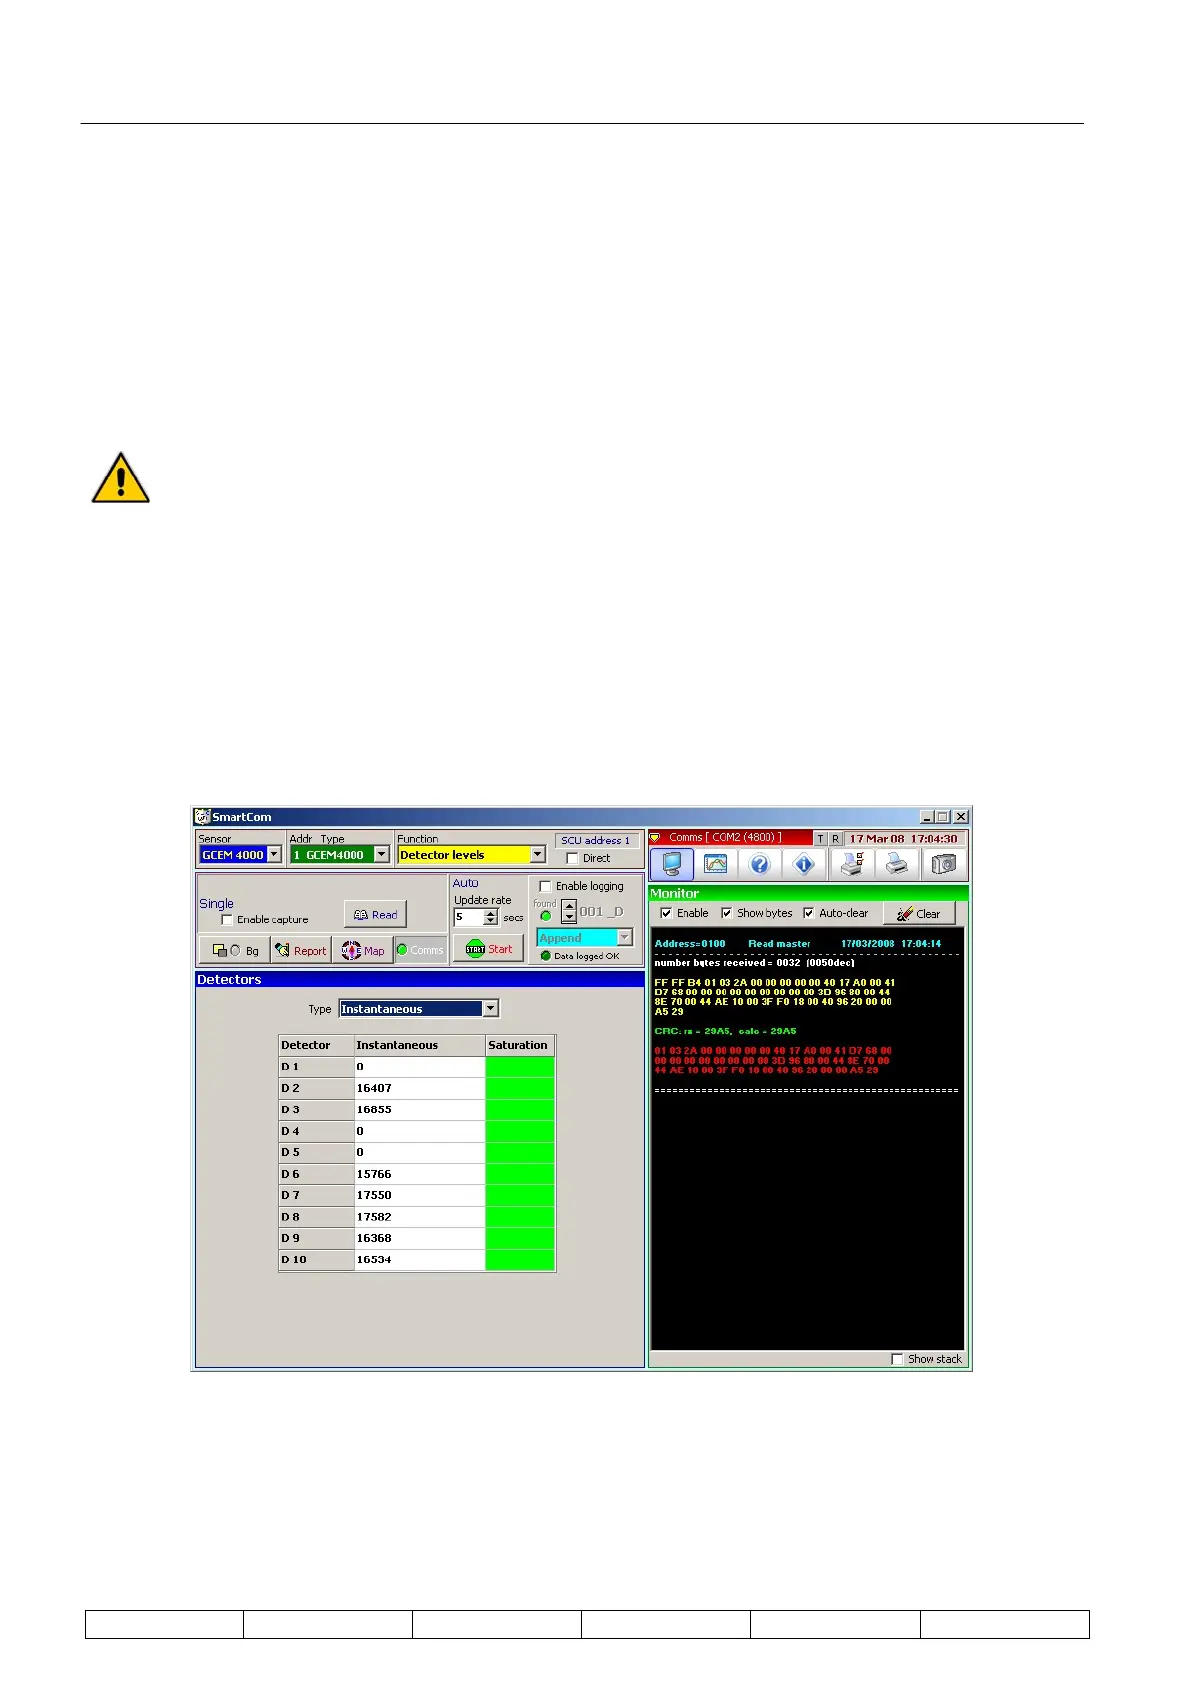
5.3.7. Detector levels
To view the analyser detector levels select 'Detector Levels' in the Function selector and click on 'Read' to
update the information. Finally, ensure the green 'message received' LED is activated.
The detector values represent the amount of energy received at the photo-detector as the gas wheel rotates.
There may be zero values dependent on the number of detection channels the analyser is set-up for. Where
there are values shown >0 they should be at least 15000 (decimal) ±2000 (if the purge air is on). If not, or if any
of the saturation LEDs are red, first check the alignment and if this does not rectify the situation, contact your
local CODEL Distributor or CODEL direct for further advice. To view the smoothed detector output, select
'smoothed' in the 'Type' box.
5.3.8. Zero Calibration
At this point the analyser requires a zero calibration to establish correct baselines for its parameters. In order to
commence a calibration, first complete the previous 4 steps to ensure the analyser is working at its optimum.
Having installed the GCEM4000, a zero calibration must be undertaken to ensure that the analyser gives
meaningful data. Select 'Calibration' in the Function selector to view the screen below.