e-mark create marking device Chapter 4 Initial operation
CODI Standard 1.0 23/60
Operating and Maintenance Manual
4.2 Assembly and switching on
Check the following points before commissioning:
Visual inspection:
Ensure that the Quick Setup Guide is legible and is available in full.
Are all product parts present: battery, docking station, e-mark create body, power adapter, ink cartridge and
the Quick Setup Guide
Are all parts required for assembly present?
Is the product damage-free? Look for any deformations and cracks on the housing, cable damage, in
particular.
Is the USB connection OK?
Are the charging cable, mains plug and charging socket OK?
The product must not go into operation if it has any visible defects or signs of damage.
Commissioning
1. Remove the e-mark create from the packaging.
2. Remove the mains plug and separate ink cartridge packaging (print head and container with 3 ink colours)
which are under the inner base of the packaging.
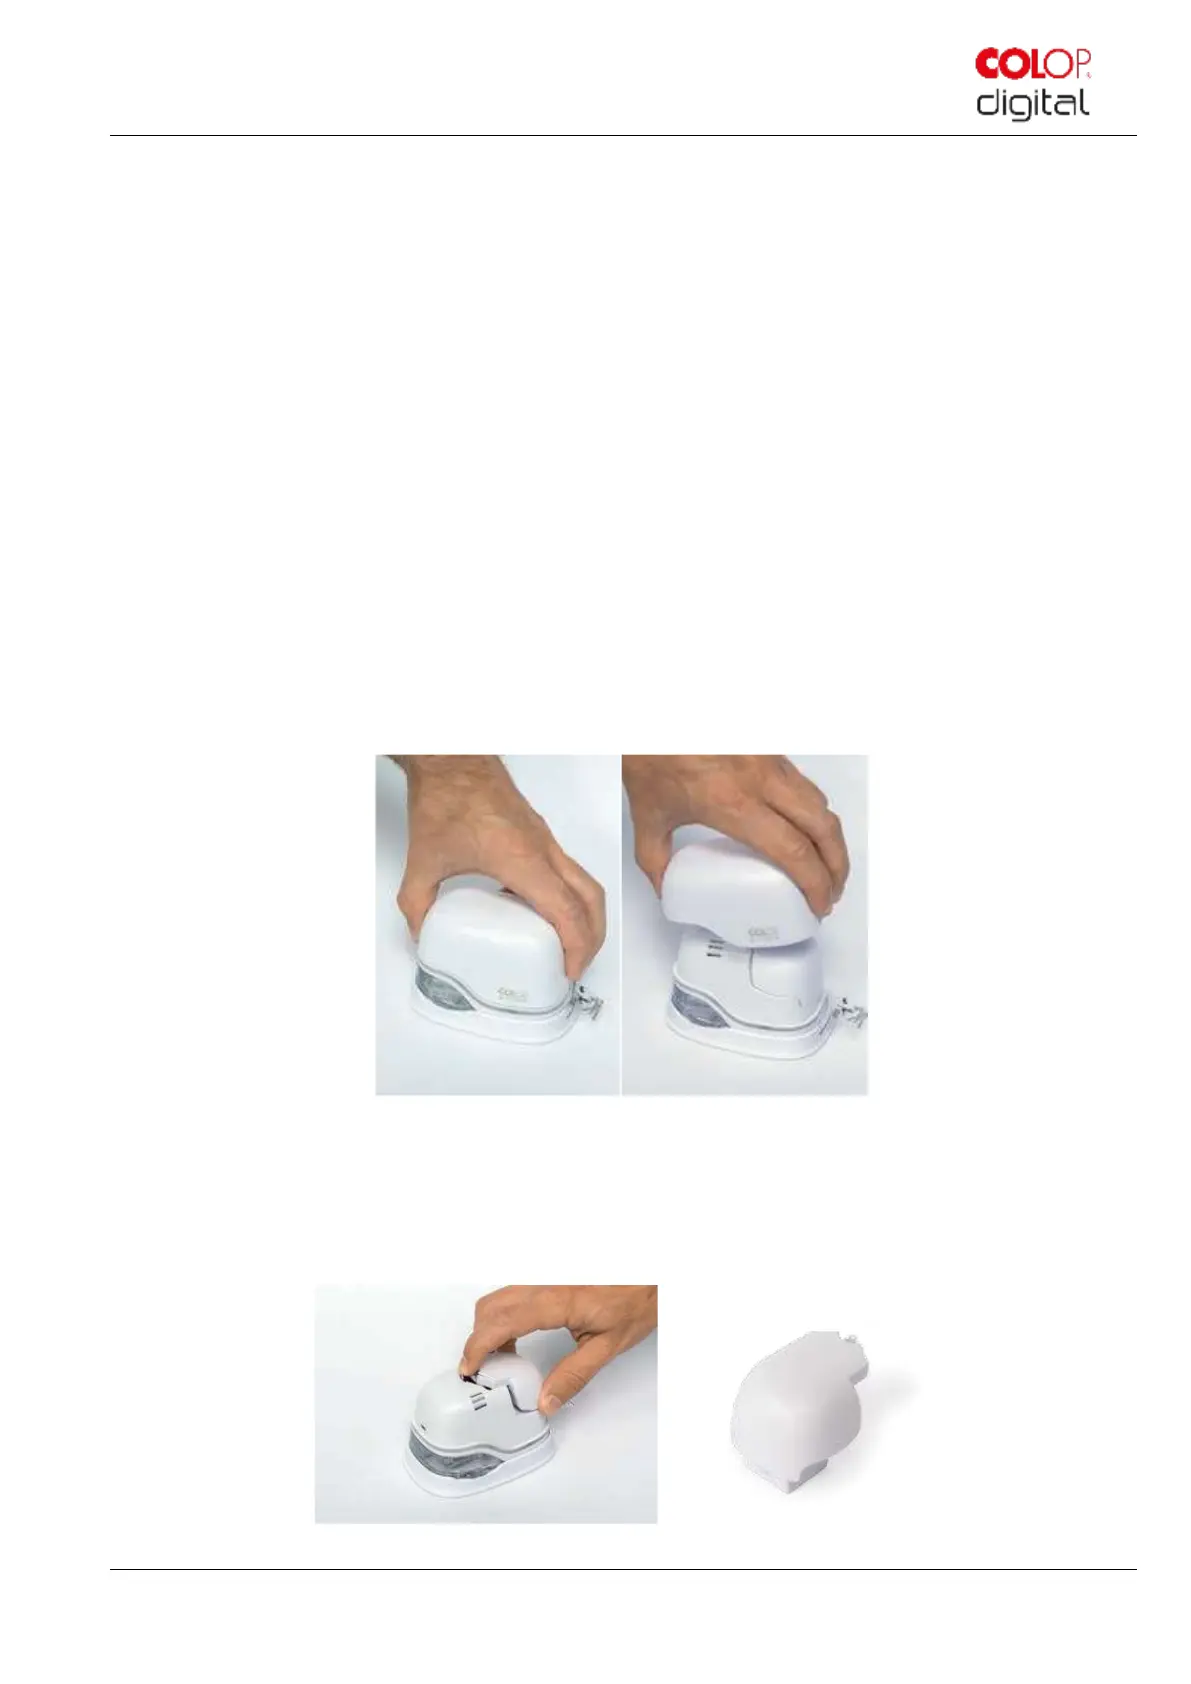
Fig. 7: Opening and removing the cover
3. Open the e-mark cover and remove it.
4. Remove the battery from the battery compartment.
5. Press the lever on top of the battery to the rear
Fig. 8: Opening the battery compartment and remove battery