e-mark create marking device Chapter 5 Operation
CODI Standard 1.0 42/60
Operating and Maintenance Manual
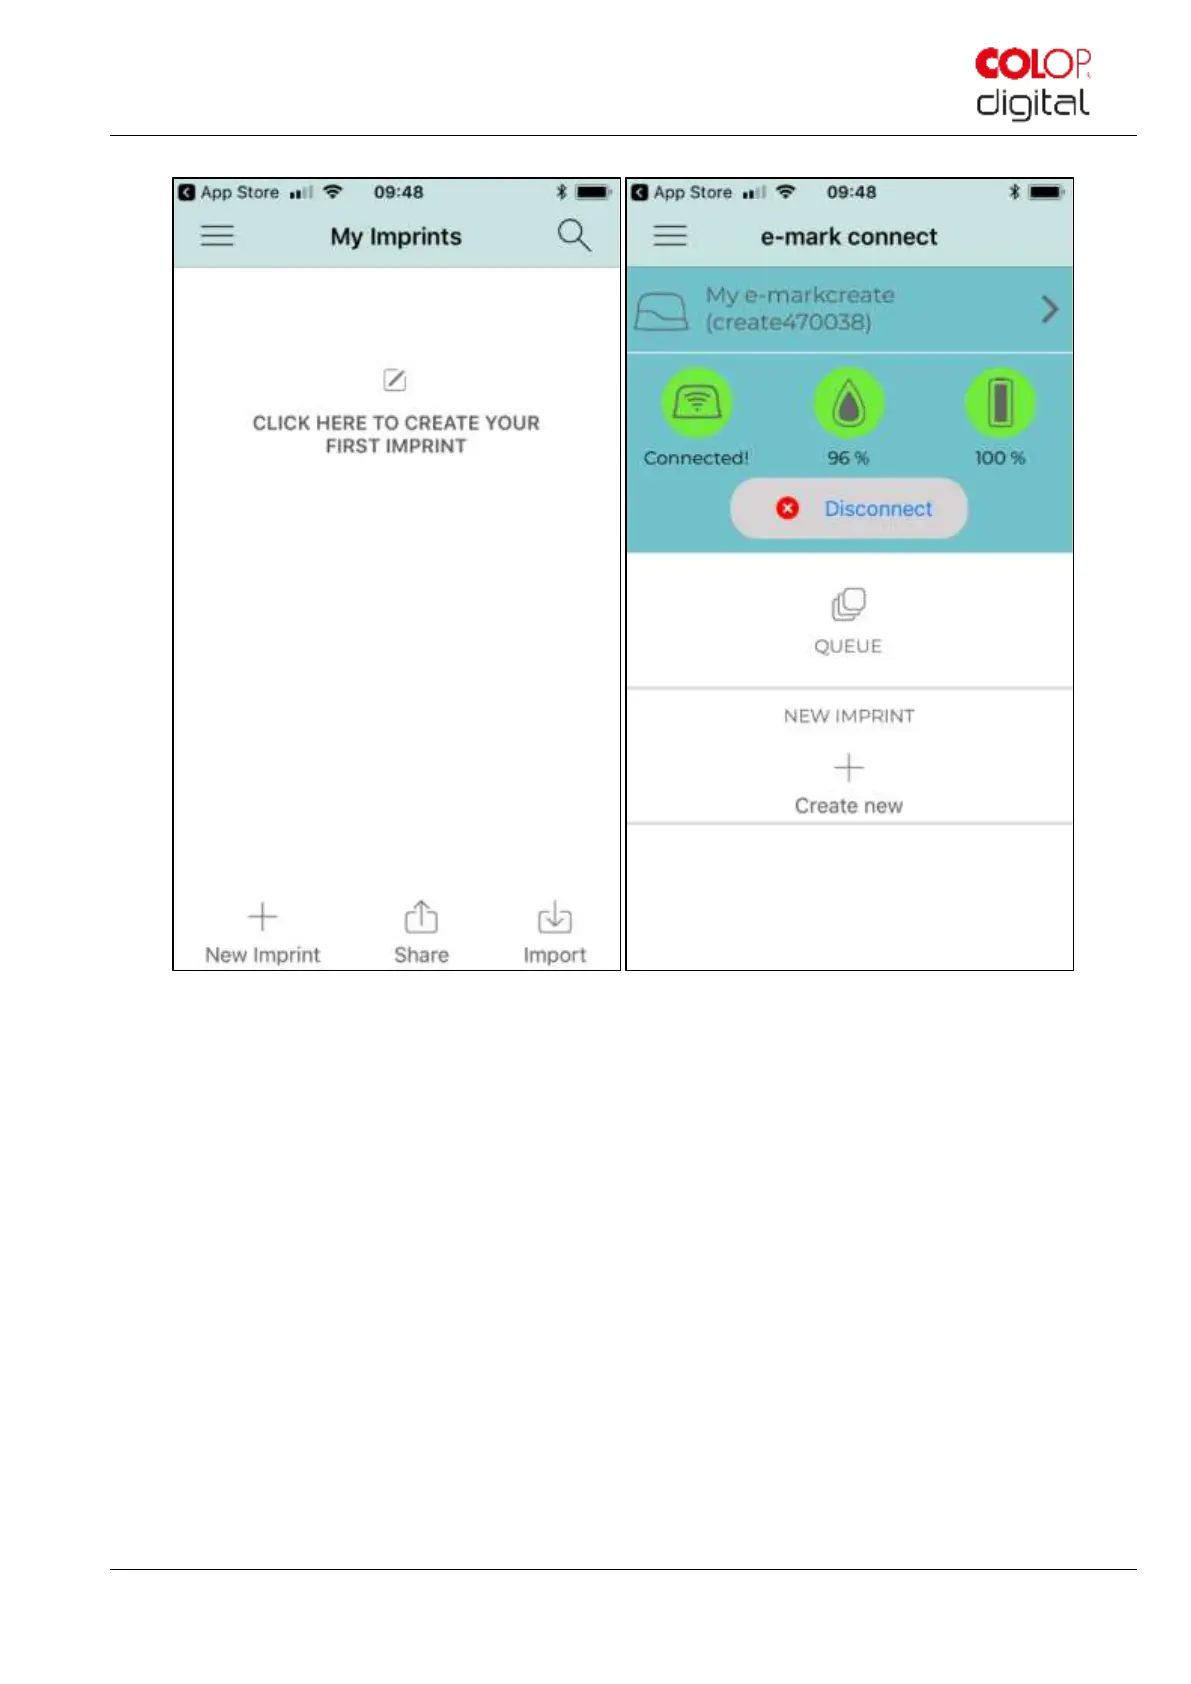
Fig. 34: e-mark connect page
9. The "e-mark connect" page is the app homepage. On the upper side you can choose the e-mark create to
which you want to be connected, you can see the status of the connection, ink and battery level. Below you
are able to step into your “Queue” or into the editor of the app.
10. Press “Queue” to see the queue of imprints which are ready to be send to the e-mark create
o Press "Add Imprints" to add other imprints to the queue.
o Press "X" to clear an imprint out of the queue.
o The "Start position lateral" setting precisely positions an imprint using the lugs on the side of the e-
mark create.
o "Continual marking" prints a selected imprint consecutively.