Viper Low overrun Service Manual
© 2016, Cornelius Inc - 51 - Publication Number: 621360241LOEWSE
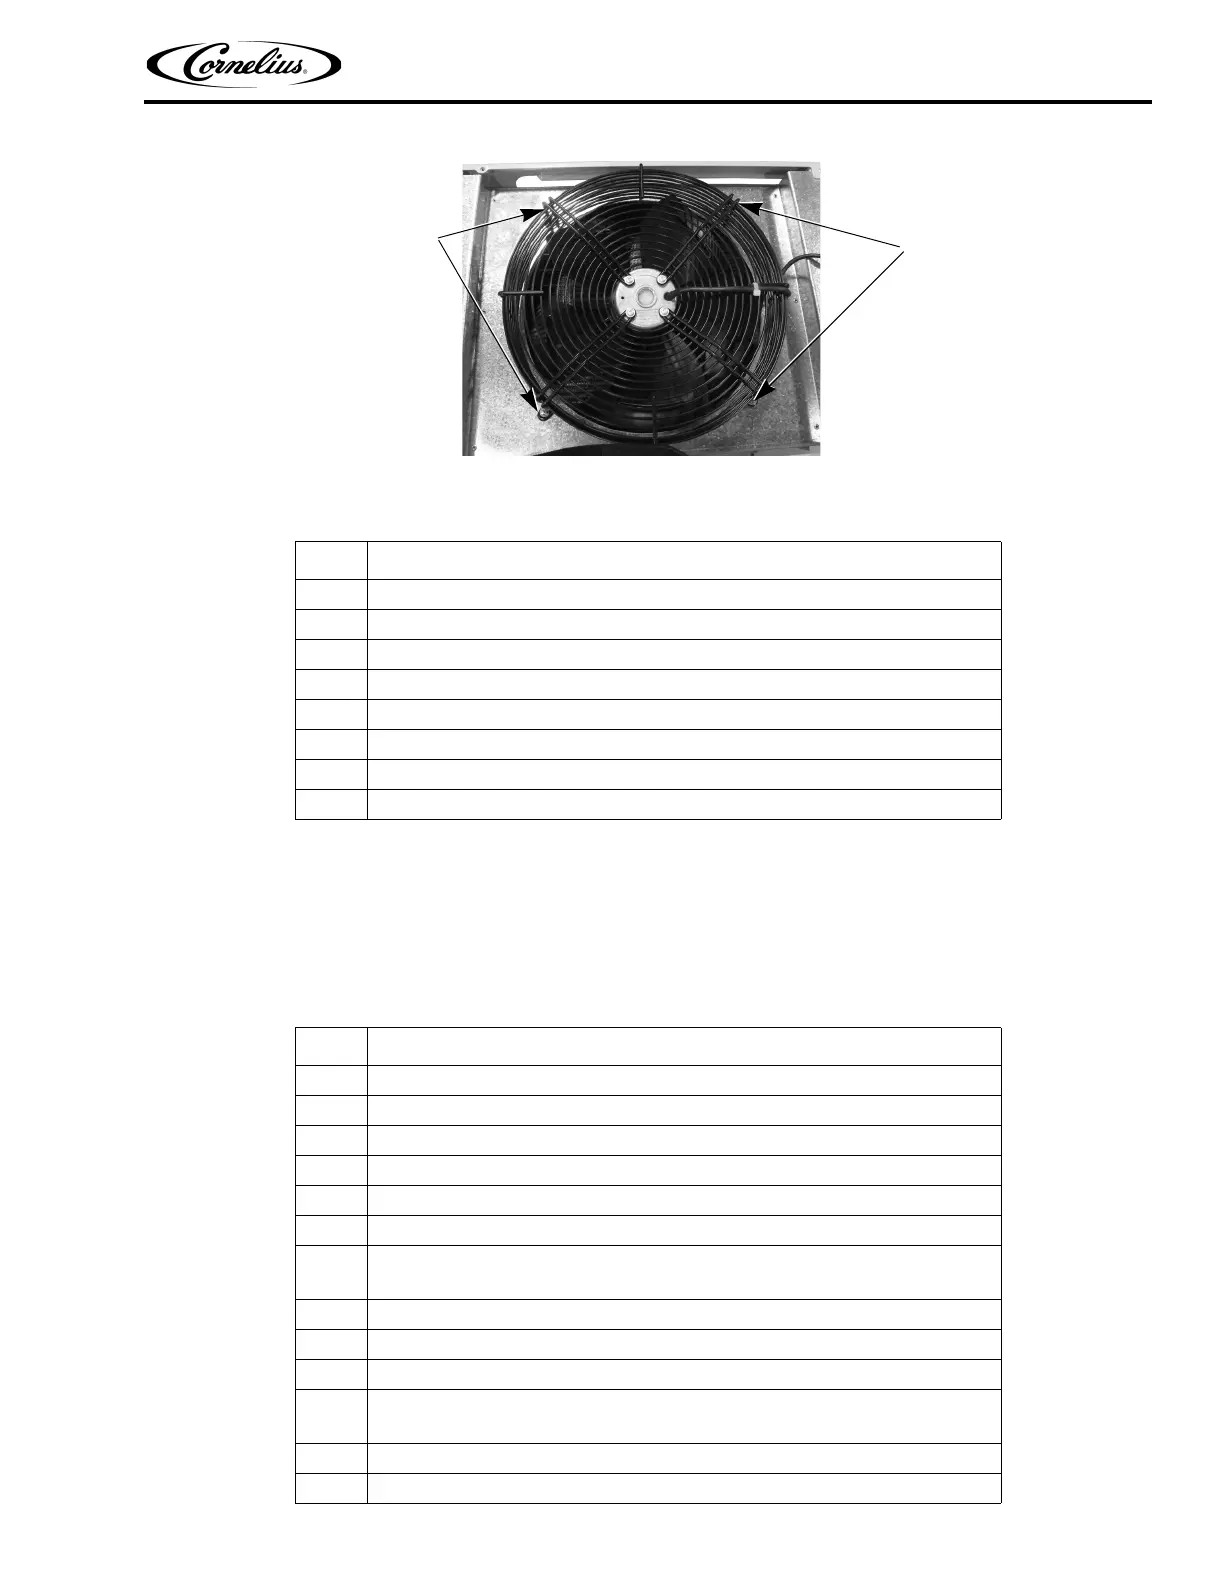
Figure 44. Condenser Fan Mounting Nuts
COMPRESSOR REPLACEMENT
Caution should be used when working with refrigerants. To replace a compressor, perform the procedure in Table
54.
NOTE: Be sure to reclaim refrigerant when replacing compressor.
Table 53.
Step Action
1 Disconnect power from the unit.
2 Disconnect the fan by unplugging the connector.
3 Remove the four locking nuts securing the fan to the top of the condenser.
4 Lift the fan and shroud off the unit.
5 Remove the four screws and washers securing the fan to the shroud.
6 Replace the fan.
7 Reverse the procedure to install the new fan.
8 Reconnect power to the unit.
Table 54.
Step Action
1 Disconnect power to the unit.
2 Remove the rear cover and side panels.
3 Label and disconnect all wires from the compressor.
4 Remove the four (4) mounting nuts from the base of the compressor.
5 Remove all insulation from around fittings.
6 Unsweat the suction line from the compressor.
7
Cut the discharge line on top of the compressor (Make sure line can be
spliced back together).
8 Remove the compressor and unsweat the discharge line.
9 Reverse the procedure to install the new compressor.
10 Replace the dryer.
11
Evacuate the system and recharge it according to the Cornelius nameplate on
the unit.
12 Replace the side panels and rear cover.
13 Reconnect power to the unit and test the unit.