With regard to the BL Touch probe, here are the things to know at the time of writing
this document:
- Current version is v3.0
- V3.0 probes manufactured before 5
th
April 2019 do not work properly with
Creality printers, at least with mine (which embeds a Creality v2.2
motherboard). Just insist to have it exchanged by your reseller if you’ve one.
- Privilege the genuine probe over its clones.
- Make your life easier by buying their 150cm genuine extension cable. That will
make a no-soldering path directly from the motherboard to the probe.
For the installation of any probe, there
are a few steps to follow:
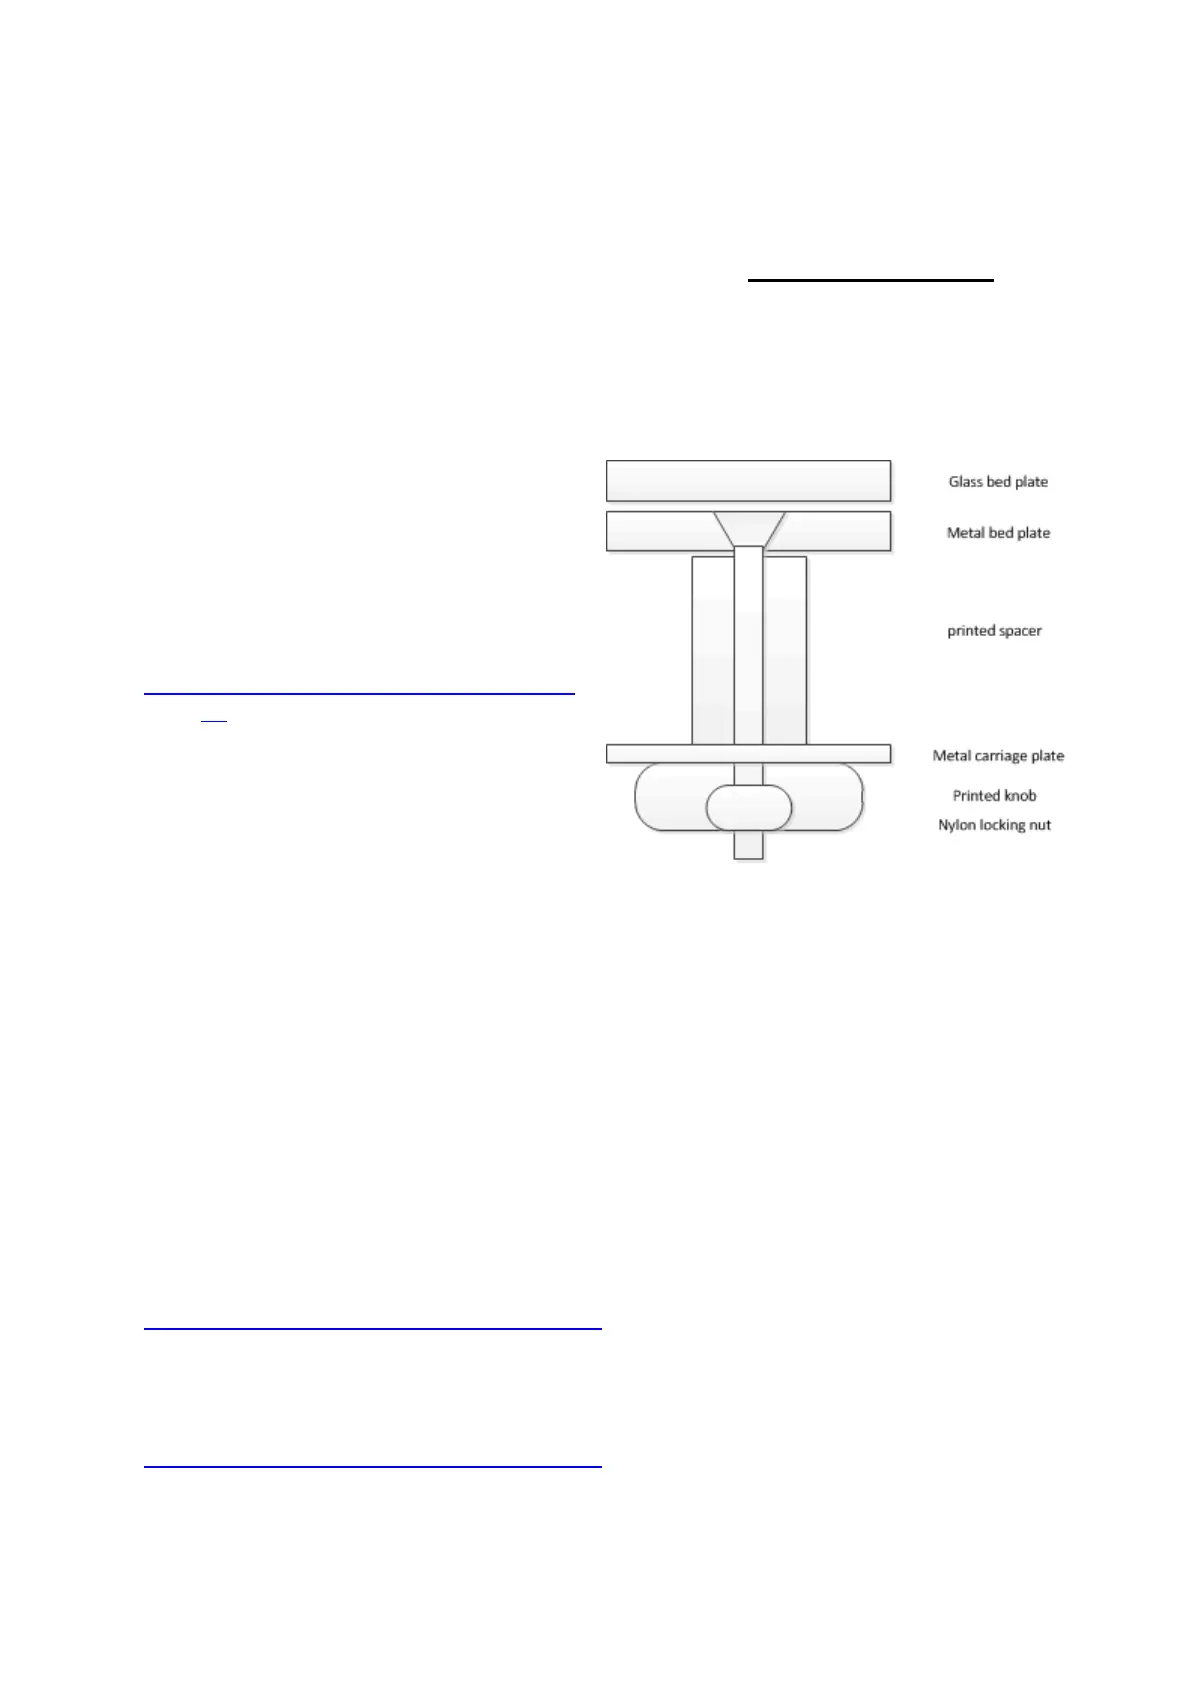
a) Print fixed length spacers for the
bed and replace the spring-mounted
bed levelling knobs that took you so
much time to install before...
https://www.thingiverse.com/thing:34650
75
b) Although I understand that this is
better to use ABS or PETG for parts
that touch the heated bed, I printed
my spacers in PLA and it is good
enough for me for now...
c) Print a probe mount that fits the print head of your choice. If you kept the stock
head, a standard probe mount is normally available from the vendor of the
probe. If you went for the “bullseye” or “petsfang”, a probe mount is available
for either the left or the right hand side of the print head. I personally placed my
probe on the left because of the length of the probe cable (150cm cable needs
a slightly shorter path than the other print head cables on an S5).
d) Finally, I designed and printed some cable guides for the probe cables. I highly
recommend to insert these cables into a woven cable tube similar to the ones
used for the stock cables.
Now the bed is fixed and the probe is in place.
Here is a remix for the probe mount with cable guide to accomodate the 150cm
cable length without further extension:
https://www.thingiverse.com/thing:3737871
Design for the cable guide dedicated to the probe cable support also to make the
path shorter to the control box:
https://www.thingiverse.com/thing:3737850

 Loading...