Getting Started 7
device, and then fix the
screws.
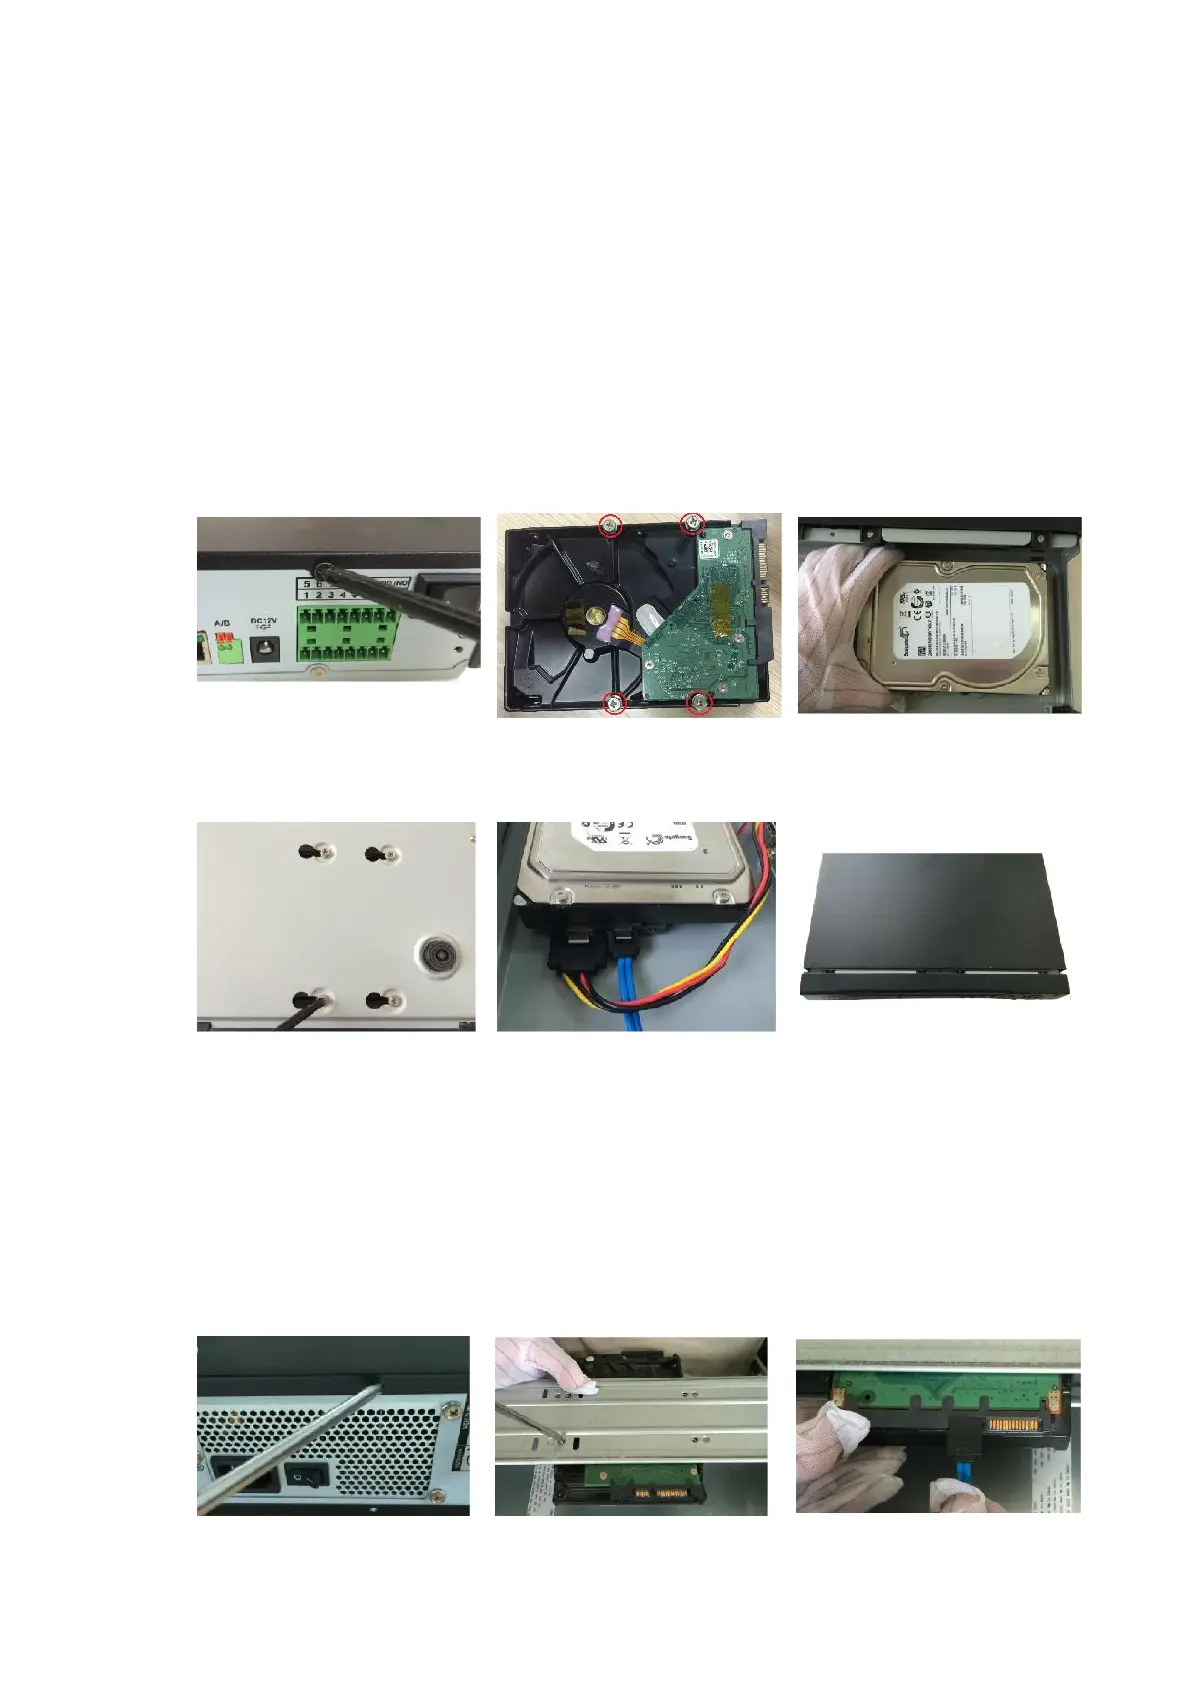
2.2.4 DH-XVR4216AN-X/DH-XVR4232AN-X/DH-XVR5216AN-X/D
H-XVR5232AN-X/DH-XVR5208AN-4KL-X/DH-XVR5216AN-4KL-X/
DH-XVR5216A-X/DH-XVR7208A-4KL-X/DH-XVR7216A-4KL-X/DH-
XVR7208A-4K-X/DH-XVR5108H-4KL-X-8P/DH-XVR5208AN-4KL-X
-8P/DH-XVR5216AN-4KL-X-16P
1. Remove the screws on
the cover.
2. Fix the screws onto the
HDD, but do not be
fastened.
3. Put the HDD into the
Device.
4. Turn the device to see the
back side of it. Align the
screws of the HDD with
the holes on the back of
the device, and then fix
the screws.
5. Use the HDD cable and
power cable to connect
HDD and mainboard.
6. Put back the cover and fix
the screws.
2.2.5 DH-XVR7416L-4KL-X/DH-XVR5432L-X
2. Use the screws to fix the
3. Connect one end of HDD
 Loading...