140
8
Disassembling Procedure
Work Procedure Point
WARNING
Before disassembling work, be sure
to turn OFF all power supplies.
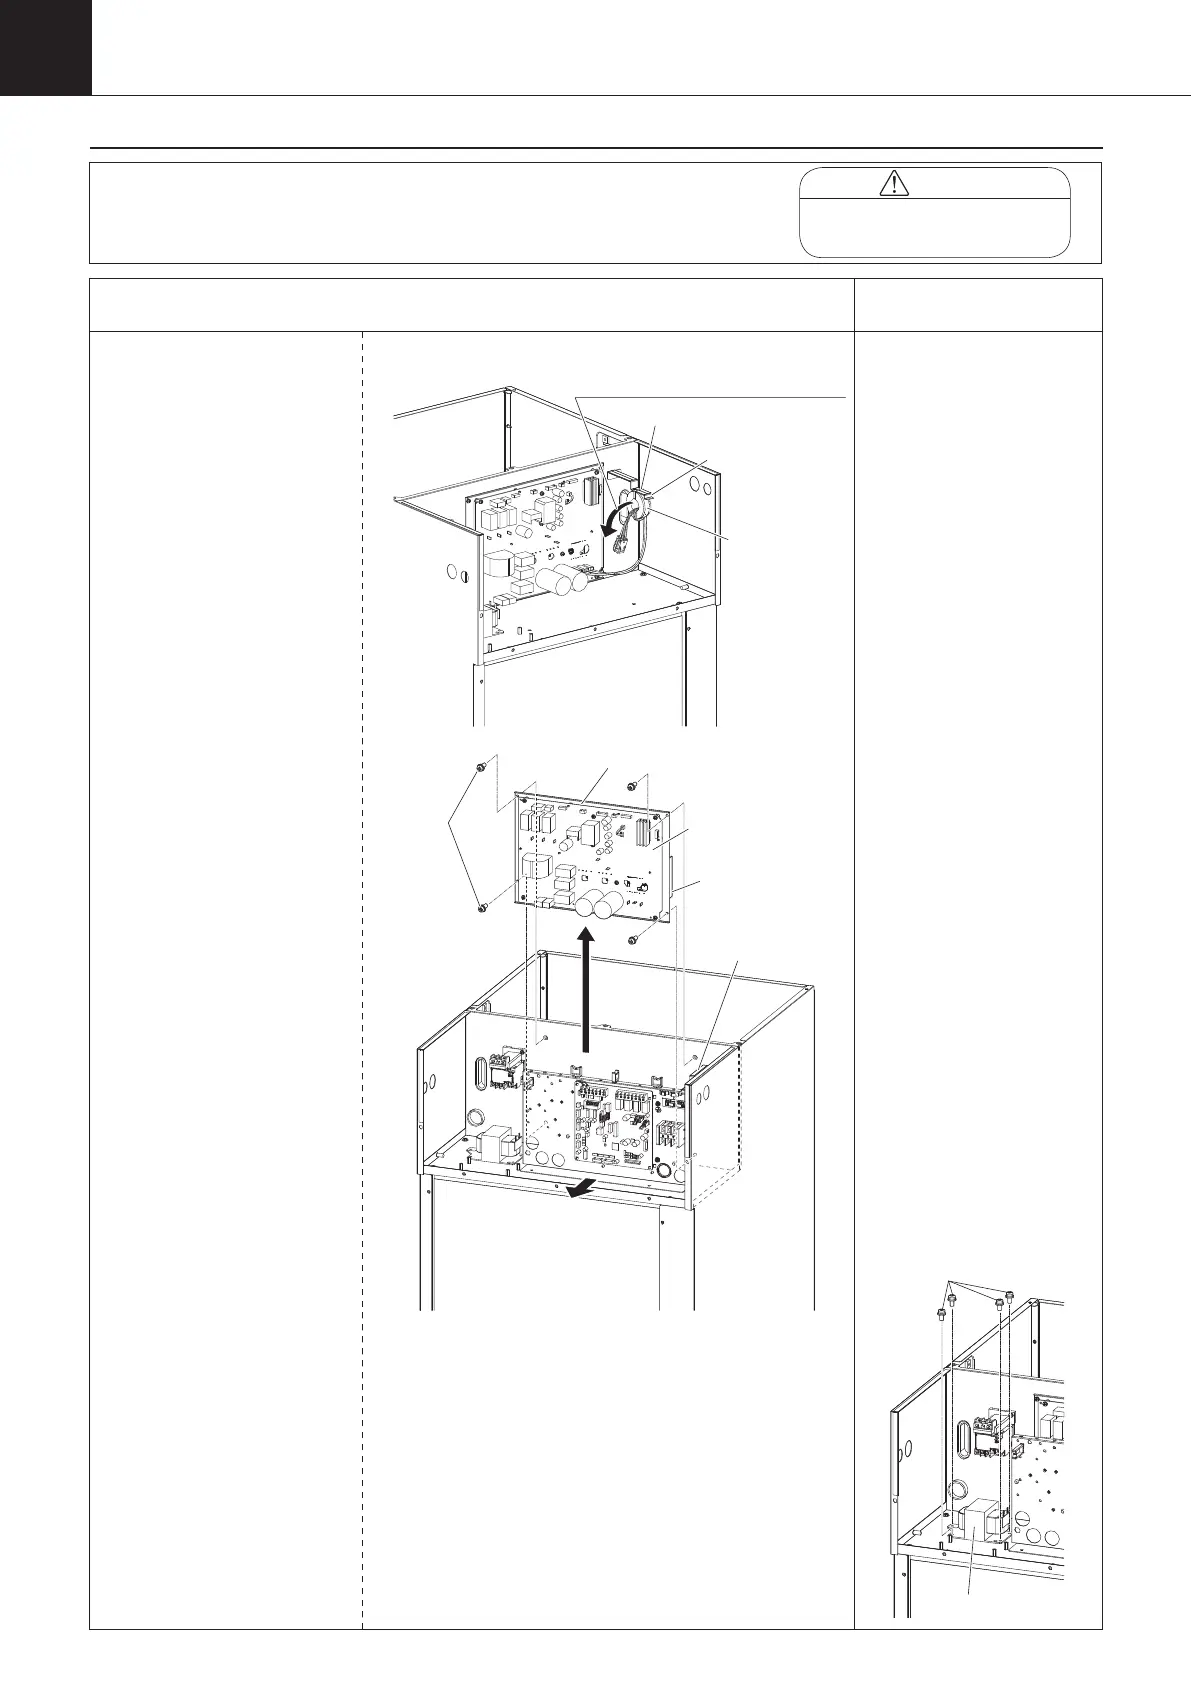
Procedure for Removing Inverter
Board (AKZ56A, 90A) (2/2)
③
Remove the ring core fixed
to the electrical fixing plate
by cutting the cable tie.
④ Slide the intermediate
panel forward.
⑤ When removing the
inverter board (A2P),
unscrew the four screws
on the inverter board
mounting plate, and
remove the inverter board
with heat sink attached
to the inverter board
mounting plate. (*2) (*3)
*1
When installing the inverter
board assembly, a cable tie
(Part number: NE43027-4,
Model: T-30R, Quantity: 1)
is required to attach the ring
core to the electrical fixing
plate.
*2
When replacing the inverter
board, handle it as the
“inverter board assembly”,
i.e., inverter board integrated
with heat sink.
Never replace the inverter
Board only. Replacement of the
inverter board only may cause
degradation of the radiation
performance of the heat sink,
leading to smoke or ignition.
*3 (AKZ56A only)
In order to remove the
screws on the inverter board
mounting plate, it is necessary
to remove the reactor.
Reactor
Ring core
Banding band
Electrical fixing
plate (*1)
Attach so that the inverter output
harness connector projects inward
Inverter board mounting plate
Inverter board
(A2P)
Heat sink
Four
screws
Electrical fixing
plate
00_PB00540A_M10.indb 140 2023/08/09 12:59:22