SiBE041102_A Indoor Unit
Removal Procedure 101
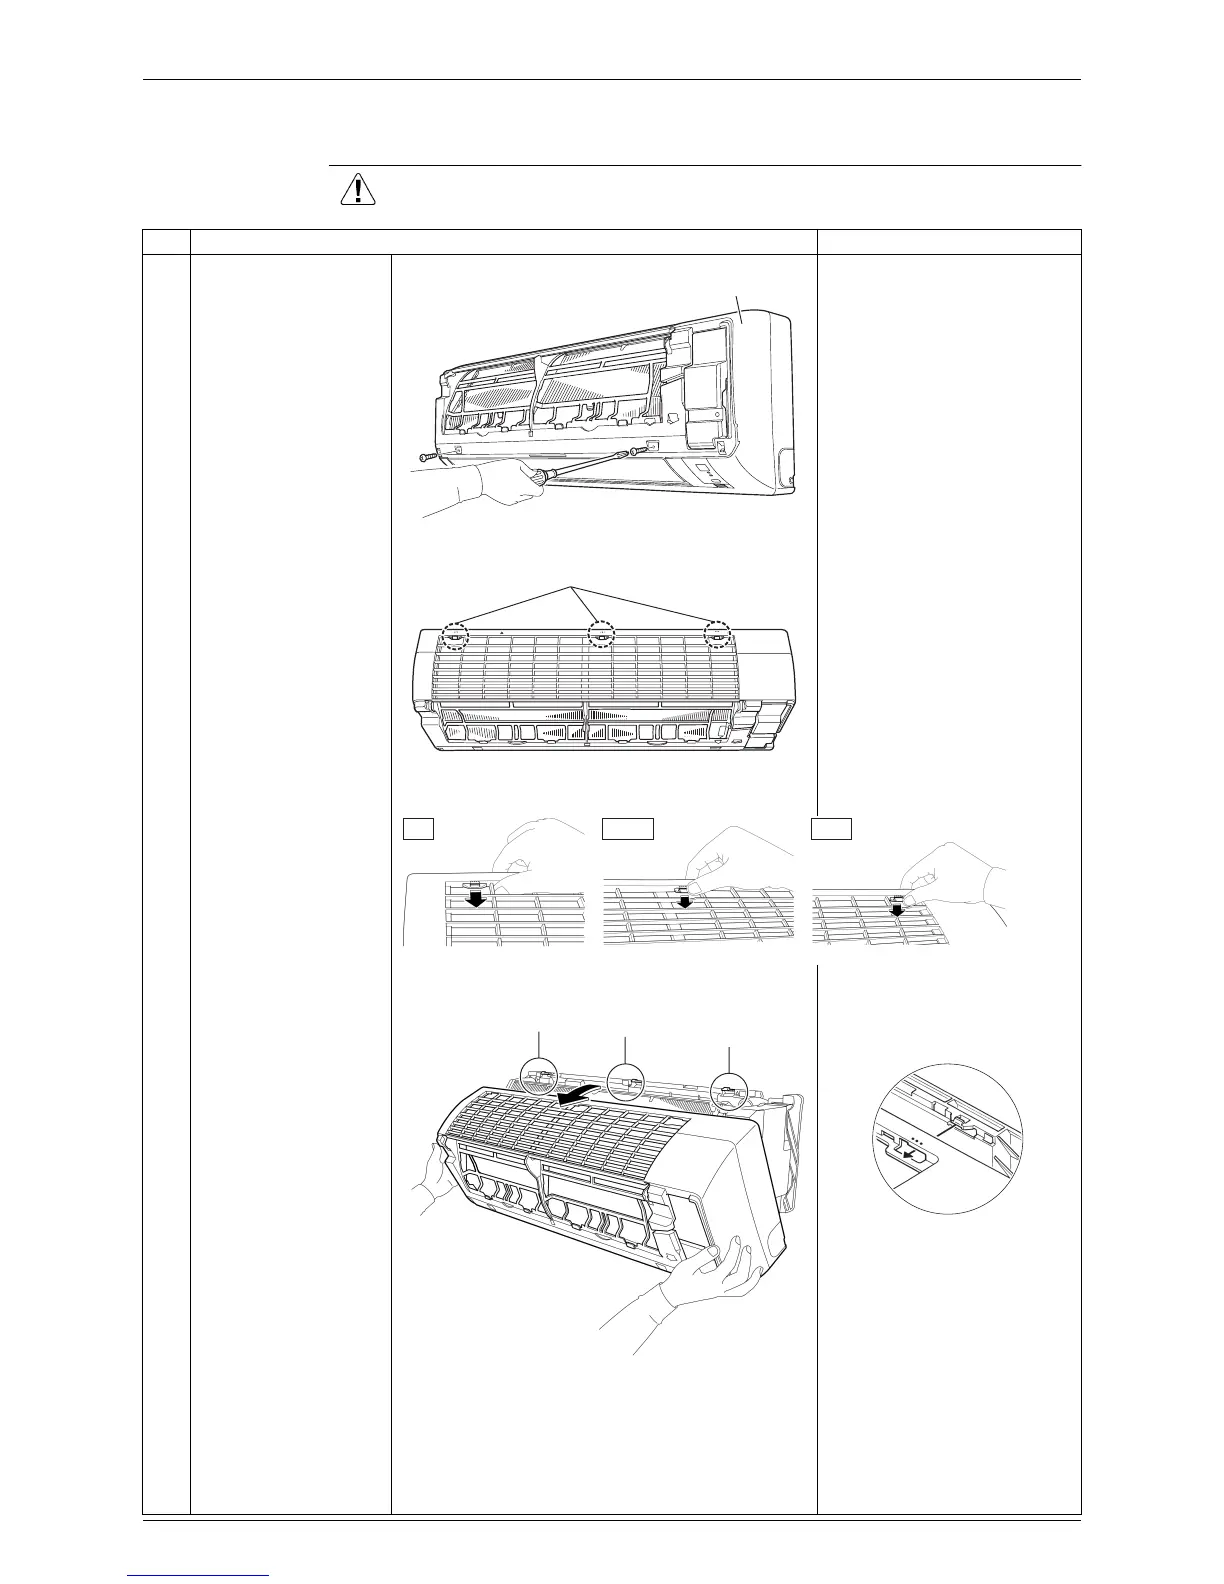
1.4 Removal of Front Grille
Procedure Warning Be sure to wait for 10 minutes or more after turning off all power
supplies before disassembling work.
Step Procedure Points
1
Remove the 2 screws,
which fix the front grille
to the main body.
2
The front grille has 3
hooks on the upper
part.
Refer to the removal
procedure in a reverse way
when reassembling.
3
Press each hook, and
also lift the grille up to
unfasten the hooks.
4
Pull the upper part of
the front grille out and
lift the lower part up,
and then remove the
front grille.
The convex marks (...) on
the front panel indicate the
position of the hooks.
When reassembling, make
sure that all the 3 hooks are
fastened as they were.
(R11631)
Front grille
(R14618)
Hook
Left Center Right
(R8030)
(R11633)
Left
Center
Right
(R12715)
 Loading...