SiBE041102_A Indoor Unit
Removal Procedure 117
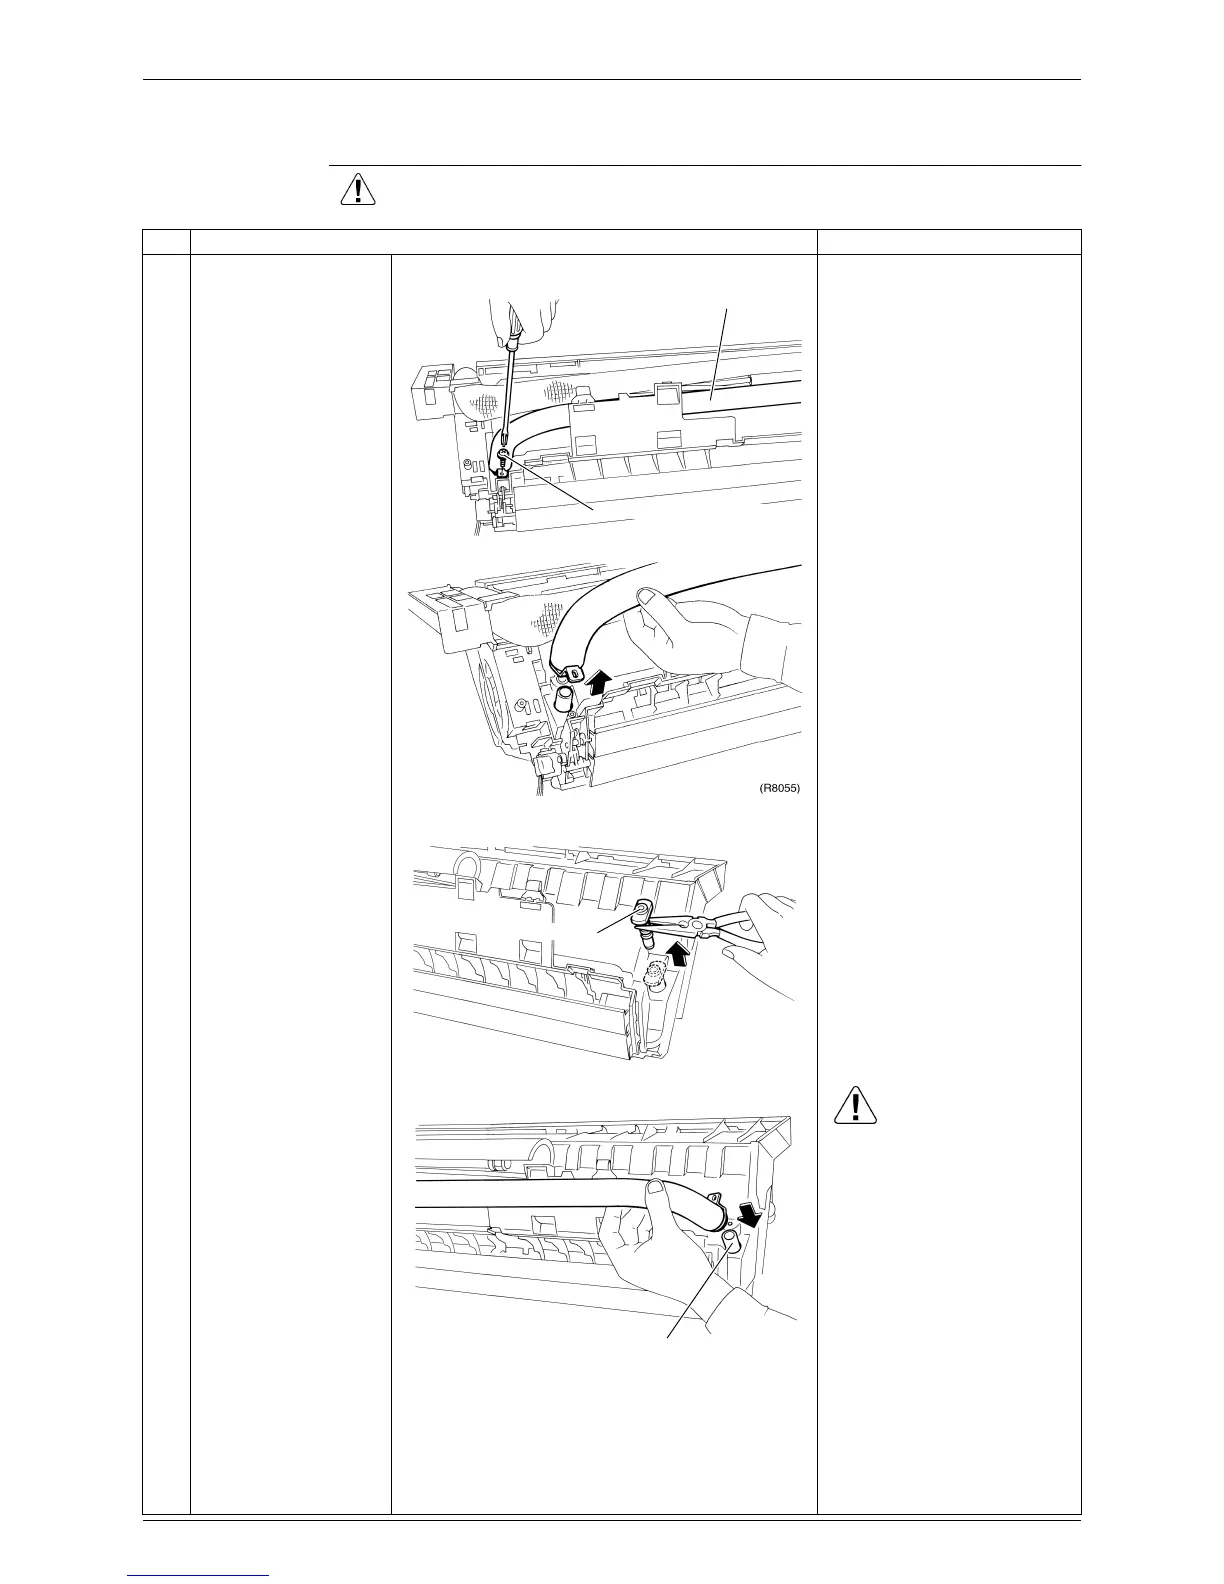
1.9 Exchange of Drain Hose (Piping Direction)
Procedure Warning Be sure to wait for 10 minutes or more after turning off all power
supplies before disassembling work.
Step Procedure Points
1
Remove the heat
insulation fixing screw
on the right side and
remove the drain hose.
2
Remove the drain plug
located at the left side
with pliers and insert
the removed drain plug
into the right side with a
hexagonal wrench (4
mm).
3
Insert the drain hose to
the left side, and tighten
it with the heat
insulation fixing screw.
Caution
Do not thrust in the drain
plug with a sharp-pointed
tool like a screwdriver. (The
drain plug may be broken,
resulting in water leakage.)
After removing the drain
hose, to prevent water
leakage, make sure to
mount the heat insulation
fixing screw as it was.
(R8054)
Drain hose
Heat insulation fixing screw
Drain plug
(R8056)
(R8057)
Drain piping (left)
 Loading...