6/ Repair Procedures
6-40 1503-0151-000 5/26/0
1. Use a 3 mm hex wrench to loosen the drive gas check valve captive mounting
screws.
2. Lift out the valve assembly.
3. Inspect the O-ring and seat for damage. Replace as necessary.
4. When installing the valve, do not pinch the pressure harness, item 2.
5. Align check valve pin into the alignment hole in the manifold for proper orientation.
6. Tighten the captive screws.
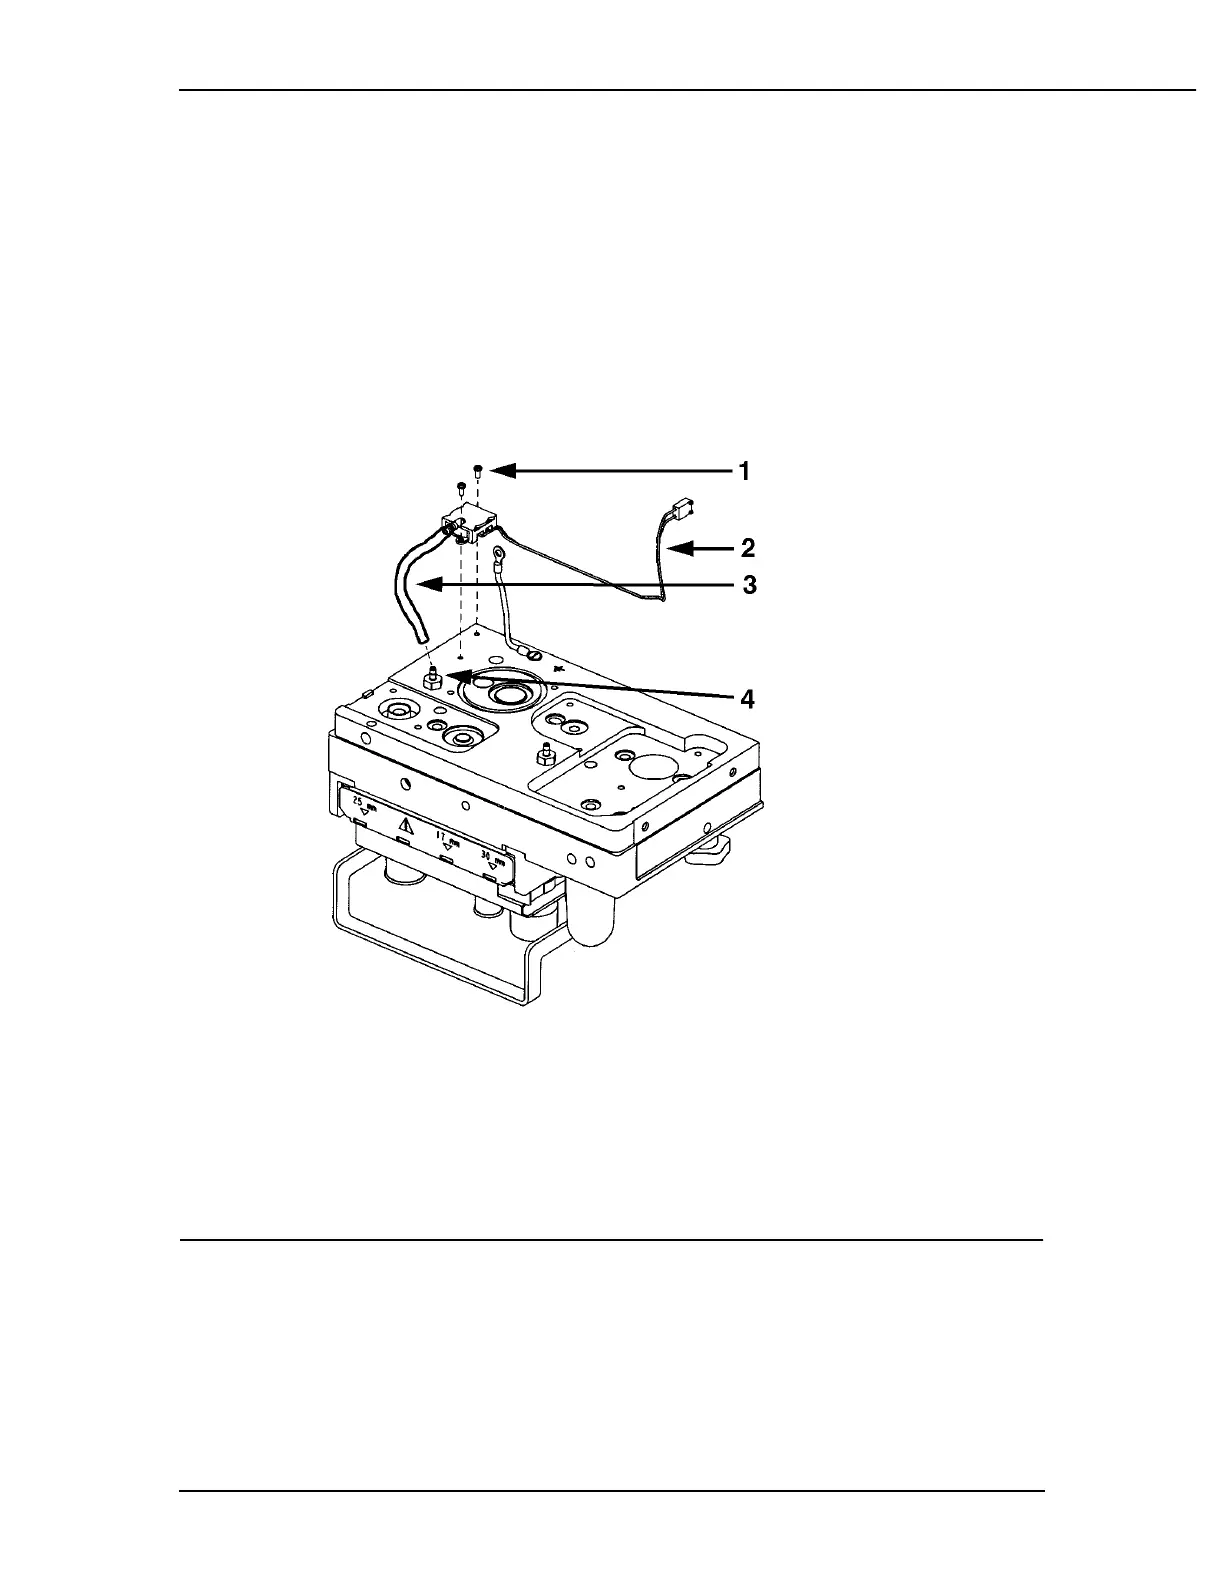
Removing the pressure sensing switch assembly
1. Pressure switch mounting screws
2. Cable connector to microcontroller board J8
3. Pneumatic tube to main manifold
4. Main manifold/pressure switch pneumatic connection
Figure 6-34
Pressure sensing switch removal
1. Disconnect the cable connector, J8, from the microcontroller board.
2. Disconnect the hose (item 4) from the manifold to the pressure sensing switch.
3. Use the 2 mm hex wrench to remove the pressure switch mounting screws
(item 5).
 Loading...