DR Robot Variomatic | User manual www.daub.nl40
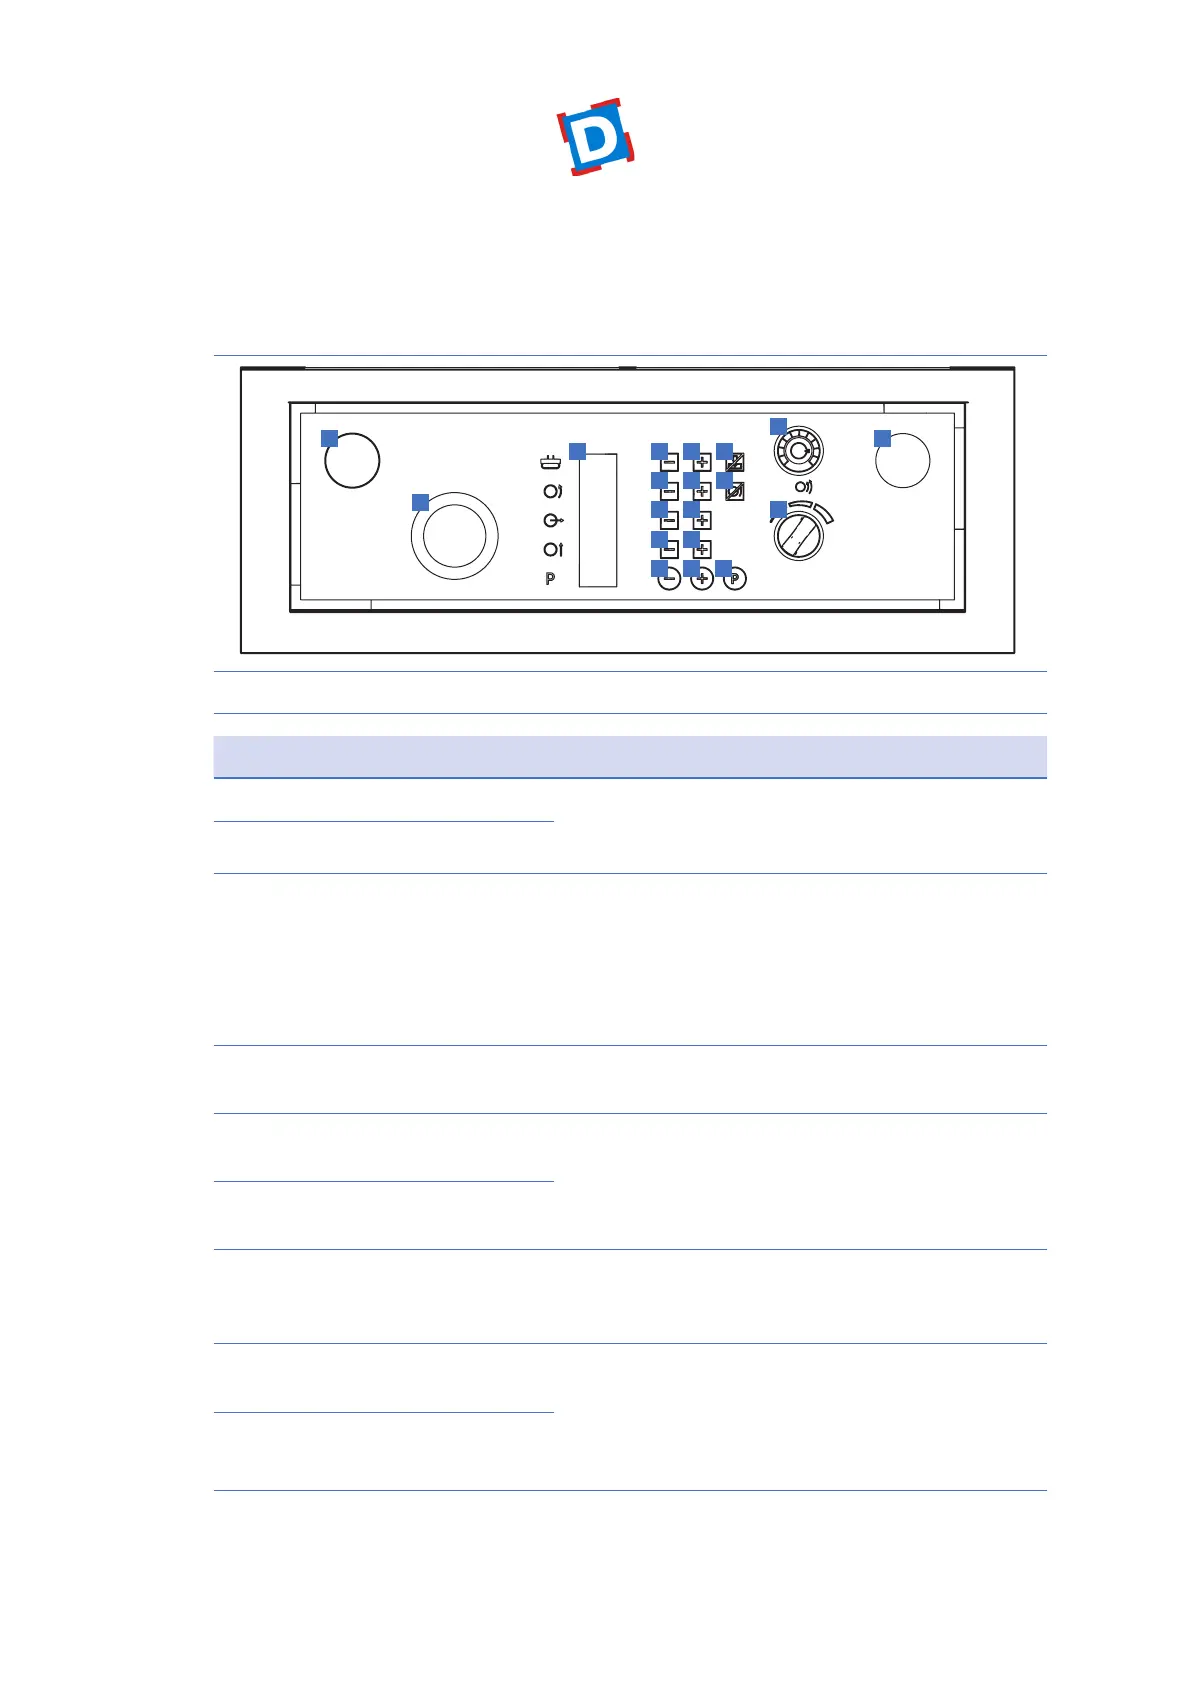
2.4. Control panel
Figure 2 shows the control panel.
54
1
3
2
6 7
8 9
11 12
13 14
15 16 17
10
19
18
Figure 2 Control panel
No. Component Function
1 Start button left With the start buttons left and right you give the general
start command. The work cycle will be automatically
completed. Press both start buttons simultaneously.
2 Start button right
3 Emergency stop Pressing the emergency stop gives a stop command to
the machine. The message ‘E5’ appears on the display.
The emergency stop must only be used in emergencies.
Normally, the machine will end its cycle on its own by
working through the internal and entered external
parameters.
4 Display for announcements
and settings
__
5 (-) key to decrease the pressing
time
The pressing time can be changed by operating the keys
5 and 6, and is set in seconds
The value is depending on the amount of dough as well
consistency.
6 (+) key to increase the pressing
time
7 Program-key for pressing only With Key 7 the machine will press only; the dough will
be pressed out only without cutting. In the display will
appear “PRS”.
8 (-) key to decrease the rounding
time
The amount of rounding can be set by changing the
timing through buttons 8 and 9; the longer the more
the dough will be stressed. The setting is depending
on type of dividing disc; the amount of dough as well
consistency.
9 (+) key to increase the rounding
time