• No parity
• 8 data bits
• 1 stop bit
• No ow control
USB-B console port access
The USB-B console port is on the I/O side of the switch.
NOTE: The S4100-ON Series switches use the Silicon Labs CP2109 USB-B chip. To nd the correct USB-B universal
asynchronous receiver-transmitter (UART) driver, see https://www.silabs.com/products/development-tools/software/usb-to-
uart-bridge-vcp-drivers.
The terminal settings are the same for the serial console port and the RS-232/RJ-45 console port:
• 115200 baud rate
• No parity
• 8 data bits
• 1 stop bit
• No ow control
When you connect the USB-B port, it becomes the primary connection and, while connected, all messages are sent to the USB-B port.
NOTE: Before starting this procedure, be sure that you have a terminal emulation program already installed on your PC. Install
the appropriate drivers to support the USB-B port. To download Dell EMC drivers, see www.dell.com/support. If your computer
requires non-Dell EMC drivers, contact Dell EMC Technical Support for assistance.
To access the USB-B console port, follow these steps.
1 Power on the PC.
2 Connect the USB-A end of cable into an available USB port on the PC.
3 Connect the USB-B end of cable into the USB-B console port on the S4100-ON Series switch.
4 Power on the S4100-ON Series switch.
5 Install the necessary USB device drivers.
To download Dell EMC drivers, see www.dell.com/support. If your computer requires non-Dell EMC drivers, contact Dell EMC
Technical Support for assistance.
6 Open your terminal software emulation program to access the S4100-ON Series switch.
7 Conrm that the terminal settings on your terminal software emulation program are as follows:
• 115200 baud rate
• No parity
• 8 data bits
• 1 stop bit
• No ow control
USB storage
USB storage does not automatically mount. The supported le system is FAT. To use USB storage, rst mount the device using the
following steps:
1 Create a mount directory for the USB.
ONIE:/ # mkdir /mnt/usb
2 View the xed disks using fdisk.
ONIE:/mnt # fdisk -l
42
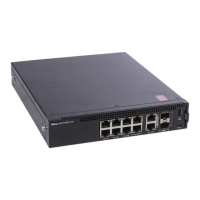
Management ports
 Loading...