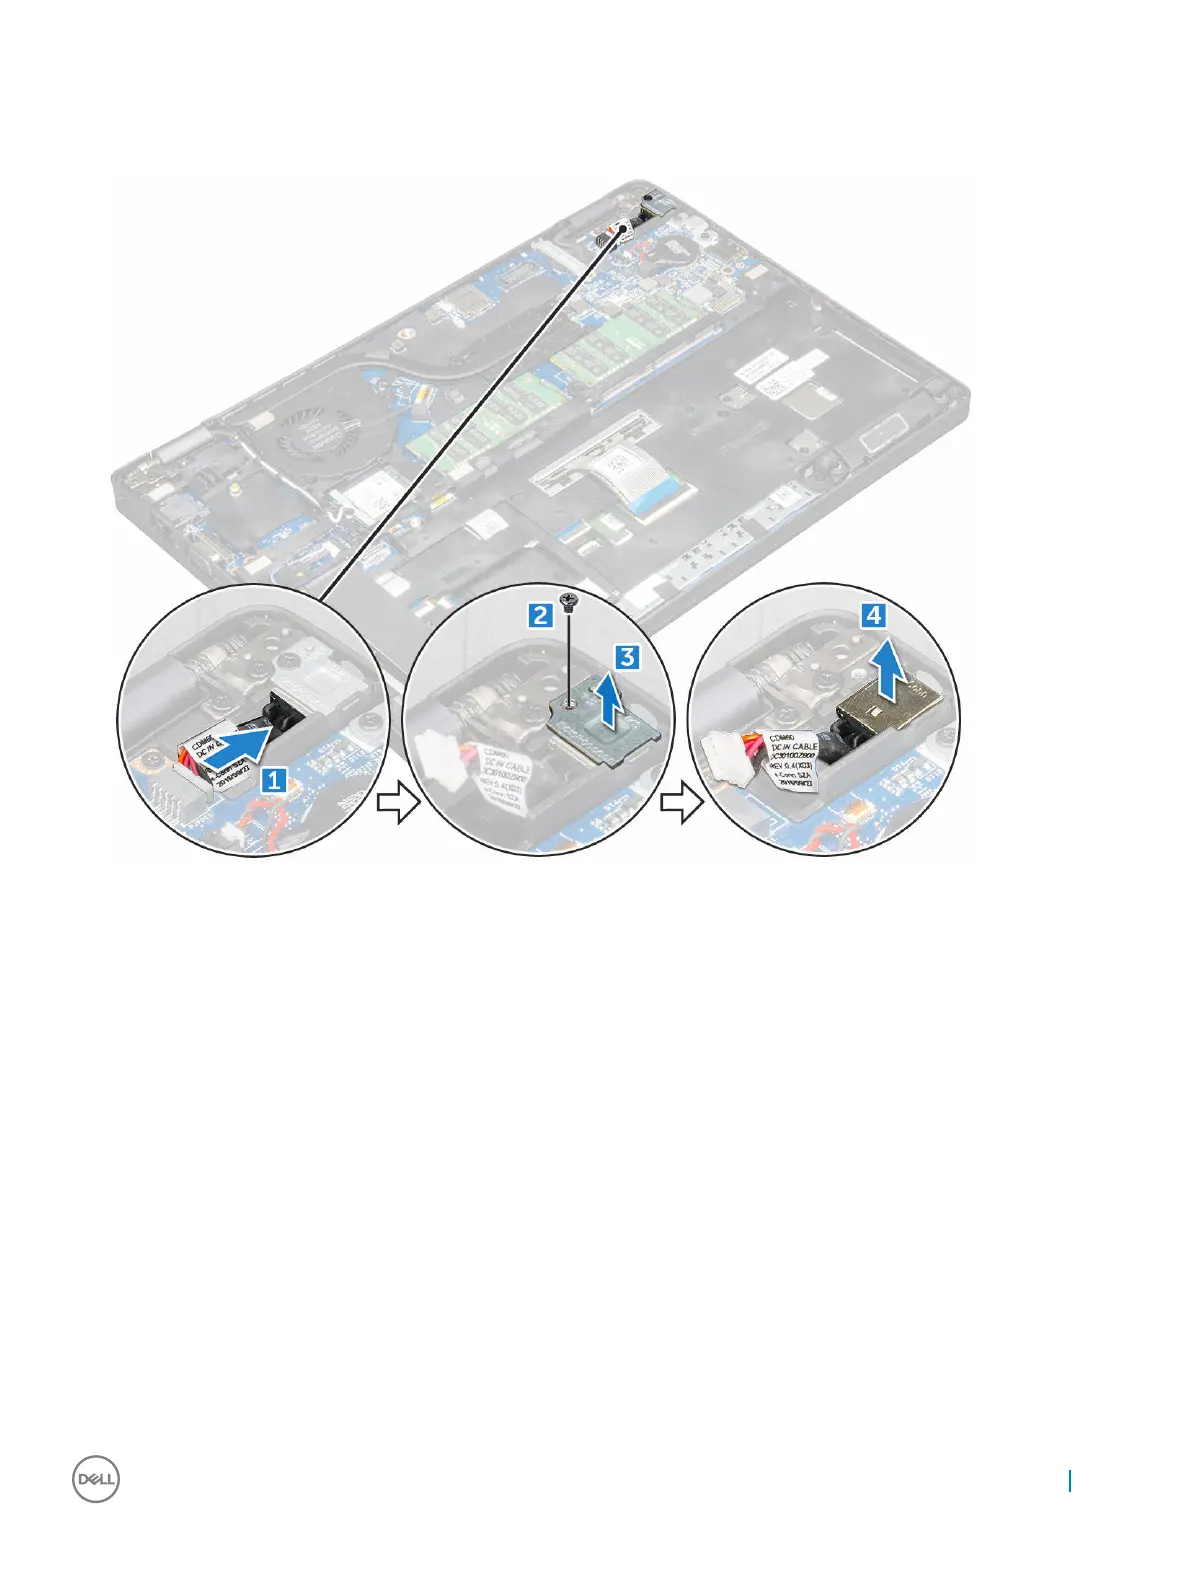
a Disconnect the power connector port cable from the connector on the system board [1].
b Remove the M2*3 screw to release the metal bracket that secures the power connector port [2].
c Lift the metal bracket [3].
d Lift the power connector port away from the computer [4].
Installing power connector port
1 Align the power connector port along the grooves on the slot and push it down.
2 Place the metal bracket on the power connector port.
3 Tighten the M2*3 screw to secure the power connector port to the computer
4 Connect the power connector port cable to the connector on the system board.
5 Install the:
a battery
b base cover
6 Follow the procedure in After working inside your computer.
Chassis frame
Removing chassis frame
1 Follow the procedure in Before working inside your computer.
2 Remove the:
a base cover
Removing and installing components
25

 Loading...