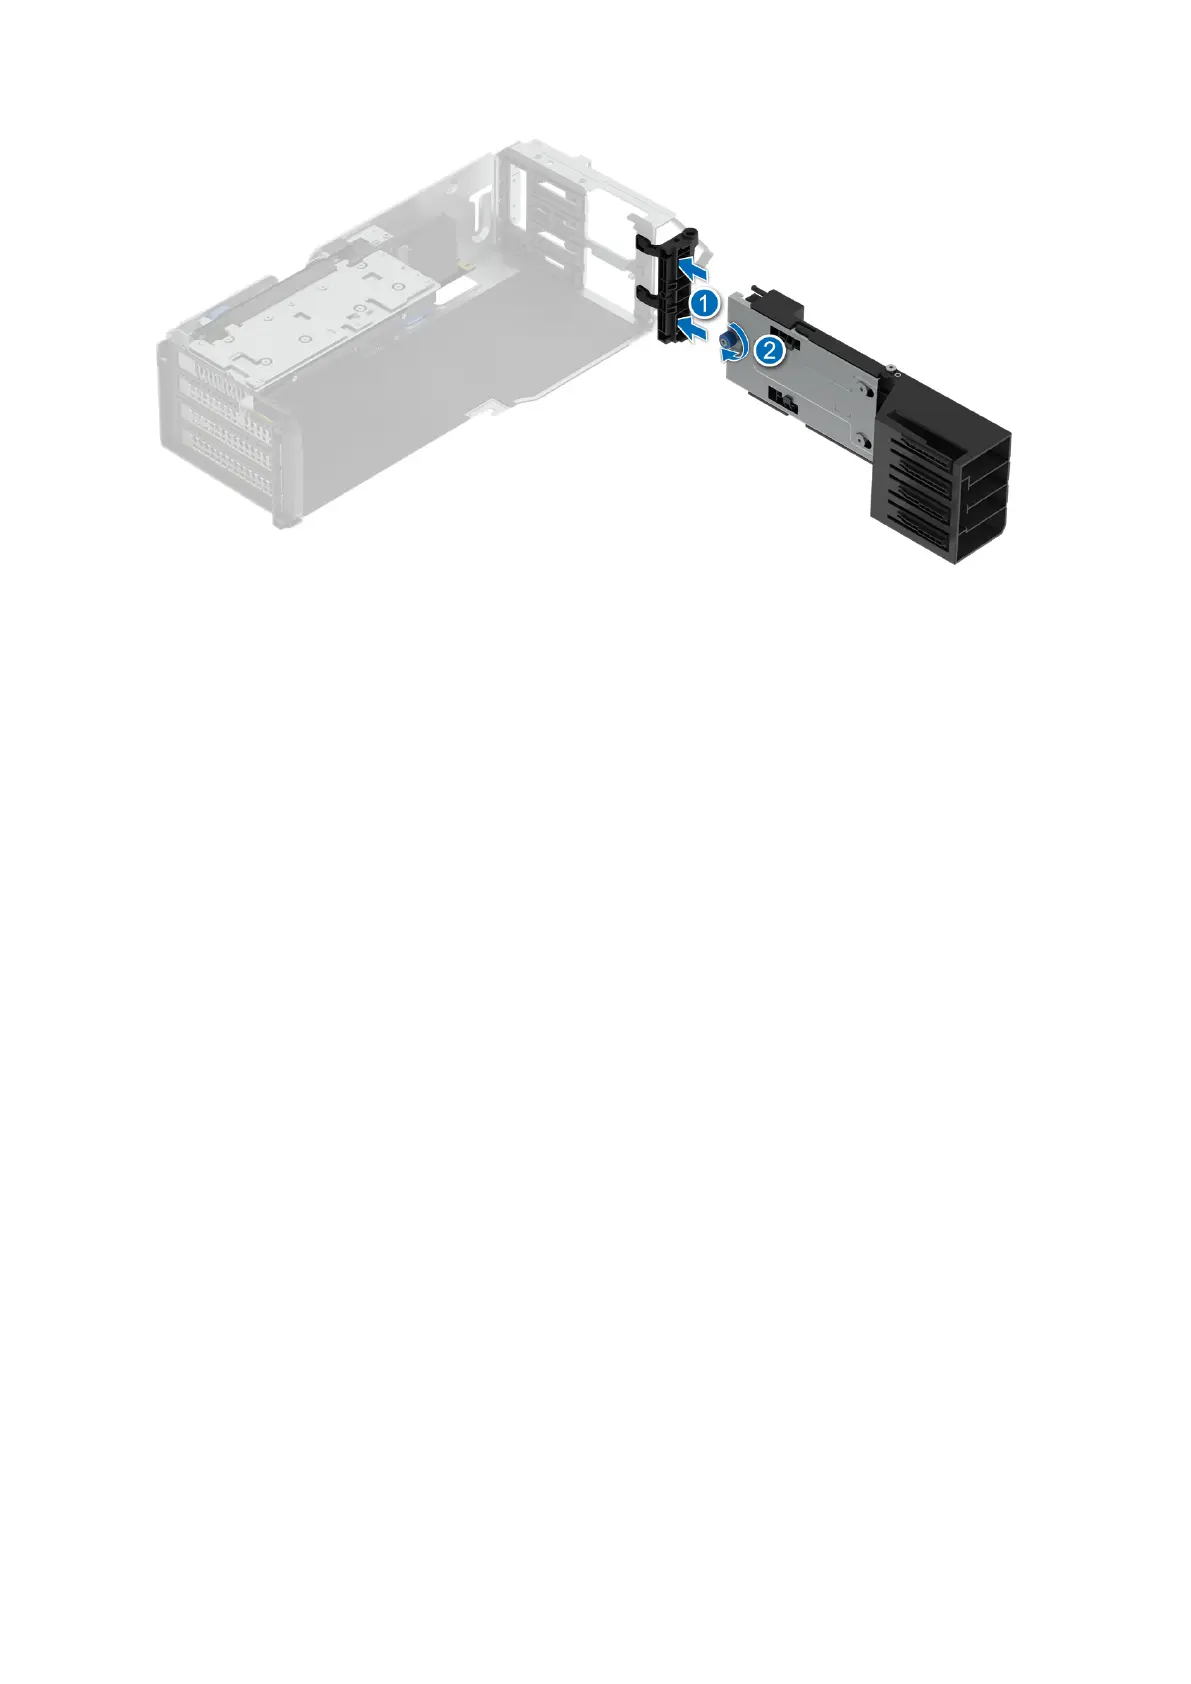
Figure 109. Installing the HH card holder
Next steps
1. Install the SW GPU card, into the GPU riser and push the hockey stick, see Installing the GPU.
2. Push the card holder into closed position.
3. Install the GPU riser module.
4. Follow the procedure listed in After working inside your system.
Optional serial COM port
This is a service technician replaceable part only.
Removing the serial COM port
Prerequisites
1. Follow the safety guidelines listed in the Safety instructions.
2. Follow the procedure listed in the Before working inside your system.
3. Remove the air shroud.
Steps
1. Loosen the captive screws on the system.
2. Press the blue release tab or blue button on the riser and holding the edges lift the expansion card riser from the riser
connector on the system board.
3. Disconnect the serial COM port cable from the rear I/O board.
4. Open the latch on the expansion card riser and slide the serial COM port out of the expansion card riser.
Installing and removing system components
141
 Loading...