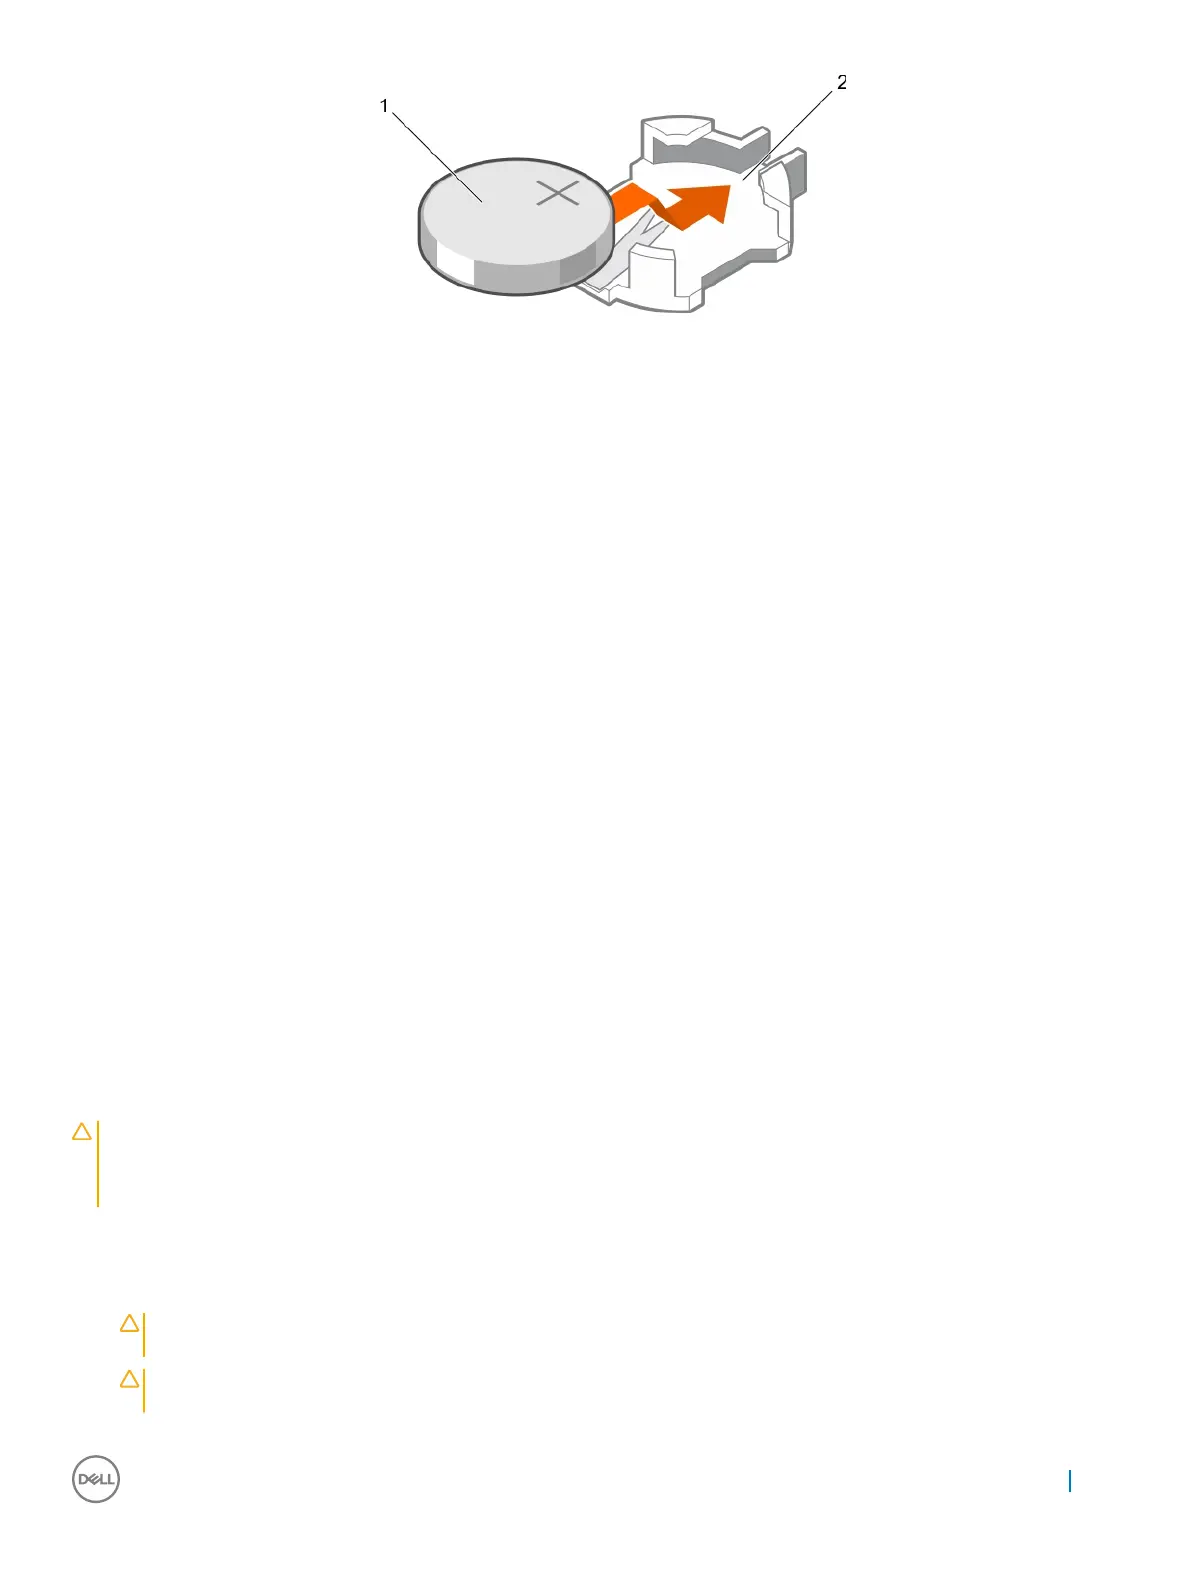
Figure 87. Installing the system battery
1 system battery 2 system battery slot
Next steps
1 Install the cooling shroud.
2 Follow the procedure listed in the After working inside your system section.
3 While booting, press F2 to enter System Setup and ensure the battery is operating properly.
4 Enter the correct time and date in the System Setup Time and Date elds.
5 Exit System Setup.
Related links
Safety instructions
Before working inside your system
Removing the power supply unit bay
Installing the power supply unit bay
After working inside your system
Hard drive backplane
Depending on the conguration, your system supports the following backplanes:
• 2.5 inch (x4) SAS/SATA backplane
• 2.5 inch (x24) SAS/SATA backplane
• 2.5 inch (x16) SAS/SATA backplane plus 2.5 inch (x8) Dell PowerEdge Express Flash (PCIe SSD) backplane
Removing the hard drive backplane
Prerequisites
CAUTION
: Many repairs may only be done by a certied service technician. You should only perform troubleshooting and simple
repairs as authorized in your product documentation, or as directed by the online or telephone service and support team.
Damage due to servicing that is not authorized by Dell is not covered by your warranty. Read and follow the safety instructions
that came with the product.
1 Follow the safety guidelines listed in the Safety instructions section.
2 Follow the procedure listed in the Before working inside your system section.
3 If installed, remove the front bezel.
CAUTION
: To prevent damage to the drives and backplane, you must remove the hard drives from the system before
removing the backplane.
CAUTION: You must note the number of each hard drive and temporarily label them before removal so that you can replace
them in the same locations.
Installing and removing system components 155