● Do not bend the battery.
● Do not use tools of any kind to pry on or against the battery.
● Ensure any screws during the servicing of this product are not lost or misplaced, to prevent accidental
puncture or damage to the battery and other system components.
● If the battery gets stuck inside your computer as a result of swelling, do not try to release it as puncturing,
bending, or crushing a lithium-ion battery can be dangerous. In such an instance, contact Dell technical
support for assistance. See www.dell.com/contactdell.
● Always purchase genuine batteries from www.dell.com or authorized Dell partners and resellers.
● Swollen batteries should not be used and should be replaced and disposed properly. For guidelines on how to
handle and replace swollen Lithium-ion batteries, see Handling swollen Lithium-ion batteries.
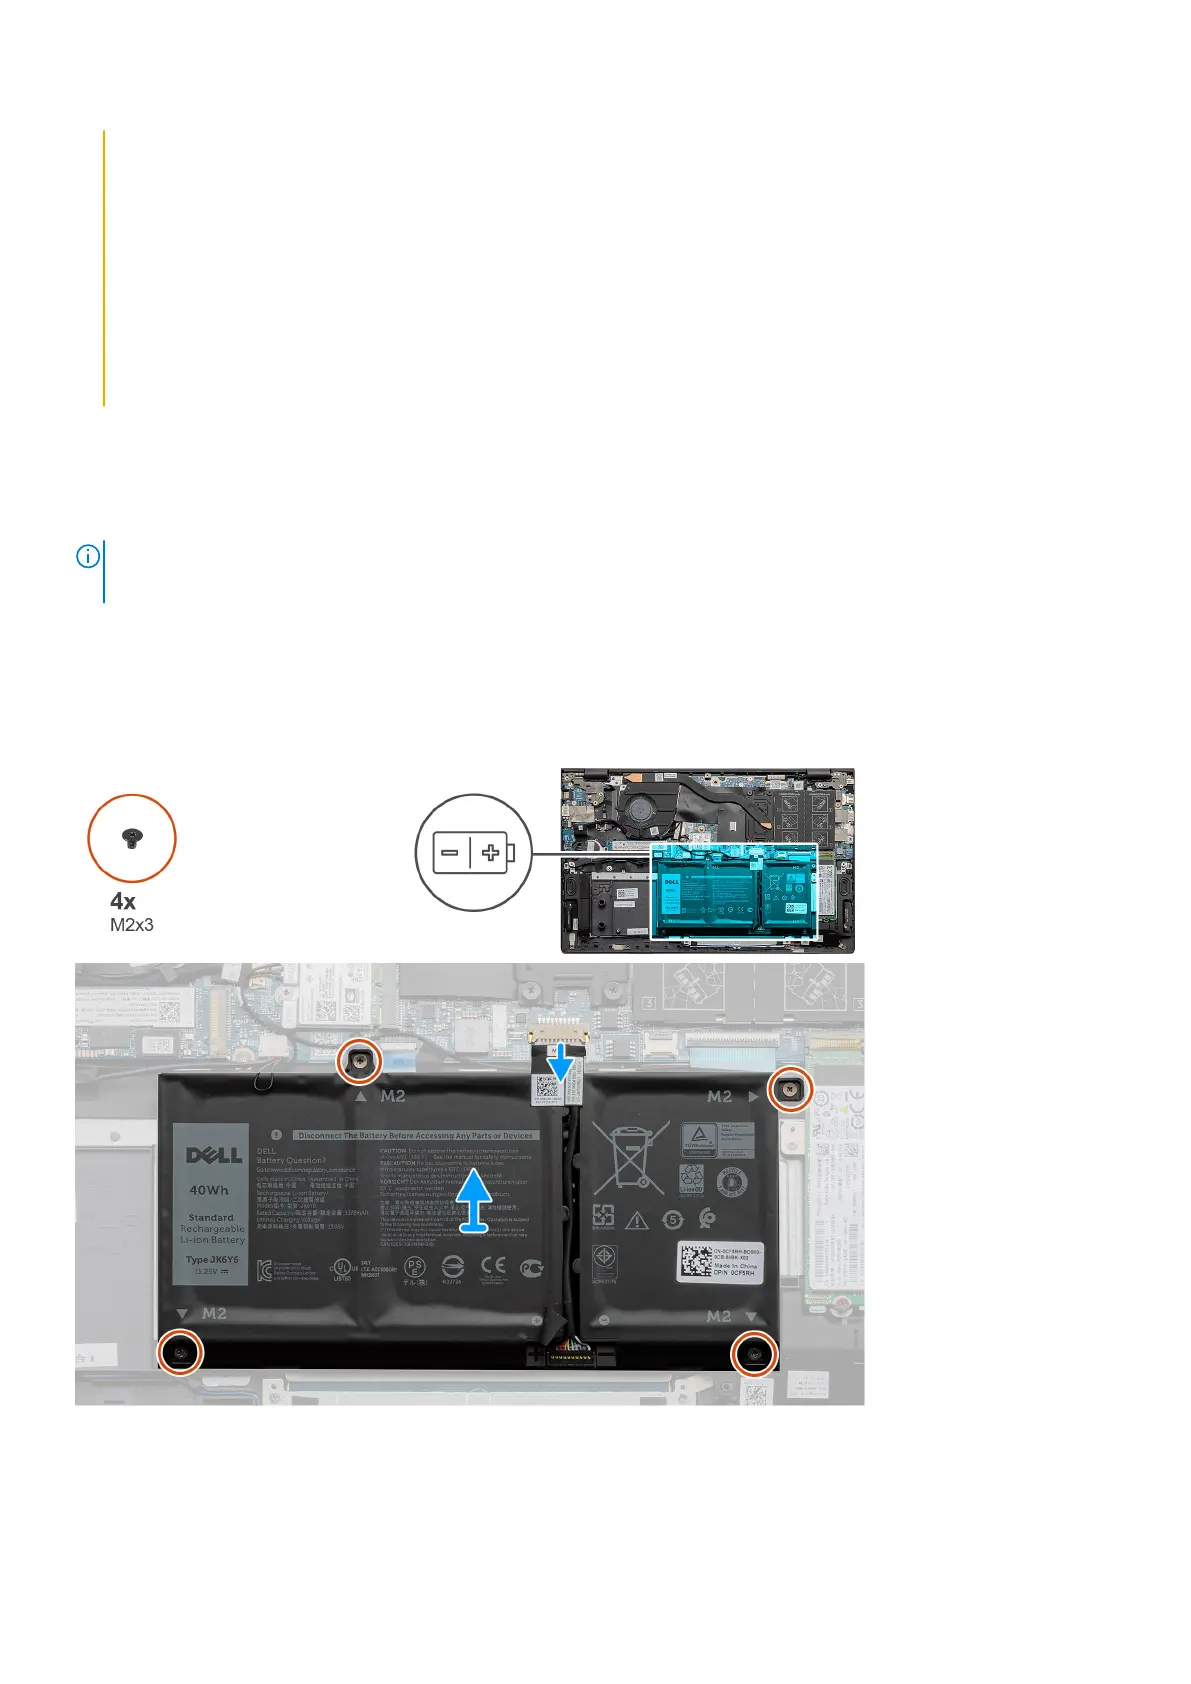
Removing the 3-cell battery - UMA/discrete
Prerequisites
NOTE:
Vostro 5501 also supports 4-cell battery.
1. Follow the procedure in before working inside your computer.
2. Remove the base cover.
About this task
The figure indicates the location of the 3-cell battery and provides a visual representation of the removal procedure.
Steps
1. Disconnect the battery cable from the system board.
2. Remove the four screws (M2x3) that secure the battery to the palm-rest and keyboard assembly.
18
Disassembly and reassembly